Textiles & fibre · Heritage & traditional crafts
Millinery
A hat is not a sewing project with a curve in it. Millinery is a forming craft: you soften a felt hood or a straw capeline with steam and stretch it over a wooden block, and it holds that shape when it dries. That single fact explains the equipment, the cost, the workshops and why the craft is unlike anything else in the textile part of this catalogue — and why the thing that makes a hat work is proportion rather than construction.
Also known as hat making, hatmaking, headwear design.
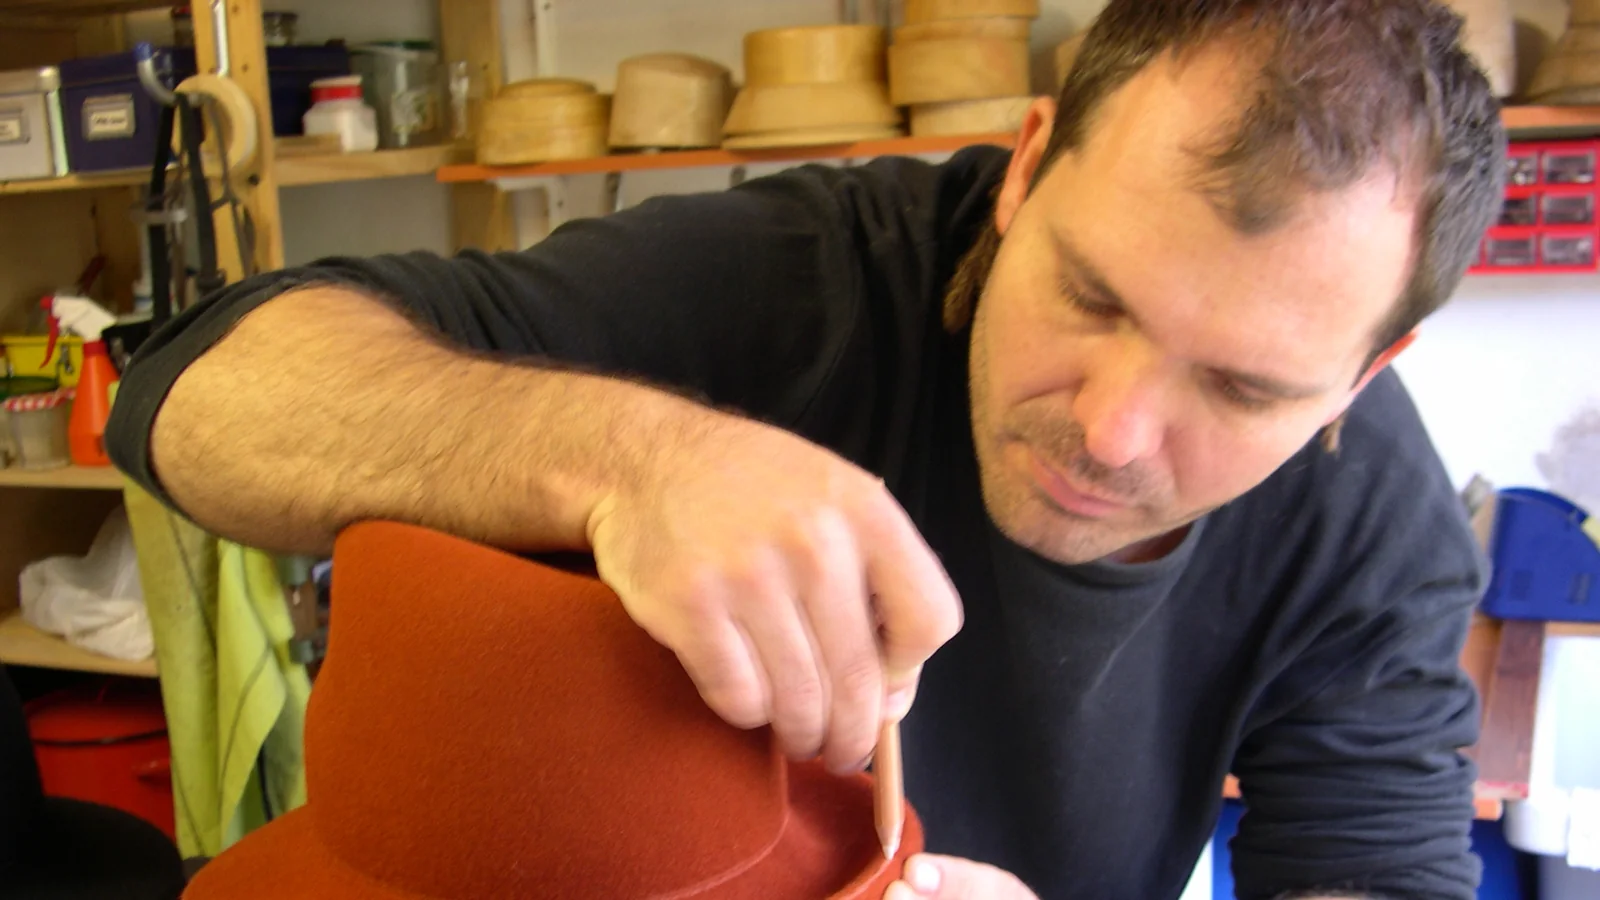
Millinery is making hats, and the reason it sits apart from the rest of textile work is that it is a forming craft rather than a cutting-and-joining one. A felt hood or a straw capeline is softened with steam, pulled down over a shaped wooden block, pinned, and left to dry — and it keeps that shape. There is sewing afterwards, but the sewing is finishing rather than construction.
That is why the equipment looks the way it does. Blocks are the craft’s capital: heavy, expensive, specific to a shape, and permanent. It is also why courses and block hire dominate the way people start, in a way they do not for dressmaking or knitting.
The other distinction worth drawing early is between a hat and a headpiece. A hat has a crown that fits a head and generally a brim; a fascinator or headpiece is a decorative object mounted on a band, comb or base and does not need to fit at all. They use different skills, and a good deal of what is sold as millinery teaching is actually headpiece making — which is a legitimate craft and a much shorter road.
- The core process
- Steam, block, dry
- The real cost
- Blocks, not materials
- Sensible first step
- A workshop, blocks provided
- What decides a hat
- Proportion and fit
Step 1: Do a one-day workshop first
£80–£250, blocks and materials provided, and you go home with a hat. Given that a single block costs as much as the day does, this is not a soft recommendation — it is the economically obvious route, and it tells you whether you want to buy anything.
You will know it worked when: A finished hat, and an informed decision.
Step 2: Start in wool felt
Cheap, forgiving and it blocks readily. Ruining two is part of learning and costs less than one fur felt hood.
You will know it worked when: A blocked crown that holds its shape.
Step 3: Learn the headband before anything decorative
Petersham, fitted properly, is what makes a hat sit and stay on. It is unglamorous, it takes an afternoon to learn, and it is the difference between a hat and an object.
You will know it worked when: A hat that stays on in wind.
Step 4: Hire or borrow blocks rather than buying
Suppliers hire, guilds share, and courses lend. Buy a block only once you have used a shape repeatedly and know you want it permanently.
You will know it worked when: Range without the capital.
Step 5: Make the same shape three times
The same block, the same material, three hats. Consistency is what teaches the process, and the third one will be visibly better than the first in a way that trying three different shapes never shows you.
You will know it worked when: A repeatable process rather than a lucky result.
Step 6: Then fit to a real head
Your own or somebody’s. Head shapes are not circles and proportion changes with the wearer — this is where millinery stops being making and starts being design.
You will know it worked when: A hat that suits the person wearing it.
- Wool felt hoods — £15–£35 and the right place to learn. Forgiving, blocks easily with steam, and cheap enough that ruining one is a lesson rather than a loss. Heavier and less refined than fur felt, which matters less than beginners think.
- Fur felt hoods — £40–£90, usually rabbit or hare. Finer, lighter, takes a sharper shape and holds it better — the material of a proper made-to-measure hat, and worth moving to once blocking is reliable.
- Straw capelines — Parasisal, sisal and panama, £20–£50. Blocked wet rather than steamed, dries rigid, and the summer half of the craft. Behaves quite differently from felt and is worth learning as its own thing.
- Sinamay — A woven abaca fabric, a few pounds a metre, used for headpieces and light structures. Cheap, forgiving and where most fascinator work happens.
- Blocks — Wooden forms — crown blocks, brim blocks, and the shapes between. £80–£250 each, permanent, and the reason block hire exists. Buy the shape you keep coming back to rather than the one that looks most impressive.
- Millinery wire and petersham — Wire to hold a brim edge, petersham ribbon for the headband that makes a hat fit and stay on. Cheap, unglamorous, and the difference between a hat that works and one that does not.
- Stiffener — What makes a blocked shape permanent. Applied at the right stage, it is invisible; applied at the wrong one it is a stiff, shiny mistake.
- A steamer — £30–£80 with a wand. A kettle works and puts your hands in the steam, which is the only real hazard in the craft.
Millinery divides cleanly into a process and a judgement, and they need different kinds of learning. The process — soften, block, dry, stiffen, wire, bind, trim — is a fixed sequence with reasons behind each step, and it is written out below because knowing the order and why it exists is most of what stops a first hat going wrong. The judgement is proportion, and it is the thing that decides whether a technically competent hat looks like anything.
One part is deliberately not here. How the felt feels when it is ready to move is a tactile skill and reading about it produces confidence rather than competence — the same reason this catalogue declines to write a centring tutorial for the potter’s wheel. What text can do is tell you what you are trying to achieve at each stage and what going wrong looks like, so that the hands-on part is learned faster and with fewer ruined hoods.
Step 1: Soften with steam, not with water
Steam relaxes the felted fibres so they will stretch and hold a new shape. Soaking a hood makes it heavy and slack rather than pliable, and it is the commonest first mistake. Work in short bursts, returning to the steam as the material cools and stiffens again.
You will know it worked when: A hood that will move under your hands rather than springing back.
Step 2: Block from the crown down, and work opposite sides
Centre the hood on the block, work the crown down first, then pull the sides evenly — opposite side to opposite side rather than round in a circle, which drags the grain and leaves the shape sitting off-centre. Pin as you go rather than at the end.
You will know it worked when: An evenly stretched shape with no drag lines.
Step 3: Pin into the block’s own line, and leave it alone
Blocking pins go into the groove or the widest line the block gives you. Then it dries, undisturbed, for as long as it takes — usually overnight and longer in a damp room. Taking a hat off the block early is how a shape relaxes back, and it cannot be corrected afterwards without starting again.
You will know it worked when: A crown that holds its shape off the block.
Step 4: Stiffen to the use, not to the maximum
Stiffener sets the shape permanently and there is no undoing it. How much depends on what the hat has to do — a wide brim that must hold a line needs more than a soft crown that should stay yielding. Erring heavy produces something that feels like plastic and cracks at the fold.
You will know it worked when: A hat that keeps its shape and still feels like felt.
Step 5: Wire the brim edge before binding it
Millinery wire is joined with an overlap rather than butted, sewn on with a wire stitch, and it is what stops a brim drooping over a season. It goes on before the binding because the binding covers it.
You will know it worked when: A brim edge that holds its line.
Step 6: Fit the petersham last, and fit it properly
The headband is what makes a hat stay on, and it is shaped rather than simply sewn in a ring — petersham is curved with an iron so it follows the head instead of fighting it. The getting-started section is right that this is the unglamorous step that separates a hat from an object.
You will know it worked when: A hat that sits at the angle you intended and stays there.
- Proportion is the whole judgement, and it is relative — A hat is not judged against a standard; it is judged against the person under it. Crown height, brim width and the ratio between them read completely differently on different faces and different heights, which is why a shape that looked right on the block can look wrong the moment somebody puts it on. This is the part that takes years and the part no block can supply.
- The brim reads against the shoulders, the crown against the face — The most useful single rule available. A brim wider than the shoulders overwhelms a frame however well it is made, and a crown much taller than the face is long elongates rather than balances. Both are worth checking on a person before the shape is committed to.
- Angle is a design decision made at the headband — How a hat sits — level, tilted, back off the forehead — is set by where and how the petersham is fitted, not by the block. It is the cheapest thing to change and the one beginners treat as fixed.
- Trimming is placement, not quantity — A single well-placed element reads as deliberate and three fighting each other read as unfinished. Position it against the line of the hat rather than centring it by default, and stop earlier than feels right.
- Straw behaves differently from felt and is less forgiving — Straw and sinamay have a grain and a weave that will not stretch equally in all directions, so a shape that blocks easily in wool felt may need a different approach in straw. Learn the process in felt first, which is what the getting-started sequence recommends and why.
- The felt will not stretch where you need it — Not enough steam, or you have let it cool. Felt blocks while hot and damp and stops cooperating as it dries — re-steam rather than pulling harder.
- Wrinkles that will not pull out — Usually pulled unevenly from one side. Work opposite points alternately, the way you would tension a wheel, rather than working round in one direction.
- The shape relaxed after it came off the block — Under-dried, or not stiffened. Leave it on the block far longer than feels necessary — overnight is normal — and check whether the material needs stiffener.
- The hat does not stay on — The headband. Petersham fitted correctly to the head size is what holds a hat, and no amount of shaping compensates for skipping it.
- It fits but looks wrong — Proportion, which is the design half rather than the making half. Crown height and brim width against the wearer’s face and shoulders is what this comes down to, and a mirror plus a photograph tells you more than measuring does.
- Shiny patches on the felt — Iron or heat applied directly. Felt scorches and glazes easily, and it is not recoverable — steam rather than press.
- The straw dried before you finished — Straw is worked wet and has a shorter window than felt. Wet it thoroughly, work quickly, and re-wet rather than forcing it.
The first stage is the process: steam, block, pin, dry, and a headband fitted properly. Two or three wool felt hats on the same block will get you there, and repeating one shape teaches far more than attempting three.
The second is materials and range — fur felt for a finer result, straw for summer, sinamay for light structures — and the discovery that each behaves differently enough to need learning separately. This is also where block hire stops being a compromise and starts being a deliberate strategy, because nobody owns every shape.
The third stage is design rather than making, and it is where millinery stops resembling other textile crafts. Crown height, brim width and angle against a particular face, a particular pair of shoulders and a particular occasion — proportion, in other words. It is judged by eye, it is what separates a competent hat from one that suits somebody, and it is the part that takes years. From there the routes are bespoke work for individuals, theatrical and historical commissions, or block making for people who have run out of shapes they can buy.
- Blocking
- Softening felt or straw and stretching it over a wooden form to take its shape. The central process of the craft.
- Hood and capeline
- The unformed cone-shaped felt blank, and the wider-brimmed straw blank. What you buy before you make anything.
- Block
- A wooden form in the shape of a crown or brim. The craft’s capital cost, permanent, and commonly hired rather than owned.
- Petersham
- The ribbed ribbon used for the internal headband. Unglamorous and load-bearing — it is what makes a hat fit and stay on.
- Sinamay
- A stiff woven abaca fabric used for headpieces and light structures. Cheap and where most fascinator work happens.
- Fascinator and headpiece
- A decorative piece mounted on a band, comb or base rather than a fitted hat. A different and much shorter craft, frequently taught as millinery.
- Stiffener
- The solution that makes a blocked shape permanent. Invisible at the right stage and obvious at the wrong one.
- Brim and crown
- The two halves of a hat, often blocked separately on different blocks and joined afterwards.
- Head fitting
- Sizing to an actual head, which is an oval rather than a circle and differs person to person. Where making becomes bespoke.
- Buckram
- A stiffened fabric used to build structured shapes that are not blocked from felt or straw. The other route to a form.
- Blocked felt hats — The classical core — fedoras, cloches, structured brims. Where the technique is deepest and the blocks matter most.
- Straw and summer work — Blocked wet, dried rigid, and a genuinely different material to handle. The other half of the traditional year.
- Headpieces and fascinators — Sinamay, wire and trim on a base. Cheap, quick, needs no blocks, and is where most people actually begin — and a complete craft in itself rather than a lesser one.
- Buckram and couture construction — Building a form rather than blocking one, which allows shapes no block can produce. The route into couture and theatrical work.
- Historical and costume millinery — Reproducing period headwear for reenactment, theatre and film. Meets the costume side of the catalogue and carries its own research problem.
- Block making — Carving your own wooden blocks. A woodworking craft in its own right, and the answer for anybody who wants a shape nobody sells.
- Still deciding — Millinery vs corsetry
Hats are ancient and millinery is not, and keeping those two apart explains most of what the craft is. The V&A’s hat collection is "a revealing and exciting record of the changes in headgear over the past 17 centuries"; millinery, by the same museum’s account, "is comparatively recent — becoming established over the past 300 years" and "concentrates on the more decorative and fashionable side of hat-wearing". People covered their heads for a very long time before anybody made a living from designing how that looked.
The craft you would learn today was formed in the period when hats were compulsory. A hatter made a hat; a milliner trimmed, shaped and sold one, working to a customer and to a season, and the division of labour that produced blocks, blocking, wired brims and hand-stitched trimming comes from a trade organised around large volumes of individual commissions. The wooden block on your bench is a piece of industrial infrastructure that outlived its industry.
What changed was not the technique but the occasion. Everyday hat-wearing in Britain effectively ended within a generation after the Second World War, and with it went the trade’s volume, its apprenticeships and most of its workshops. Millinery survived by moving to the places where a hat still does a job — weddings, racing, ceremony, religious observance, the couture show — which is why the surviving craft is so heavily weighted towards the decorative end that the V&A describes.
That is also why the hat is such an unusually loaded object to make. The museum puts the function plainly: hats "have the power to impart a message of authority, affiliation, individuality, propriety, rebellion and style". A milliner is not making an accessory. They are making a statement somebody has to be brave enough to wear into a room.
Sources for this section
- Hats — Explore the Collections (opens in a new tab) — Victoria and Albert Museum · Institutional · read — supports the claim
- Do I need to buy blocks to start?
- No, and you should not. A single wooden block costs £80–£250 — about the same as a one-day workshop where blocks, materials and tuition are all provided and you leave with a finished hat. Suppliers hire blocks, guilds share them and courses lend them. Buy one only when you have used a shape repeatedly and know you want it permanently; they last forever and hold their value, so there is no hurry.
- How is this different from sewing a hat?
- Millinery is a forming craft rather than a cutting-and-joining one. You soften a felt hood or straw capeline with steam or water, stretch it over a wooden block and let it dry into that shape — the sewing that follows is finishing rather than construction. That is why the equipment is blocks and a steamer rather than patterns and a machine, and it is why the skills transfer from dressmaking less than people expect.
- What is the difference between a hat and a fascinator?
- A hat has a crown fitted to a head and usually a brim; a fascinator or headpiece is a decorative object mounted on a band, comb or small base and does not need to fit. They are different crafts — headpieces use sinamay, wire and trim, need no blocks, and are much quicker to learn. A good deal of what is advertised as millinery teaching is headpiece making, which is worth knowing before booking.
- What should I make first?
- The same simple shape in wool felt, three times, on one block. Wool felt is £15–£35, forgiving and blocks readily, and repeating one shape teaches the process in a way that attempting three different ones never does — the third will be visibly better than the first. Learn to fit a petersham headband early, because that unglamorous strip is what actually makes a hat stay on.
- Why does my hat fit but look wrong?
- Proportion, which is the design half of the craft rather than the making half. Crown height and brim width read differently against different faces, heights and shoulders, and a hat that is technically perfect can still be wrong for its wearer. It is judged by eye rather than measured — look in a mirror and then at a photograph, because they tell you different things — and it is the part that takes years.
- Is it an expensive hobby?
- It has a low running cost sitting behind a real equipment threshold. Materials are cheap — £15–£35 for a wool felt hood, a few pounds a metre for sinamay — and tools are about £100 all in. The blocks are the problem at £80–£250 each, which is exactly why hiring and workshops dominate how people start. Do a course before buying anything.
If you like this
Each of these is here for a stated reason, not because it is also a hobby.
Similar to
- Corsetry — Both are structured garment crafts where the shape is built rather than draped, and both are learned on courses because the equipment is specialised.
Goes well with
- Dressmaking — The same wardrobe and frequently the same maker, and almost none of the same technique — forming over a block rather than cutting and joining.
- Natural dyeing — Felt and straw both take dye, and matching a trim to a garment is a colour problem that dyers solve rather than shop for.
- Theatrical costume making — Where much millinery is actually practised professionally, and where buckram construction matters more than blocking.
Substantial
Last reviewed 2026-08-18. Cost, time and difficulty figures on this page are HobbyHQ estimates — see how we work. Something here wrong or out of date? Tell us.