Woodworking · Heritage & traditional crafts · Outdoor & adventure
Whittling
Whittling needs one knife, one piece of wood and a way to keep the knife sharp. That is the whole craft. It is also the craft where beginners hurt themselves most predictably, always in the same way and always for the same reason — a blunt knife and a thumb in the wrong place — and both of those are entirely fixable in the first ten minutes.
Also known as wood whittling, knife carving.
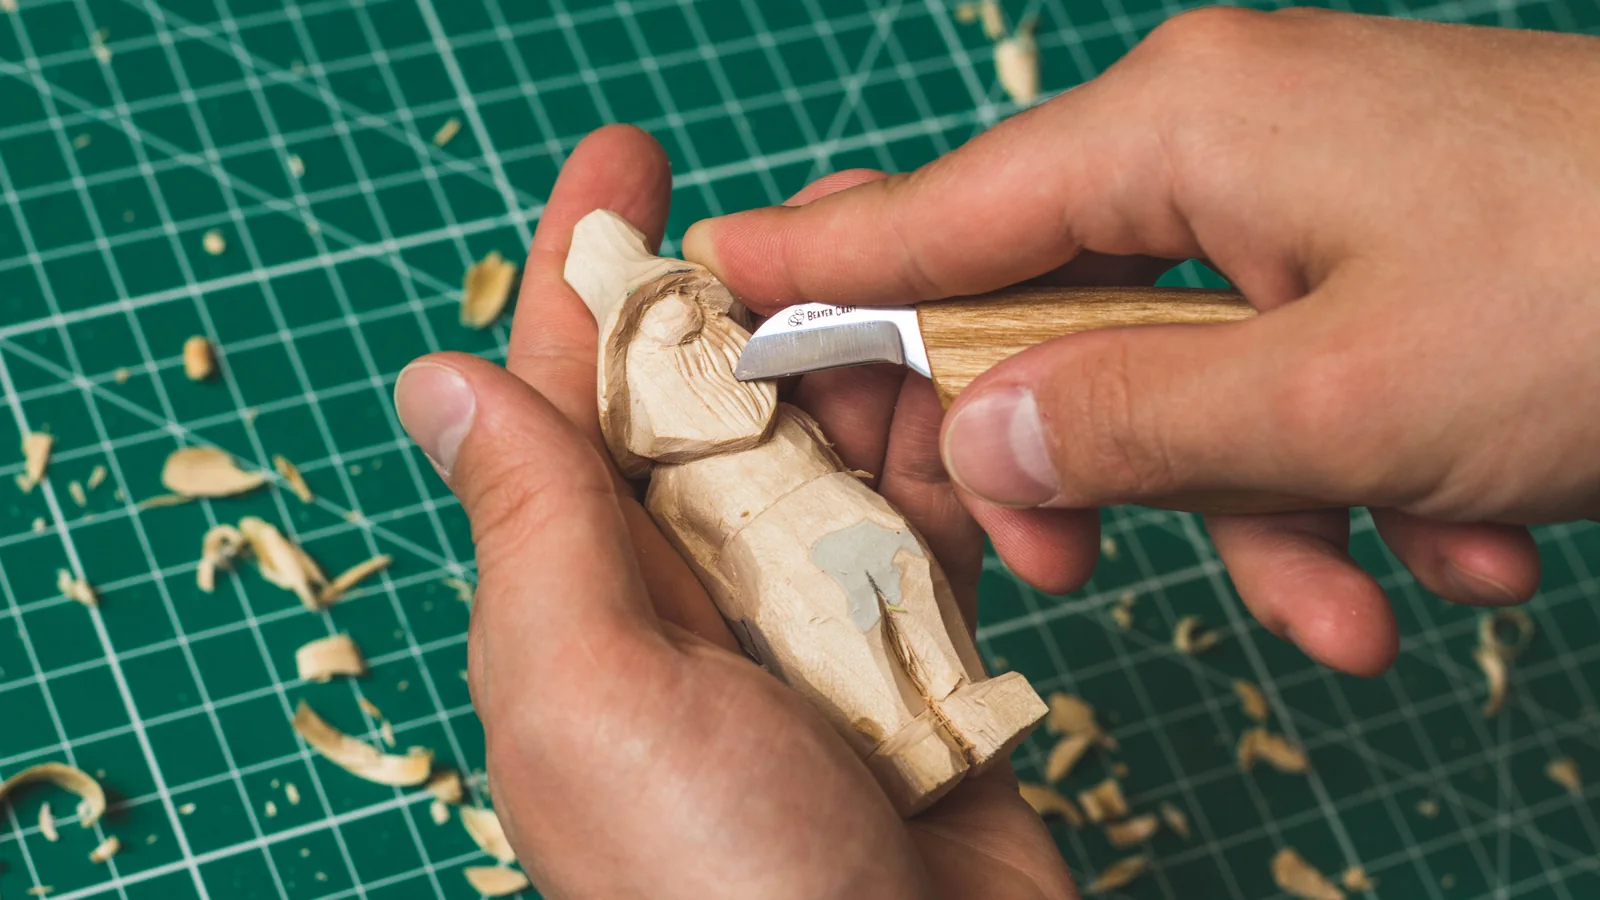
Whittling is carving with a knife alone, without gouges, mallets or a bench. That constraint is the definition and it is what gives the craft its character: it is portable, quiet, slow, and done sitting down with the work in your hands rather than clamped.
It sits at one end of a spectrum. Wood carving proper uses gouges and a mallet on a fixed workpiece and can produce large sculptural work. Whittling produces small objects — spoons, figures, birds, chains, ball-in-cage puzzles, walking stick handles — and the size limit is the point rather than a limitation.
The learning curve is unusual: the first hour is genuinely hard because you do not yet know what a sharp knife feels like or how grain behaves, and then it becomes easy quite suddenly. Most people who abandon whittling do so within that first hour, with a blunt knife, having tried to carve a piece of construction pine.
- Still deciding — Whittling vs wood carving
- Still deciding — Whittling vs knifemaking
Step 1: Buy a proper whittling knife, not a pocket knife
A sloyd or detail knife with a short, thin, fixed blade and a handle that fills your palm. A Swiss Army knife has the wrong blade geometry, a loose pivot and no handle to speak of, and it is why many people conclude they are bad at this.
You will know it worked when: A blade you can steer precisely with light pressure.
Step 2: Learn to strop before you learn to carve
A leather strop loaded with polishing compound, twenty passes each side, takes a minute and restores a working edge. This is a genuine skill and it is the one that makes everything else possible.
You will know it worked when: A knife that cuts end grain cleanly and pares a shaving thin enough to see through.
Step 3: Start with lime, basswood or fresh-cut green hazel
Soft, even-grained and forgiving. Do not start with construction pine — it is full of hard knots and soft summer wood in alternating bands, which tears and splits, and it is the wood most beginners happen to have.
You will know it worked when: Clean cuts instead of torn fibres.
Step 4: Learn four cuts
The push cut (away from you, controlled by the whole arm), the pull or draw cut, the thumb-push (thumb of the knife hand braced on the work, very short controlled travel), and the stop cut (a vertical cut that a later cut runs into, so the shaving breaks off cleanly). Almost all whittling is these four.
You will know it worked when: Control over where the cut ends, which is the whole craft.
Step 5: Make a spatula, then a spoon, then a figure
A flat spatula teaches grain and profile. A spoon adds a hollow, which is the first real challenge. A figure adds three-dimensional planning. In that order.
You will know it worked when: Three finished objects and an understanding of grain direction.
Wood is a bundle of fibres running along the length of the piece, and a knife either separates them cleanly or tears them. Cutting "downhill" — with the fibres running away from the edge, like stroking fur the right way — produces a clean, shiny surface. Cutting uphill lifts and tears the fibres, leaving a rough surface and often splitting off more than you intended.
The direction changes constantly as you carve a curved form, which is why experienced carvers turn the work in their hands continually rather than cutting in long consistent strokes. If a cut suddenly feels rough or grabs, the answer is almost always to turn the piece around and cut from the other direction.
The stop cut is the technique that makes detail possible. Make a firm vertical cut into the wood where you want a shape to end, then cut towards it from the other side: the shaving lifts and breaks off exactly at the stop cut rather than running on and tearing out the feature you were trying to make. Nearly every crisp edge in whittled work is a stop cut.
Green wood — freshly cut, still wet — carves far more easily than seasoned wood and is the traditional material for spoon carving. The trade-off is that it will shrink and can crack as it dries, so roughed-out green work is usually left to dry slowly, often in a paper bag with the shavings, before final shaping.
Sources for this section
- Woodland Trust (opens in a new tab) — Woodland Trust · Institutional · read — supports the claim
Nearly every whittling complaint traces back to one of three things: the edge, the wood, or the direction. That is a short list, and the useful consequence is that a symptom you cannot place is almost always the edge, because a dull knife causes faults that look like everything else.
- The surface is fuzzy and no amount of care fixes it — Likely direction, then edge. A fuzzy surface is torn fibres rather than cut ones. Check whether the cut is running uphill — if it grabs or feels rough as it goes, it is. Next, turn the work and cut from the other direction. If it is still fuzzy going both ways, the knife is dull, because a genuinely sharp edge severs fibres rather than pushing them aside.
- The knife keeps splitting off more than I meant to remove — Likely cut size. A large shaving follows the grain rather than the shape you had in mind, and once it runs it takes material with it. Check the size of the shavings coming off — if they are long and thick, that is the fault. Next, take many small controlled cuts. It feels slower and it arrives sooner, because nothing has to be recovered.
- It is hard work and my hands ache after twenty minutes — Almost certainly the edge. Effort is the first symptom of a dull knife and it arrives long before anybody notices the surface. Check by trying to slice the corner of a sheet of paper held in the air — a working edge does it, a dull one folds it. Next, strop. Stropping is the maintenance the craft actually runs on, and it takes under a minute.
- The wood is fighting me everywhere — Likely the wood rather than you. Construction pine alternates hard and soft growth rings and is full of knots, which is why it is the wrong wood to learn on despite being the one to hand. Check whether the resistance changes rhythmically as the cut travels. Next, buy or cut lime, basswood, birch, hazel or willow. This is the single change that makes the most difference to a beginner.
- My piece has cracked while it dried — Likely drying speed. Green wood loses moisture from the ends and the outside first, and the shrinkage that follows opens splits. Check where the crack is — end grain and the widest section are the usual places. Next, slow the drying: a paper bag, a cool room, and weeks rather than days. Nothing recovers a split that has already opened, so this is prevention rather than a fix.
- I keep cutting my thumb — A position fault, and the reason to stop rather than adapt. Nearly every beginner cut is the holding thumb sitting in the blade’s path. Check where your thumb is at the *end* of the cut rather than at the start, which is where it gets caught. Next, keep the thumb behind the blade or out of the plane of travel entirely, and use a thumb guard while the habit forms. A cut hand is the one injury this craft reliably produces and it is entirely avoidable.
Whittling has no grades, and the natural progression is not towards harder shapes so much as towards larger tools, greener wood and things people use. Several of these steps are sideways into related crafts rather than upwards within this one, which is honest: a lot of whittlers end up carving something that is no longer whittling.
Step 1: Finish something on purpose
A first object taken all the way to a cut surface rather than abandoned at roughly-the-right-shape. Almost everybody has a bag of half-carved blanks and almost nobody learns from them.
You will know it worked when: One finished thing, and a knife-finished surface you can see the difference in.
Step 2: Make the same object three times
The third is visibly better than the first in a way that trying three different objects never shows you, because the variable is you rather than the shape.
You will know it worked when: A repeatable process instead of a lucky result.
Step 3: Move to green wood
Freshly cut wood cuts like cheese compared with dry, and it changes the craft more than any tool does. It also introduces drying, which is the part that goes wrong.
You will know it worked when: You are cutting easily, and thinking about moisture.
Step 4: Add a hook knife and make a spoon that works
The bowl is the step that needs a second tool, and a spoon somebody actually eats with is a meaningfully harder object than a decorative one.
You will know it worked when: A spoon in the kitchen drawer rather than on a shelf.
Step 5: Add an axe, and stop starting from bought blanks
Roughing out from a log with an axe is where spoon carving proper begins, and it is the point at which the hobby needs somewhere to make a mess and a different set of safety habits.
You will know it worked when: You start from wood rather than from a shaped blank.
Step 6: Go sideways, if you want to
The neighbours are close: wood carving with gouges and a mallet, green woodworking with a shave horse, or spoon-carving meets and courses, which is where most people find they learn fastest.
You will know it worked when: A clear idea of whether you want a bigger bench or a sharper knife.
The four habits that prevent almost every whittling injury:
- The safety circle — Extend your arm and rotate. Nothing and nobody, including your own legs, should be within that circle while you are cutting. Most whittling injuries in groups are caused by somebody else’s arm.
- Cut away from yourself — with two named exceptions — The thumb-push and the chest-lever cuts are controlled techniques where the blade travels towards you under very tight constraint, and they are legitimate. Everything else goes away from the body, and always away from the artery on the inside of the thigh.
- Never cut towards a supporting thumb — The single most common injury. The thumb holding the workpiece must be behind the blade’s path, not in front of it. A leather thumb guard is cheap.
- Wear a cut-resistant glove on the holding hand — Standard practice, not a beginner’s crutch. Experienced carvers wear them.
- Working with a blunt knife — Causes bad cuts, bad surfaces and injuries. Strop constantly.
- Starting on construction pine — Alternating hard and soft growth rings, knots everywhere. Lime, basswood, birch, hazel and willow are all much better.
- Taking big cuts — Large shavings run into the grain and split off material you wanted. Many small controlled cuts get there faster and without disaster.
- Cutting uphill against the grain — Produces tearing and a fuzzy surface no amount of sanding fully rescues. Turn the work.
- Ignoring the thumb — The holding thumb in the blade’s path is how nearly every beginner cut happens.
- Sanding instead of cutting — A knife-finished surface is burnished and shiny; a sanded one is dull and raises fibres when it gets wet. Whittling is meant to end with a cut surface.
- Letting green work dry too fast — A roughed-out green spoon left on a radiator will crack. Dry it slowly, in shavings or a paper bag.
- Sloyd knife
- A general-purpose carving knife with a straight, fairly short fixed blade, from the Scandinavian craft-education tradition of slöjd.
- Stop cut
- A cut made across the grain to terminate a subsequent cut cleanly, so the shaving breaks off at a defined line.
- Push cut
- A cut driven away from the body, controlled by the arm and shoulder.
- Thumb-push cut
- A short, highly controlled cut in which the thumb of the knife hand braces against the work and pushes the blade a small distance.
- Green wood
- Freshly cut wood still containing its natural moisture. Much softer to carve, and it shrinks as it dries.
- Grain direction
- The orientation of the wood fibres, which determines whether a cut is clean or tears.
- Strop
- A leather strip charged with fine abrasive compound, used to realign and polish the edge between sharpenings.
- Roughing out
- The first stage of removing bulk material to establish the overall form.
- Crook knifealso: hook knife
- A curved knife used to hollow bowls and spoon bowls, where a straight blade cannot reach.
- Chip carving
- A related discipline in which precise geometric chips are removed from a flat surface, using one or two specialised knives.
Whittling has no origin because it has no beginning: shaping wood with an edged tool is among the oldest human activities, and every timber-rich culture has a version. What it has instead is a set of traditions.
The Scandinavian slöjd tradition is the most influential on the modern hobby. Introduced into Swedish and Finnish schools in the nineteenth century as a system of craft education, it standardised knife technique and the knives themselves, and it is why the default whittling knife shape is called a sloyd knife. Its emphasis on making useful domestic objects — spoons, butter knives, bowls — remains the tone of the craft.
In Britain, whittling survived within rural work rather than as a named hobby: hurdle makers, hedgers, besom makers and clog makers all used knife work as part of a larger trade. The current revival owes a great deal to the green woodworking movement from the 1970s onwards, and specifically to the rediscovery of pole-lathe turning and spoon carving as leisure crafts, which brought a body of technique back into general circulation.
Sources for this section
- Woodland Trust (opens in a new tab) — Woodland Trust · Institutional · read — supports the claim
- What knife should I buy?
- A dedicated whittling or sloyd knife with a short fixed blade, £20–£40. Blade geometry matters much more than brand or steel: you want a thin, flat-ground blade that can take a very fine edge, and a handle that fills your palm. A folding pocket knife has the wrong geometry and a pivot that flexes, both of which make control worse.
- What wood should I use?
- Lime (basswood) for figures and detail — soft, even and almost grain-free in behaviour. Fresh-cut green hazel, birch or willow for spoons and sticks. Avoid construction pine, which alternates hard and soft bands and tears, and avoid dry hardwoods like oak and ash until you are experienced.
- Is whittling safe for children?
- It is commonly taught from around eight to ten with close supervision, and the safety rules are simple and teachable: a cut-resistant glove, a clear safety circle, cut away from the body, and a properly sharp knife. The instinct to give a child a blunt knife is exactly wrong — a blunt blade skids and is far more dangerous.
- Can I carry my knife with me?
- Not freely. In England and Wales, carrying a knife in public requires good reason unless it is a non-locking folder with a blade under three inches. A fixed-blade carving knife is not exempt, so carry it wrapped and stored, going to and from somewhere you have permission to carve, and check the current government guidance — the rules differ across the UK and are periodically tightened.
- How often do I need to sharpen?
- Strop constantly — every ten or fifteen minutes of carving — and you will rarely need to sharpen properly at all. Stropping takes under a minute and maintains the edge; full sharpening on a stone is only needed when the edge has been damaged or allowed to go genuinely dull. Most beginners strop far too little and then conclude that carving is hard work.
Guides
Longer answers to questions this page can only summarise.
- Keeping a whittling knife sharpStropping, when to go back to a stone, and why a sharp knife is the safety equipment rather than the risk.
- Choosing a whittling knife and the wood to use it onWhat separates a whittling knife from a pocket knife, which blade shapes do what, and why the wood you choose matters more than the knife you buy.
Within this activity
Disciplines, variants and techniques that sit inside it.
Disciplines
- Spoon carving — Carving eating and cooking spoons from green wood with an axe and two knives.
If you like this
Each of these is here for a stated reason, not because it is also a hobby.
Cheaper alternative
- Knifemaking — If what appeals is a blade and a quiet afternoon rather than a workshop, whittling needs one knife and no machinery — and it teaches what a good edge is for.
Goes well with
- Wood finishing — A carved spoon still has to be finished, and the choice matters more than usual because the object gets handled constantly and sometimes wetted.
- Bushcraft — Knife control and an understanding of green wood are foundational bushcraft skills, and the two are usually learned together.
Progresses to
- Green woodworking — The same material understanding scaled up to chairs and bowls, with a shave horse and a pole lathe.
- Spoon carving — The standard next project: adds a hollowing knife and green wood, and produces something genuinely used.
- Wood carving — Gouges, a mallet and a fixed workpiece open up scale and depth that a knife alone cannot reach.
Similar to
- Chip carving — One or two knives, a flat surface and precise geometry — the same tool discipline applied to pattern rather than form.
Sources for this section
- Buying and carrying knives (opens in a new tab) — UK Government · Governing body · read — supports the claim
- Forestry Commission Byelaws (opens in a new tab) — Forestry England / Forestry Commission · Governing body · corroborated indirectly
- Woodland Trust (opens in a new tab) — Woodland Trust · Institutional · read — supports the claim
Comprehensive
Last reviewed 2026-08-13. Cost, time and difficulty figures on this page are HobbyHQ estimates — see how we work. Something here wrong or out of date? Tell us.