Technical & maker · Metal & jewellery
Home machining
A lathe is the only machine that can make its own parts, and a home workshop with one stops being dependent on what is available to buy. That is the real appeal, and it arrives with a genuine hazard: these are unguarded machines with enough torque to take a hand in. This page covers the machines, the workflow, the buying decisions and the habits — and publishes no feeds and speeds, for the same reason the CNC page does not.
Also known as metalworking lathe, model engineering machining, lathe work.
Home machining is cutting metal to a dimension. A lathe rotates the workpiece against a fixed tool and produces anything round; a mill rotates the tool against a fixed workpiece and produces everything else. Between them they make parts that cannot be bought, repair parts that are no longer made, and produce the fittings every other workshop craft turns out to need.
The craft divides by what it serves rather than by technique. Model engineering — locomotives, stationary engines, clocks — is the traditional heart of it in Britain and the reason the society network exists. Repair and restoration is the largest practical use: a bush, a shaft, a thread, a part for a machine whose manufacturer disappeared in 1974. One-off making covers everything else, from tooling for the workshop itself to parts for other hobbies entirely.
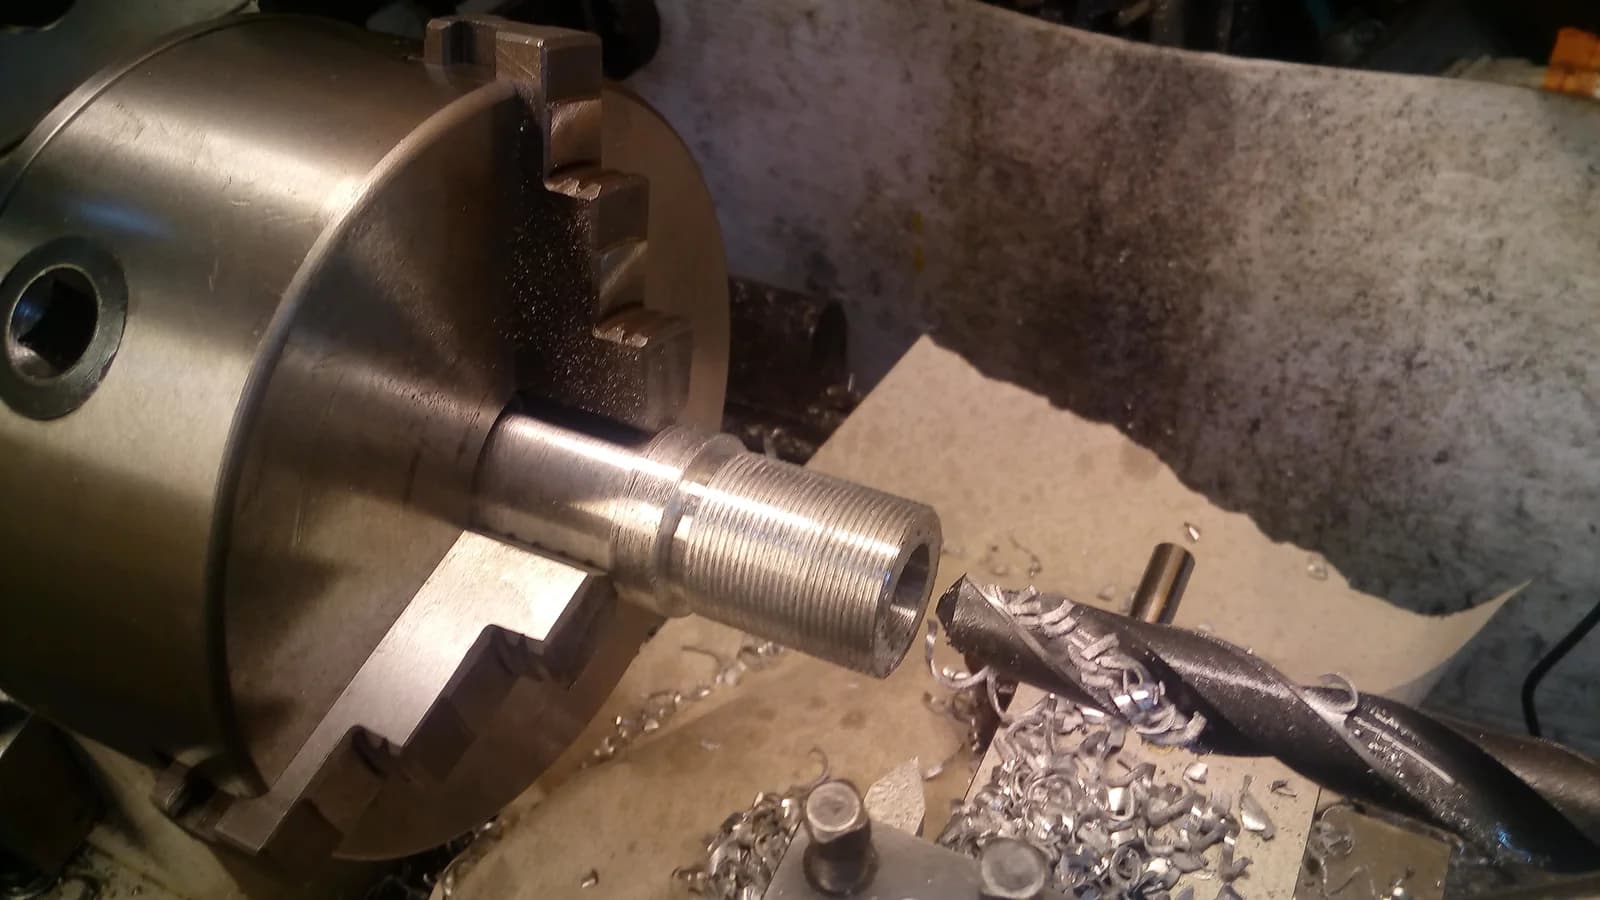
What beginners consistently underestimate is that the machine is the cheap part of the problem and workholding is the craft. Getting metal to sit exactly where you want it, rigidly, so that it can be cut without moving, is most of the skill and nearly all of the frustration. A cut that goes wrong is almost always a setup that was not rigid enough.
- The actual skill
- Workholding, not cutting
- Best first move
- A model engineering society
- Budget for tooling
- As much again as the machine
- What this page will not give you
- Feeds and speedsDeliberately. See below.
Step 1: Join a model engineering society before buying anything
Most have equipped workshops, training sessions and members who will teach you on their machines. Thirty to eighty pounds a year against several thousand, and you will learn what you actually want before you buy it.
You will know it worked when: Real experience, and a much better purchase later.
Step 2: Learn to hold work before learning to cut it
Three-jaw, four-jaw, between centres, faceplate, and how each one affects concentricity and rigidity. This is the part that determines whether anything else works.
You will know it worked when: Setups that do not move.
Step 3: Buy measuring equipment early
A caliper, a micrometer and a dial indicator. Machining is the act of measuring repeatedly and cutting occasionally, and without instruments you are guessing at the only thing that matters.
You will know it worked when: The ability to know rather than hope.
Step 4: Make tooling for the machine
A mandrel, a boring bar holder, a set of soft jaws, a tailstock die holder. Traditional first projects because they are useful, forgiving, and teach the machine while improving it.
You will know it worked when: A better workshop and a trained operator at once.
Step 5: Then buy a lathe, second-hand, with tooling
An older British or a decent import machine with a chuck set and a toolpost included is worth far more than a bare new machine at the same price. Tooling is where the money goes.
You will know it worked when: A working setup rather than a machine and a shopping list.
- Rigidity, above every other specification — Mass, bearing quality and how well the machine is bolted down determine what cuts are possible far more than headline capacity does. A small rigid lathe beats a large flexible one at everything.
- A three-jaw and a four-jaw chuck — The three-jaw is fast and approximately concentric; the four-jaw is slow and exactly whatever you set it to. You need both and beginners frequently buy only the first.
- Measuring instruments you trust — A digital caliper for setting out, a micrometer for anything that must fit, and a dial indicator for setup. Cheap calipers are fine; a cheap micrometer is not.
- A quick-change toolpost — The upgrade that changes the experience most. Repeatable tool height and thirty-second changes turn a discouraging setup task into nothing.
- Cutting tools, in one system — Ground high-speed steel or indexable carbide inserts. Both work; mixing systems randomly is how a beginner ends up with a drawer of tools and no consistent results.
- A digital readout, eventually — Removes backlash arithmetic from every operation and is a genuine accessibility aid as well as a convenience. Worth more than most people expect.
- What can wait indefinitely — A large lathe, a full collet set, exotic tooling and a second machine. The most common beginner error is buying capacity instead of tooling.
- Work it out — Metric thread and tapping drill reference
Machining splits cleanly into two kinds of knowledge and only one of them belongs on a page. Executing a cut is judged live, by sound, by the colour and shape of the swarf, and by what the machine is telling you through your hands — and the parameters that govern it depend on the material, the tool, the rigidity of your specific machine and how the work is held, which is why this site publishes none of them. Planning the job is the opposite: it happens before the machine is switched on, it is written down by every competent machinist anyway, and getting it wrong is the reason most amateur parts end up scrap.
The organising idea is datums. A datum is the surface or axis every subsequent measurement is taken from, and the single most common cause of a part that will not assemble is measuring each feature from the previous one, so that four small errors accumulate into one large one. Choose a face and an axis at the start, machine them first, and refer everything to them. Where a part is turned round and re-held, the question that decides whether it works is how you re-establish that datum.
The second idea is order of operations, and it follows from the first. Rough before you finish, so the stresses released by heavy cutting are removed before the surfaces that matter are made. Do the operations that need the most rigidity while the workpiece is largest. Drill before you bore. Leave the feature that is hardest to hold until the part still has something convenient to hold it by — and if you cannot answer "what am I gripping for the last operation" before you start, you do not yet have a plan.
The third is workholding, which the safety section already treats as a safety system and which is equally a precision one. A part held in a way that lets it move produces a surface that is wrong in a way no amount of care at the handles can correct, and a part held in a way that distorts it will spring back into a different shape when released. Both are decided before cutting.
Measurement, which is the discipline the craft actually runs on:
- Measure the thing, not the handwheel — Dials and readouts describe what the machine was asked to do. Only a measurement describes what happened, and the difference between the two is the backlash, deflection and tool wear that make machining interesting.
- Sneak up on a dimension — Take a light cut, stop, measure, and take the rest. Material removed cannot be replaced, and the entire cost of a cautious approach is a few minutes.
- Know what your instrument can resolve — A measuring tool has a resolution and an accuracy and they are different numbers. Working to a tolerance finer than your instrument can resolve is a way of generating confident nonsense.
- Let things reach temperature — Metal expands measurably at the tolerances this craft works to, and a part measured hot from cutting will be a different size cold. This surprises everybody once.
- Deburr before you measure — A burr is a raised edge and calipers will happily include it. A great many mystifying half-millimetre errors are a burr.
- A patterned finish and a distinctive ringing noise — Chatter, and it is nearly always rigidity. Check overhang first — of the work and of the tool — then tool height, then whether the machine is properly bolted down. Changing the cut is the last resort rather than the first.
- The part measures smaller than the dial says — Backlash taken up in the wrong direction, or tool deflection under load. Check by approaching the final cut from one direction only and taking a spring pass.
- The tool rubs rather than cuts — Tool height relative to centre, or a blunt edge. Check centre height against the tailstock centre — this is the single most common cause and takes a minute to eliminate.
- Parting off digs in and stalls — Rigidity and tool height again, and often too much overhang from the chuck. Check that the tool is exactly on centre and that the work is as short as it can be.
- Threads that will not fit — Almost always thread depth rather than pitch. Check with a gauge or the mating part, and cut in small increments — a thread cannot be un-cut.
- A part came loose in the chuck — Stop and reconsider the whole setup rather than tightening harder. This is a warning rather than an inconvenience, and the next one may not miss.
- The chuck key never stays in the chuck — A key left in and the machine started throws it with real force. The universal habit is that the key is never let go of while it is in the chuck.
- Workholding is a safety system, not a convenience — A part that comes loose in a chuck or a vice becomes a projectile. Most dramatic amateur incidents are workholding failures rather than tool failures.
- Stop the machine to measure — Every time, without exception. Measuring a rotating part is the second most common route to an entanglement injury after hand-held abrasive.
- Swarf is not touched — Long turnings are sharp along their whole length and hot when fresh. A brush and a hook, never fingers, and never while anything is turning.
- Isolate before changing anything — Tooling, chucks, belts. Switched off is not isolated, and a machine that starts while your hand is in it does not care why it started.
Sources for this section
- Using emery cloth on metalworking lathes (opens in a new tab) — Health and Safety Executive · Governing body · read — supports the claim
- Buying the biggest machine that fits — Capacity is the specification that matters least in a home workshop, and the money spent on it is money not spent on tooling and measurement, which is where capability actually comes from.
- Work sticking too far out of the chuck — The single most common cause of chatter, poor finish and thrown parts. Support it, shorten it, or use a centre — almost never push on regardless.
- Copying parameters from a forum — Derived on a different machine, a different tool and a different setup. This is the habit that turns a manageable craft into a hazardous one.
- Hand-held abrasive on turning work — Widespread in amateur workshops, unambiguously condemned by the regulator, and the mechanism behind a share of the serious injuries in this craft.
- Ignoring backlash — Every manual machine has it, and a dial reading taken after reversing direction is meaningless until it is taken up. This accounts for a great many mysteriously undersized parts.
- Working without a plan for the order of operations — Which face first, which datum, when to part off. A part machined in the wrong sequence often cannot be finished at all, and this is the thing experience most obviously supplies.
- Model engineering — Locomotives, stationary and traction engines, built to drawings over years. The traditional core of the craft in Britain and the reason the society and exhibition network exists. Published here as its own subject.
- Repair machining — Bushes, shafts, threads and replacement parts for machines nobody supports any more. The most practically useful branch and the one that justifies the machine to everybody else in the house.
- Toolmaking — Making tooling for the workshop itself. Traditional first projects, immediately useful, and unusually forgiving of a beginner’s tolerances.
- Clockmaking and horological work — Machining at very small scale with its own tooling, thread standards and lathes. A distinct discipline that shares only the principles. Published here separately.
- Firearms and engine work — Both use the same machines and both bring separate regulatory or safety regimes that sit entirely outside this page.
- CNC conversion — Adding stepper motors and control to a manual machine. A large and rewarding project, and a different craft afterwards — the CNC routing subject covers the workflow side of that world.
- Still deciding — Home machining vs CNC routing
- Swarfalso: chips
- The metal removed by cutting. Sharp along its length, hot when fresh, and moved with a brush rather than a hand.
- Workholding
- How the part is held while it is cut — chuck, collet, faceplate, vice, fixture. The actual craft, and the source of most failures.
- Backlash
- The slack in a leadscrew before movement begins after reversing direction. Present in every manual machine and the reason dials are always approached from one side.
- Chatter
- Self-sustaining vibration between tool and work, producing a patterned finish and a distinctive noise. Almost always rigidity rather than technique.
- Parting off
- Cutting the finished part from the stock. The operation that most reliably alarms beginners, and the one where rigidity matters most.
- Tramming
- Squaring a mill head to the table. An hour of setup that determines whether everything the machine subsequently makes is square.
- Between centres
- Holding work on points at both ends. The classic way to turn something long, accurate and able to be removed and replaced identically.
- Datum
- The reference surface or point from which measurements are taken. Choosing it well is most of what a good order of operations means.
The culture of this craft is the model engineering society, and it is one of the most generous institutions in British hobby life. Societies own equipped workshops, run tracks, hold exhibitions and contain a very high density of people who will spend an afternoon showing a beginner how to grind a tool. The demographic skews old and the societies know it, which means a new member of any age is met with something close to relief.
The second cultural feature is documentation. This is a craft with a century of magazines, drawings and books behind it, and the practice of publishing a design so that other people can build it is deeply embedded. That makes it unusually learnable from print compared with crafts that live on video, and it is why so much of the useful material is older than the internet.
The tension worth naming is between the traditional and the modern approaches — hand-ground high-speed steel and a dial against carbide inserts and a digital readout. Both work, both have advocates who overstate the case, and a beginner is best served by ignoring the argument entirely and using whatever the person teaching them uses.
Step 1: Turning something round to a dimension
Facing, turning to diameter, measuring, and hitting a size on purpose. Sounds trivial and is the whole foundation.
You will know it worked when: Control over one axis.
Step 2: Holding work several ways
Four-jaw setup, between centres, faceplate work. The point at which the machine stops limiting what you can attempt.
You will know it worked when: Setups rather than a single method.
Step 3: Threading, boring and parting
The three operations that intimidate beginners and that between them cover most real work.
You will know it worked when: Parts that fit other parts.
Step 4: Working from a drawing to a tolerance
Order of operations planned, datums chosen, fits achieved deliberately rather than by luck.
You will know it worked when: Engineering rather than turning.
Step 5: A long project, or a converted machine
A locomotive over several years, a full restoration, or CNC conversion and a different craft again. All three are common destinations and none of them is an end point.
You will know it worked when: A workshop that can make what you need.
The screw-cutting lathe is one of the foundational machines of industrial society, and the amateur version followed the industrial one almost immediately. By the late nineteenth century there was a recognisable home workshop movement in Britain with its own press, its own suppliers and its own competitive exhibitions, and the model engineering societies that still run today were founded in that period.
The twentieth century gave the craft its characteristic material culture: a magazine press that published buildable designs, a supply of surplus and ex-industrial machinery that put real capability into garages, and a set of British machine names — Myford above all — that still define the second-hand market. A very large proportion of home workshops in Britain are still built around machines made between 1950 and 1980, and that is a functioning ecosystem rather than nostalgia.
The recent changes are two, pulling in opposite directions. Cheap imported machines have lowered the entry price substantially and lowered the average rigidity with it, which is why so much modern advice is about improving a new machine. And CNC has moved from industry into workshops, which has produced a generation who arrive at manual machining from computer control rather than the other way round — and who tend, interestingly, to be better at planning operations and worse at feeling when a cut is wrong.
- What lathe should I buy first?
- A second-hand one that comes with tooling, and smaller than you think. Rigidity matters far more than capacity in a home workshop, and a small solid machine will do better work than a larger flexible one. In Britain the used market for older machines is deep and well supported, and a package including chucks, a toolpost and measuring equipment is worth substantially more than a bare machine at the same price — because tooling is roughly half the true cost of getting started and it is bought continuously.
- What feeds and speeds should I use?
- This site does not publish them, and the reason is that they are not a property of the material alone. The right numbers depend on the material, the tool, the rigidity of your specific machine, how the work is held and how far it projects, and hobby machines are typically far less rigid than the industrial ones published figures were derived on. Get them from the tooling manufacturer for the cutter you are actually using, or from a reference written for your class of machine. The advice that is safe to give is what experienced machinists actually say: start conservatively, take a test cut, and let the sound and the chip tell you.
- Do I need a mill as well as a lathe?
- Not to start, and eventually most people want one. A lathe alone covers everything round and, with a vertical slide or a milling attachment, a surprising amount that is not — the traditional home workshop worked this way for decades. A mill becomes worth the space and money when you find yourself repeatedly designing around the fact that you cannot cut a flat or a slot. Buying both at once is a common and expensive way to end up with two under-tooled machines.
- Is it dangerous?
- It carries real risk and the risk is concentrated in a few identifiable habits rather than spread evenly. The dominant mechanism is entanglement: anything flexible near a rotating spindle — a rag, emery cloth, a glove, a sleeve, untied hair — can pull a hand or a person into the machine, and HSE is explicit that applying emery cloth by hand to a rotating machine is never acceptable and that the injuries include amputation and occasionally death. Beyond that, swarf is sharp and hot, workholding failures throw parts, and measuring a rotating workpiece is how people get caught. None of it is unmanageable; all of it is unforgiving of shortcuts.
- Can I learn this without buying a machine?
- Yes, and it is worth doing before you buy anything. Model engineering societies across Britain have equipped workshops, run training sessions and are actively pleased to see new members; membership is typically £30–£80 a year. You will learn on better machines than you would buy, find out which operations you actually enjoy, and make a far more informed purchase afterwards. Adult education courses in machining also still exist in some areas and are worth looking for.
- How much space does a lathe need?
- More than its footprint, and this is the thing people underestimate. You need clearance at the tailstock end for long work, access along the front, room to get behind for belt changes and maintenance, and a floor that will take a concentrated load — a modest lathe with its stand is a couple of hundred kilograms. A single-car garage is comfortable for a lathe, a bench and storage; it becomes tight the moment a mill arrives.
If you like this
Each of these is here for a stated reason, not because it is also a hobby.
Similar to
- CNC routing — The same problem — hold the work, choose the tool, remove exactly enough material — approached by hand and by program. Both refuse to publish cutting parameters here for the same reason, and a machinist already understands why.
Goes well with
- Hobby welding — Cutting metal away and joining it together are the two halves of a metal workshop, and almost every project of any size needs both — a fabricated frame with machined fittings is the standard shape of the work.
- Shed building — Most home workshops exist to hold something, and a shed is where the lathe and the mill end up living.
- Model engineering — Model engineering is what most home machining is for in Britain, and its societies are where the machines, the teaching and the drawings all are — which makes it the entry route rather than the destination.
Shares equipment with
- Knifemaking — A bench, a vice, a drill press and the same relationship with steel. Machinists frequently arrive at knifemaking for the heat treatment, which their own craft mostly avoids.
- Narrowboat restoration — Engine and fittings work draws on the same tools and the same relationship with metal, and vintage marine engines are a restoration hobby of their own.
Sources for this section
- Using emery cloth on metalworking lathes (opens in a new tab) — Health and Safety Executive · Governing body · read — supports the claim
Substantial
Last reviewed 2026-08-16. Cost, time and difficulty figures on this page are HobbyHQ estimates — see how we work. Something here wrong or out of date? Tell us.