Technical & maker · Vehicles & motorsport
Bicycle maintenance
A bicycle is one of the few machines a beginner can genuinely understand completely, and almost every part of it can be fixed on a kitchen floor with hand tools. That makes it an unusually satisfying craft to learn, and an unusually cheap one, because the first three jobs you do yourself pay for the tools. The two things worth knowing before you start: the order to learn in is not the order things break, and there are exactly two components where getting it wrong has consequences.
Also known as bike maintenance, bicycle repair, bike mechanics.
A bicycle is a closed system of about a dozen mechanisms, none of them mysterious, all of them accessible without special equipment. That is what makes maintenance a genuinely good first mechanical craft: you can see every part, most adjustments are reversible, and the machine tells you immediately whether you got it right.
The work divides into three layers that are worth keeping separate in your head. Routine maintenance — cleaning, lubricating, checking tyre pressure and brake pads — is not really a skill and is most of what keeps a bicycle working. Repair and adjustment covers punctures, gear indexing, brake setup, cable and chain replacement, and it is where a weekend of learning saves years of shop bills. Overhaul and building means bearings, wheel building and assembling a bicycle from parts, and it is a craft in the full sense with a genuine apprenticeship to it.
The one thing that surprises beginners is standards. Bicycle components have proliferated into a bewildering set of incompatible bottom brackets, freehub bodies, axle widths and brake mounts, and a large proportion of maintenance frustration is not mechanical difficulty but discovering that the part you bought does not fit your bicycle. Identifying what you actually have, before ordering anything, is the skill nobody lists.
- Learn in this order
- Puncture, then gears, then brakesNot the order they break — the order of consequence.
- The two to take seriously
- Brakes and anything carbon
- Best single purchase
- A workstand
- What actually causes wear
- A dirty chainIt quietly destroys the expensive parts around it.
Step 1: Fix a puncture properly, twice
The foundational job, and the one that removes the most helplessness per hour invested. Do it once with a patch rather than a new tube, and find what caused it — a puncture you do not diagnose is a puncture you will have again in a mile, because the flint is still in the tyre.
You will know it worked when: You are never stranded, and you have learned to look for causes.
Step 2: Learn to clean and lubricate a chain
Unglamorous and the highest-value habit in the whole subject. A dirty chain wears the cassette and chainrings — the expensive parts — several times faster than a clean one. Degrease, dry, one drop per roller, wipe the excess off.
You will know it worked when: The drivetrain lasts years instead of a season.
Step 3: Index the gears
Barrel adjuster, limit screws, cable tension, in that order. It is the job that feels like witchcraft and is actually a short deterministic procedure, and getting it right is the single biggest improvement to how a bicycle feels to ride.
You will know it worked when: Shifting becomes something you fixed rather than something you tolerate.
Step 4: Learn your bike’s standards and write them down
Bottom bracket type, headset size, seatpost diameter, axle spacing, brake mount, chain speed. Half an hour with the manufacturer’s spec sheet, written on a card in your toolbox, prevents most of the wasted orders and returns that make this hobby feel expensive.
You will know it worked when: You order parts that fit.
Step 5: Do brakes with somebody who knows, the first time
Pad alignment, cable or hydraulic setup, and bedding in. This is the one system where a mistake has real consequences, and a community workshop or a friend who has done it before turns a nervous job into a routine one.
You will know it worked when: Confidence on the component that deserves the most respect.
Step 6: Build a wheel when you want the deep end
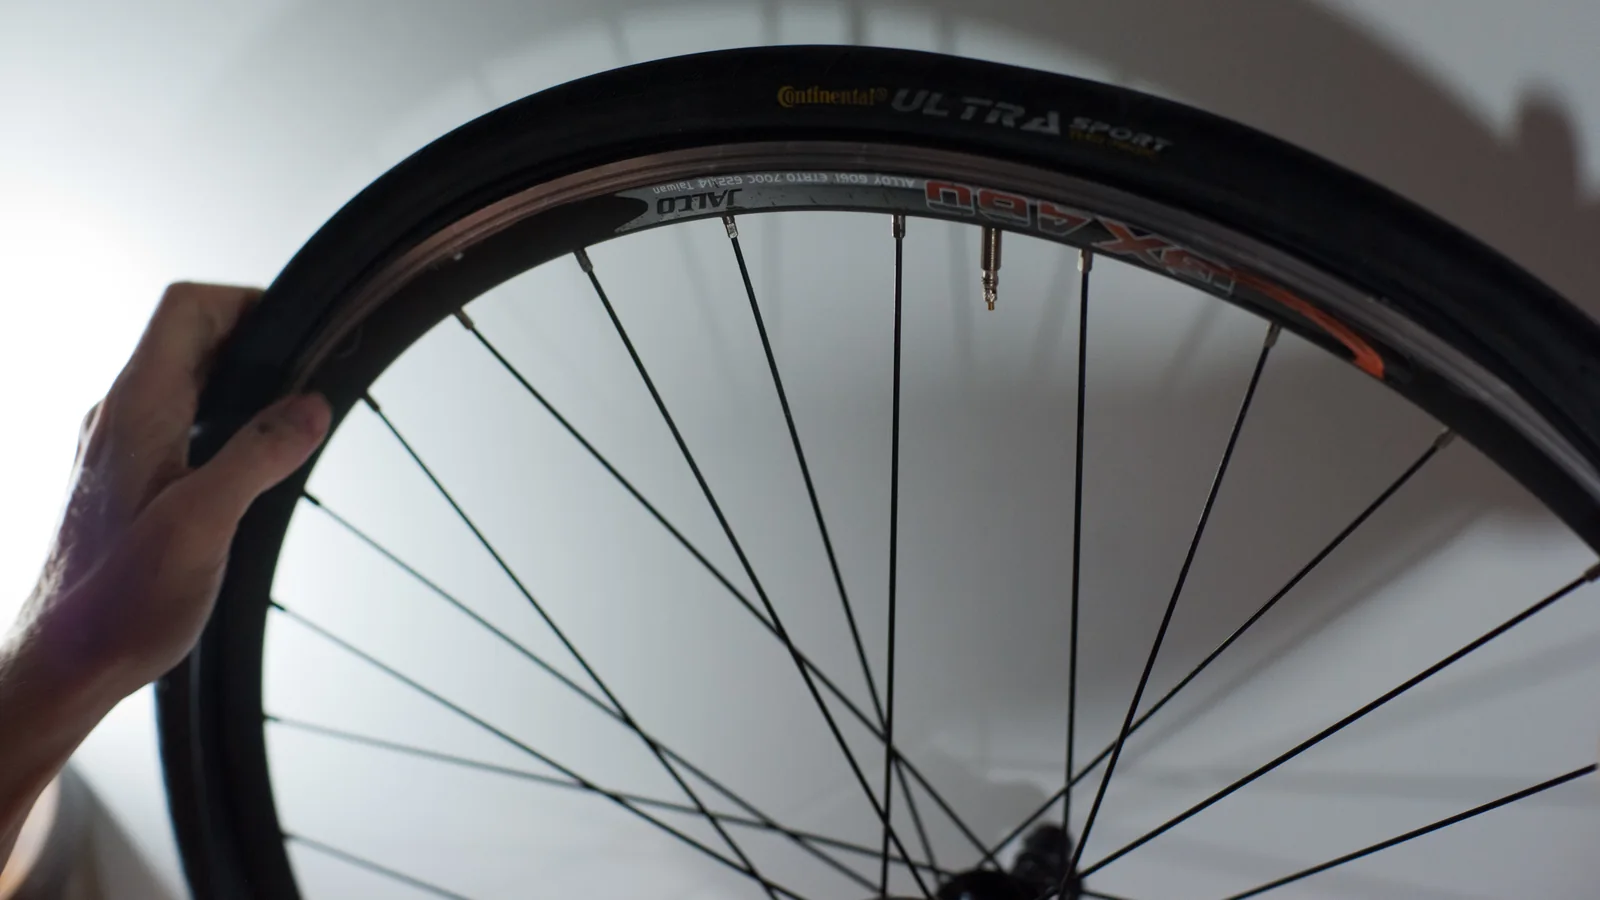
Lacing, tensioning, truing and dishing a wheel from a hub, spokes and a rim. It takes most people several hours and a certain amount of swearing the first time, and it is the job that turns a competent home mechanic into somebody who understands bicycles.
You will know it worked when: The craft, rather than the maintenance.
- Allen keys and Torx — Almost everything on a modern bicycle. Buy one good set rather than three cheap ones — rounded bolt heads are the classic false economy, and a rounded bolt is a much bigger job than the tool cost.
- Tyre levers, patches and a pump with a gauge — The gauge matters more than people expect. Correct tyre pressure is the cheapest performance and comfort adjustment on a bicycle and most people guess it badly.
- Chain tool and chain checker — The checker costs a few pounds and tells you when to replace a chain before it wears the cassette. This single tool saves more money than any other in the box.
- Cable cutters — Proper ones. Pliers crush a cable rather than cut it, and a frayed inner is a job you have to do twice.
- A workstand — The purchase that changes the activity. Working on a bicycle upside down on the floor is possible and unpleasant; at chest height with the wheels free it becomes a craft.
- A torque wrench — Not the first purchase, and non-negotiable the moment you own anything carbon. Carbon components fail by crushing rather than stripping, and the failure is sudden.
- Job-specific tools — Bottom bracket tools, cassette lockring tools, spoke keys, headset presses. Buy each one the first time the job comes up, because which one you need depends entirely on what your bicycle uses.
- Go deeper — Building a bicycle maintenance kit, in the order you will need it
- Work it out — Gear ratio calculator
- Work it out — Metric thread and tapping drill reference
- Gears skip under load but shift fine on the stand — Cable tension has dropped as a new outer bedded in, or the chain and cassette are worn to different shapes. Check by shifting under light pedalling pressure and watching whether it hesitates in one gear or all of them. One gear points at indexing — a quarter turn of the barrel adjuster at a time. All gears, with a chain past wear limit on a gauge, points at a drivetrain that needs replacing together.
- Brakes squeal but stop the bike — Usually glazed or contaminated pads, or a rim or rotor with a film on it. Check the pad surface for a shiny glaze and the rotor for fingerprints or oil. Degrease the rotor with a proper disc cleaner and deglaze or replace the pads. If the squeal came on immediately after any work involving lubricant, assume contamination and treat the pads as suspect.
- Brakes feel spongy or pull to the bar — On cables, a stretched inner or compressed outer. On hydraulics, air in the system. Check whether the lever firms up when pumped — if it does, it is air. Cables you can fix; a hydraulic bleed needs the right kit and the manufacturer's procedure. Do not ride a bike whose lever comes to the bar, and this is a stop-use condition rather than something to nurse home.
- Creaking that appears under pedalling load — Almost never the bottom bracket, despite the reputation. Check in this order: pedals, cleats, saddle rails, seatpost, then the bottom bracket. Creaks travel through the frame and the ear is a poor locator. Strip, clean and grease each interface in turn rather than replacing parts on suspicion.
- A wheel rubs the brake once per revolution — The wheel is out of true, or the axle is not seated square in the dropouts. Check by spinning and watching the gap. Reseat the wheel first — it is free and it is often the answer. If the wobble persists, that is spoke tension and a truing job.
- A new chain skips on an old cassette — The cassette wore to match the old stretched chain and the new one no longer sits in it. Check chain wear before replacing anything: a gauge costs a few pounds. The fix is a new cassette too, which is why replacing chains on time is the cheapest habit in the hobby.
- Go deeper — Getting home: fixing a bike at the roadside
Bicycle maintenance is a low-risk activity to perform. The risk is almost entirely deferred: a job done badly is discovered at speed, some distance away, and usually on a descent. Two systems account for nearly all of it.
- Quick-release skewers and thru-axles are the most commonly under-tightened parts on a bicycle, and a wheel coming out of the fork is the worst thing on this list. Check them by hand before every ride, not just after working on the bike.
- Degreasers and disc brake cleaners are solvents. Use them in ventilated space, keep them off your skin, and keep them well away from brake surfaces you are not cleaning.
- A chain under tension can take a fingertip off if the wheel turns while your hand is in the drivetrain. Turn the cranks deliberately, and never with your fingers between chain and chainring.
- Old bar tape, cables and pads accumulate metal filings and grit. Wash your hands before eating; brake pad dust in particular is not something to have on food.
There is no licensing, registration or inspection regime for bicycles in the UK, and no legal requirement to have your bicycle serviced by anybody. Maintaining your own is entirely a matter for you. The one place the law does reach a bicycle is lighting, and it is a duty on the person riding rather than on the person who built it.
Sources for this section
- Road Vehicles Lighting Regulations 1989, regulations 18 and 24 (opens in a new tab) — The National Archives (legislation.gov.uk) · Governing body · read — supports the claim
- Over-lubricating everything — A chain dripping with oil collects grit and becomes a grinding paste. One drop per roller, then wipe the outside dry. Oil belongs inside the rollers and nowhere else, and it certainly does not belong on a disc rotor.
- Buying parts before identifying standards — The single most common source of wasted money in the hobby. Bottom brackets, freehubs and axle widths have multiplied into genuine incompatibility, and "it is a road bike" is not enough information to order anything.
- Tightening by feel on carbon — Feel is calibrated on steel and aluminium, which yield gradually. Carbon does not — it holds, then crushes. This is the case where the torque figure is not a suggestion.
- Not diagnosing the puncture — Replacing the tube without finding what caused it means doing it again within a mile. Run a finger carefully round the inside of the tyre; the flint is almost always still there.
- Adjusting the derailleur limit screws to fix indexing — Limit screws set the two extremes of travel; the barrel adjuster sets the cable tension that everything in between depends on. Using one to fix the other produces a bicycle that shifts badly everywhere instead of badly in one place.
- Ignoring the chain until something else breaks — A chain is a consumable, it stretches measurably, and once it is worn it starts wearing the cassette and chainrings to match. Replacing a chain on time is cheap; replacing a drivetrain is not.
- Drivetrainalso: transmission
- Everything that transmits your effort to the wheel — chainrings, chain, cassette, derailleurs. Treated as a system because the parts wear each other.
- Indexing
- Adjusting cable tension so each click of the shifter moves the chain exactly one sprocket. The most common adjustment on a geared bicycle and the one that most improves the ride.
- Limit screws
- The two screws on a derailleur that set how far it can travel at each end, stopping the chain going into the spokes or off the smallest sprocket. Set once; not a tuning control.
- Truing
- Adjusting spoke tension so a wheel runs straight, both side to side and up and down. Dishing is the related job of centring the rim between the hub flanges.
- Bottom bracket
- The bearing assembly the cranks turn on. Notorious for having many mutually incompatible standards, and the usual reason a beginner orders the wrong part.
- Chain wearalso: chain stretch
- The elongation of a chain as its pins and rollers wear. Measured with a cheap gauge, and the number that tells you whether you are replacing a chain or a whole drivetrain.
- Bedding in
- Deliberately heating new brake pads and rotor together with repeated controlled stops so they mate. Skipping it leaves brakes feeling weak and is the usual reason new discs disappoint.
- Q-factor
- The distance between the outer faces of the crank arms. One of several fit measurements that matter to comfort and are invisible until they hurt.
Step 1: Keeping your own bicycle running
Punctures, chains, cables, gears, pads. Six months of occasional jobs gets most people here comfortably.
You will know it worked when: You stop booking services.
Step 2: Overhauls and bearings
Hubs, headsets and bottom brackets stripped, cleaned, regreased and reassembled. Slower, more satisfying, and where you start understanding how a bicycle is actually put together.
You will know it worked when: Nothing on the machine is a mystery any more.
Step 3: Wheel building
The traditional test of a bicycle mechanic, and still the job that separates the confident from the competent. Requires patience and a spoke key and very little else.
You will know it worked when: A wheel you built, under you, holding.
Step 4: Building a complete bicycle from parts
Frame up. Mostly a compatibility problem rather than a mechanical one, which is a good summary of modern bicycles generally.
You will know it worked when: A machine specified and assembled entirely by you.
Step 5: Restoration, or volunteering
Vintage restoration is a craft with its own following and its own parts problem. Community workshops and cycling charities need mechanics constantly, and it is one of the more directly useful ways to spend a skill.
You will know it worked when: A direction beyond your own garage.
The safety bicycle of the late 1880s — two equal wheels, chain drive to the rear, diamond frame — settled the basic layout so effectively that a modern bicycle is recognisably the same machine. Very few consumer objects have been that stable for that long, and it is the reason maintenance knowledge accumulates rather than being obsoleted every few years.
Home maintenance was simply normal for most of the twentieth century. Bicycles were transport, parts were standardised and widely available, and the local shop and the domestic toolbox handled the same jobs. What changed was not the bicycle so much as the market: from the 1980s onwards, component manufacturers competed through proprietary systems, and the resulting multiplication of standards is the single largest practical difference between maintaining a bicycle then and now.
The counterweight has been the internet, and it is a genuine one. Detailed repair documentation, manufacturer service instructions and video of every procedure are freely available, which has made deep maintenance accessible to amateurs in a way it was not when the knowledge lived in a shop. Community bike workshops and repair cafés, which spread widely in Britain from the 2000s, do the other half of the job by supplying the stands and tools that a flat with no garage cannot.
- What tools do I actually need to start?
- Less than you think. Allen keys, tyre levers, a patch kit, a pump with a pressure gauge, a chain tool and a chain wear checker will cover the great majority of routine jobs, and that is £40–£70 of equipment. Add cable cutters when you first replace a cable. The one purchase that changes the experience rather than enabling a job is a workstand, and it is worth it the moment you own more than one bicycle or find crouching difficult. Buy job-specific tools — bottom bracket, cassette, headset — the first time each job comes up, because which one you need depends on your particular bicycle.
- Is it cheaper to maintain my own bike?
- Substantially, and it pays back faster than almost any other craft. A basic service at a shop typically costs more than a starter tool kit, so the tools are paid for by the second or third job. The larger saving is preventive: a chain checker costing a few pounds tells you when to spend £25 on a chain rather than £150 on a chain, cassette and chainrings. The place home mechanics lose money is ordering parts that do not fit, which is a knowledge problem rather than a tool problem.
- Are there any jobs I should not do myself?
- Very few permanently, but some not first. Brakes are the system where a mistake has real consequences, and doing them the first time alongside somebody experienced — a friend, a community workshop — is worth arranging. Anything carbon needs a torque wrench and the manufacturer’s figures rather than judgement. Hydraulic brake bleeding, suspension internals and press-fit bottom brackets need specific tools and are the usual reasons to visit a shop. Frame damage, particularly on carbon, is an inspection job rather than a repair one.
- Do I legally need lights on my bike?
- In the dark, yes. The Road Vehicles Lighting Regulations require that lamps a vehicle must be fitted with are kept lit and unobscured during the hours of darkness, and separate provisions govern what must be fitted in the first place. There are specific exemptions for pedal cycles — one waiting to proceed at the near-side edge of the carriageway, or being pushed along the edge of the road, is treated differently from one being ridden. We deliberately do not reproduce the full specification here because it sits in a schedule we have not extracted, and reflectors in particular are the part people get wrong. Check the current regulations or government guidance for the detail.
- How often should I service my bike?
- By condition rather than by calendar, which is more useful and less commonly said. Check tyre pressure weekly and brake pads monthly, clean and lubricate the chain whenever it looks or sounds dry — more often in winter, where a wet gritty week does more damage than a dry month. Measure chain wear every few hundred miles with a gauge. Bearings get overhauled when they feel rough or notchy rather than on a schedule. A bicycle ridden daily through a British winter needs several times the attention of one ridden in summer.
Guides
Longer answers to questions this page can only summarise.
Within this activity
Disciplines, variants and techniques that sit inside it.
Disciplines
- Bicycle wheel building — Lacing and tensioning wheels by hand, which is the one bicycle skill that stays hard.
If you like this
Each of these is here for a stated reason, not because it is also a hobby.
Similar to
- Automotive detailing — Both are maintenance crafts on a machine you already own, where the technique matters far more than the products and the market is built on persuading you of the opposite.
- Machine knitting — An odd pairing that holds: both are hobbies where an orphaned mechanical object has to be kept alive by its owner, and where the maintenance skill is inseparable from the craft.
Goes well with
- Cycling — The obvious pairing, and the one that pays: maintaining your own bicycle is cheaper, and understanding the machine changes how you ride it and what you notice going wrong.
- Downhill mountain biking — Gravity riding eats consumables faster than any other cycling discipline, and a rider who can service their own brakes and suspension rides more days and spends less.
- Indoor cycling — A trainer eats drivetrains through sweat rather than through miles, which is a maintenance problem most riders meet for the first time indoors.
Shares equipment with
- Recumbent cycling — Ordinary bicycle components on an unusual frame, plus a chain three times the length and a pair of idlers to keep clean.
Progresses to
- Classic car restoration — The same diagnostic habit and the same tolerance for standards that do not match, at ten times the cost and with somewhere to put it. A bicycle is where a lot of mechanics found out they liked this.
Sources for this section
- Road Vehicles Lighting Regulations 1989, regulations 18 and 24 (opens in a new tab) — The National Archives (legislation.gov.uk) · Governing body · read — supports the claim
Substantial
Last reviewed 2026-08-15. Cost, time and difficulty figures on this page are HobbyHQ estimates — see how we work. Something here wrong or out of date? Tell us.