Ceramics & clay
Pottery
Pottery is the craft with the largest gap between how it looks and what it requires. The forming is the enjoyable part and perhaps a fifth of the process; the rest is drying, firing schedules, glaze chemistry and shrinkage, and it is the parts nobody photographs that decide whether your pot survives. It is also the craft where the health risks are real and specific.
Also known as ceramics, clay.
A pot goes through a fixed sequence and every stage can destroy it. You form the clay; you let it dry slowly and evenly to leather-hard, at which point it can be trimmed and handles can be attached; you let it dry completely to bone-dry, when it is extremely fragile; you bisque fire it, typically to around 1000°C, which drives out chemically bound water and makes it permanently ceramic but still porous; you glaze it; and you fire it again to maturity, anywhere from about 1050°C for low-fire earthenware to around 1300°C for stoneware and porcelain.
Clay shrinks throughout. Total shrinkage from wet to fired is commonly in the region of 10–15% depending on the clay body, which means a mug thrown at 100mm across comes out of the kiln at roughly 85–90mm. Anything that must be a specific finished size — a lid, a tile, a dish for a particular shelf — has to be made oversized by the right amount, and getting that wrong is one of the most common sources of frustration for people making functional ware.
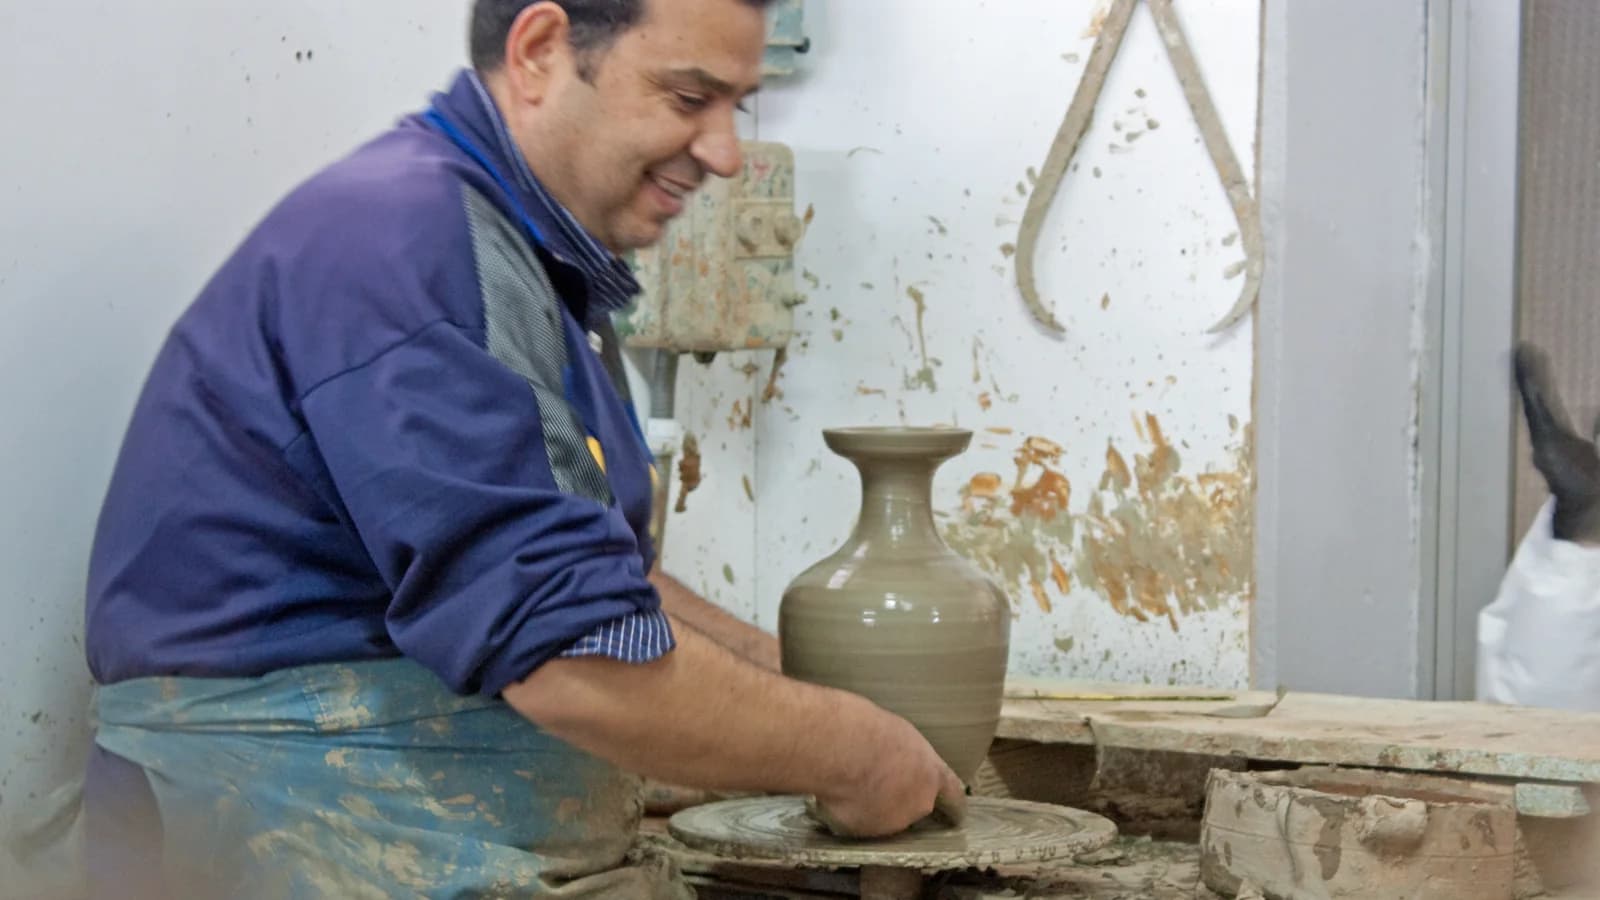
The two forming approaches are genuinely different crafts. Wheel throwing is fast, physically demanding and produces round symmetrical forms; it takes months to get reliable. Hand-building is slower, needs no equipment, and imposes no shape constraints at all.
Step 1: Take a studio course before buying anything
Not caution — economics. A course costs a fraction of the equipment and tells you whether you are a wheel person or a hand-builder, which determines everything you would otherwise buy wrong.
You will know it worked when: You know which craft you are actually taking up.
Step 2: Learn to centre before learning to throw
On the wheel, centring the clay is not step one of throwing, it is the whole foundation. Uncentred clay cannot be pulled into an even wall no matter what you do next, and every beginner’s wobbly pot is a centring failure rather than a pulling failure. Expect to spend several sessions on it.
You will know it worked when: The clay runs true and stops fighting you.
Step 3: Make the same form twenty times
Twenty cylinders teaches more than twenty different objects. Repetition is how ceramic skill is built, and it is what studio training is largely made of.
You will know it worked when: A consistent wall thickness, which is what everything else depends on.
Step 4: Understand your studio’s firing schedule
Which clay bodies, which cone, which glazes are compatible. Mixing a low-fire glaze with a stoneware body, or vice versa, is a common and expensive error.
You will know it worked when: Your work survives the kiln.
Step 5: Test your clay’s shrinkage once and write it down
Mark a 100mm line on a wet slab, fire it through both firings, measure it. That single number lets you size everything correctly from then on.
You will know it worked when: Lids that fit and tiles that are the size you meant.
Sources for this section
- Craft Potters Association (opens in a new tab) — Craft Potters Association of Great Britain · Specialist publisher · could not be reached
Almost every technique question in ceramics is really a question about water. Clay passes through a sequence of moisture states on its way from bag to kiln, each state allows a different set of operations, and each one is irreversible in one direction only. Beginners are usually taught the operations — throw, trim, join, glaze — without being told that the state is what makes each of them possible, which is why the answer to "why did this not work" is so often "you did it a day too late".
Learning the states first makes the rest of the craft legible. It also explains the studio habit that looks like superstition from outside: the plastic bag, the damp cloth, and the constant checking of whether something is ready yet.
| State | How it feels | What you can do | What you cannot |
|---|---|---|---|
| Plastic | Soft, bends without cracking, takes a fingerprint | Wedging, throwing, pinching, coiling, slabbing | Hold a shape unsupported, or take a clean cut |
| Soft leather-hard | Firm, cool, still darkens under a damp finger | Joining, handles, altering, carving, most decoration | Take fine detail without tearing |
| Leather-hard | Holds its shape absolutely, no longer sticky | Trimming a foot, burnishing, crisp carving, slip work | Join reliably — the window is closing |
| Bone dry | Pale, room temperature, brittle, dusty | Very light sanding, and firing | Join, alter or carve anything at all |
| Bisque | Hard, porous, sounds like a plant pot | Glazing, because it drinks water from the glaze | Change the form in any way |
The transitions run one way. Water can move clay back from leather-hard towards plastic in principle, but it does so unevenly, and unevenly wetted clay cracks — which is why rescuing a piece that has gone too far usually fails.
The rule that follows from the table is the one that prevents most beginner failures: join at leather-hard or softer, never later, and never across states. A handle at plastic softness attached to a leather-hard mug is two pieces of clay that will shrink by different amounts on different timetables, and the join will open. Match the states, score both faces, use slip, and press rather than smear.
The operations, and what each is actually doing:
- Wedging — Kneading the clay before you use it. Not to soften it — to make its water content uniform and to remove air pockets. Uneven water means uneven shrinkage and a warped or cracked result; trapped air produces a void that expands in the kiln. The two common patterns are ram’s head and spiral. Either is fine; doing neither is not.
- Centring — On the wheel, getting the clay running true about the axis before you open it. It is not step one of throwing so much as the foundation of it, and it is a matter of bracing your arms against your body and letting the wheel do the work rather than pushing with your hands. Almost every wobbly beginner pot is a centring failure wearing a pulling failure’s clothes.
- Opening and pulling — Opening presses a hole down the centre and out to the floor width; pulling raises the wall in several passes, each one thinning it a little and lifting it a lot. The unlearnable-by-reading part is pressure: too little does nothing, too much tears. Keep the wall wet, move slowly and upwards, and stop while it is still even rather than when it is as tall as you hoped.
- Hand-building — Pinching, coiling and slab work, in roughly that order of difficulty. It needs no wheel, no fixed studio time and very little equipment, and it makes forms a wheel cannot — anything not round. It is a complete route through the craft rather than a preparation for throwing, which is how it is often presented.
- Trimming — Cutting a foot ring and refining the profile at leather-hard, with the pot inverted on the wheel. This is where a thrown pot acquires its final proportions and where a heavy pot becomes a light one. Too soft and it smears; too dry and it chatters and chips.
- Drying — The step that is not a step, and the one that cracks work. Rims, handles and edges dry faster than bases and walls, and the differential is the stress. Slow it down and even it out: loosely covered, out of draughts and off a cold surface. Most cracks that appear in the kiln were made on the shelf.
- Glazing — Applied to bisque, which is porous and pulls the water out of the glaze, leaving the particles behind. Thickness is the variable that matters most and the hardest to judge, since raw glaze looks nothing like fired glaze. Wax or wipe the foot: glaze that touches the shelf fuses the pot to it.
What deliberately is not here is a firing schedule. Ramp rates, holds and cooling curves depend on the clay body, the glaze, the kiln and how densely it is packed, and a generic schedule published for a reader whose kiln we have never seen is the kind of advice that ruins a load at best. Use the schedule your studio or your clay supplier specifies for the body you are actually using — and see the safety section for the parts of firing that are a health matter rather than a craft one.
What matters, in the order it starts to matter:
- Clay body — The most consequential choice and the one beginners think least about. Earthenware fires low and stays porous unless glazed; stoneware fires high and is dense and durable; porcelain is fine, white, expensive and unforgiving. Grog — pre-fired ground clay mixed in — reduces shrinkage and cracking and makes a body far more tolerant for hand-building.
- A rib and a wire — A wooden or metal rib compresses and shapes; a cutting wire releases work from the wheel. Together they cost under £10 and do most of the work a beginner needs.
- A needle tool and a trimming tool — For levelling rims and turning a foot ring at leather-hard. Cheap, and the difference between a pot and a finished pot.
- The wheel — £300–£1,200. Motor torque matters more than top speed — a wheel that stalls under hand pressure cannot be centred on. Test one before buying, and consider that studio membership gives access to better wheels than most people buy.
- The kiln — £800–£2,500 plus, in most cases, a dedicated electrical circuit installed by a qualified electrician. This is the purchase that decides whether pottery happens at home or at a studio, and for the overwhelming majority of hobby potters the answer is the studio.
- Glazes — Bought ready-mixed or mixed from raw materials. Ready-mixed is far simpler and the sensible starting point; the firing range on the bucket must match your clay body and your kiln, and mismatching them is a common and expensive error.
- Go deeper — What to buy for pottery at home, and in what order
- Work it out — Clay shrinkage calculator
- Work it out — Hobby startup cost estimator
- S-crack in the base — A spiral crack in the bottom of a thrown pot. Caused by insufficient compression of the base during throwing, and by the base drying at a different rate from the walls. Compress the floor firmly with a rib before pulling walls.
- Cracks where a handle joins — The handle and the body were at different moisture levels when joined, so they shrank differently. Join at the same leather-hard state, score and slip both surfaces, and dry the assembly slowly under plastic.
- Explosion in the bisque firing — Trapped moisture or trapped air. Water turning to steam inside a wall destroys the piece and often others nearby. Ensure work is genuinely bone-dry and ramp the early part of the firing slowly.
- Dunting — cracks appearing during cooling — Cooling too quickly through the quartz inversion, or a mismatch between glaze and body. Slow the cooling.
- Crazing — a fine network of cracks in the glaze — The glaze is under tension because it shrank more than the body on cooling. Sometimes decorative, but on functional ware it lets liquid into the body and is best avoided by matching glaze to clay body.
- Shivering — glaze flaking off edges — The opposite mismatch, and more serious: flakes are sharp and can end up in food. Do not use shivered ware.
- Pinholing and crawling — Usually a dusty or oily bisque surface, or glaze applied too thickly. Wipe bisque ware with a damp sponge before glazing.
- Warping — Uneven drying, uneven wall thickness, or a form fired too close to its softening point. Dry slowly and evenly, under plastic, turning work as it goes.
Step 1: Handbuilding first
Pinch, coil and slab. These teach how clay behaves — drying rates, joins, thickness — without the wheel adding a second problem.
You will know it worked when: Pieces survive drying and firing without cracking at the joins.
Step 2: Centring
The wall everybody meets. It is a continuously modulated force judged by feel, which is why this site does not attempt to teach it in text and why studio time is not optional here.
You will know it worked when: Clay stops fighting you within the first minute.
Step 3: Pulling walls and throwing repeats
Height, even thickness, and then the same form six times. Repetition is the actual curriculum and it is what separates a potter from somebody who has thrown a pot.
You will know it worked when: Six bowls that look like a set.
Step 4: The plateau
Trimming and glazing, not throwing. Most people can make a decent form long before they can finish one well, and glaze is where the disappointments cluster.
Step 5: Where it branches
Wheel versus handbuilding as a primary practice, glaze chemistry, kiln firing, or sculpture. Glaze chemistry is a hobby inside the hobby with its own literature.
Step 6: When instruction helps
At centring, and again at glaze. Both are feel-and-chemistry problems that text serves badly.
Kilns:
- Ventilation — Firing releases fumes including sulphur compounds and, from some glazes, metal vapours. A kiln needs a dedicated extraction system or a well-ventilated space that is not a living area.
- Heat and clearance — External surfaces reach high temperatures and manufacturers specify minimum clearances from walls and combustibles. These are not conservative estimates.
- Electrical supply — Most kilns above the smallest test sizes need a dedicated circuit installed by a qualified electrician. This is a substantial part of the true cost of a home kiln.
- Never open a hot kiln — Thermal shock destroys the work and the elements, and the radiant heat can burn at a distance.
- Not wedging properly — Air pockets left in the clay explode in the kiln, and uneven moisture makes centring almost impossible. It is the least interesting part of the process and skipping it ruins the most work.
- Walls too thick, or too thin in one place — Thick walls dry unevenly and crack; a wall that is thin in one band and thick in another warps. Consistency matters more than thinness.
- Drying too fast — A radiator, a sunny windowsill or a draught will crack work that would have survived a slow week under loose plastic. Almost every mysterious crack traces back to this.
- Adding water constantly on the wheel — Over-wetted clay slumps and loses structure. Use enough to keep the surface slipping and no more, and stop to sponge out standing water inside the form.
- Glazing over dust — Bisque ware picks up dust and finger oils on the shelf. Wipe with a damp sponge before glazing, or expect crawling and pinholes.
- Glazing the foot — Glaze melts. Anything on the foot fuses the pot to the kiln shelf, and separating them destroys one or both. Leave a clear margin and wipe it.
- Dry sweeping the studio — Not a craft mistake but a health one, and the most important item on this list. See the safety section.
- Wheel throwing — Centring and pulling a form on a rotating wheel. The image the whole craft is known by, the hardest to begin, and the one that genuinely needs a person standing next to you — which this page says plainly rather than pretending otherwise.
- Hand-building — Pinch, coil and slab. Older than the wheel, needs almost no equipment, and makes forms the wheel cannot. The branch a beginner can genuinely start at a kitchen table, and badly underrated because it is taught as what you do before the wheel.
- Slipcasting — Liquid clay poured into plaster moulds. The route to repeatable identical pieces, and the one that overlaps with mould making rather than with throwing — a different set of skills wearing the same word.
- Sculptural and figurative work — Clay as a sculptural material rather than a vessel one, with hollowing and drying problems that functional potters never meet. Its own progression and its own firing headaches.
- Tableware and functional work — Where most potters end up: things meant to be used, which brings food safety, glaze fit and dishwasher survival into the work as constraints rather than afterthoughts.
- Atmospheric and alternative firing — Raku, pit, saggar, wood and salt firing, where the kiln atmosphere makes the surface rather than the glaze recipe. Usually a group activity at a shared kiln, and a common reason people join a club.
- Air-dry and polymer clay — Neither is pottery and both are constantly searched for as though they were. Included so the distinction is available: nothing is fired, nothing is waterproof, and the reason to choose them is that no kiln is involved.
- Still deciding — Fired pottery vs air-dry clay
- Greenware
- Unfired clay work, at any stage of dryness.
- Leather-hard
- Clay dried enough to hold its shape firmly but still cool and damp enough to trim and join. The working state for handles, feet and carving.
- Bone-dry
- Completely air-dried and ready to fire. Extremely fragile and the state in which most breakages happen.
- Bisquealso: biscuit
- The first firing, which makes clay permanently ceramic but leaves it porous so it will absorb glaze.
- Glaze firing
- The second firing, which melts the glaze into a glassy surface and brings the body to its final density.
- Slip
- Clay mixed with water to a liquid, used for joining, decorating and casting.
- Grog
- Pre-fired ground clay added to a clay body to reduce shrinkage and cracking. Coarse-grogged bodies are much more forgiving for hand-building.
- Cone
- A pyrometric cone — a shaped ceramic that bends at a known combination of heat and time, used to verify that a firing actually reached maturity rather than merely reaching a temperature.
- Wedging
- Kneading clay to remove air pockets and make its moisture and structure even. Skipping it causes explosions and uneven throwing.
- Throwing
- Forming on the wheel. From an Old English sense of "to twist or turn", not from throwing anything.
Shared studio, shared shelf, shared kiln
Almost nobody starts pottery at home, which means almost everybody starts it in somebody else’s space — and a shared studio has more conventions than any other making environment in this catalogue.
A pottery studio is a shared workshop where everybody’s work is fragile, slow, and physically in everybody else’s way for weeks. That produces a culture built almost entirely around not costing other people their pieces — and, underneath it, around a genuine health hazard that a careless member creates for everyone breathing the same air.
- Wet cleaning, always, and it is not fussiness — Never sweep a studio floor dry and never dry-brush a table. Fired and unfired clay dust carries respirable crystalline silica, and the person who raises it is not only dosing themselves. Sponge, mop, wipe down. In a shared studio this is the convention that members police hardest, and correctly.
- Clean the wheel and the bat, then clean the sink trap conversation — You leave a wheel as you would want to find it, and you do not tip slurry down a domestic drain — studios run settling traps for exactly that reason and somebody has to empty them. Learning where the trap is on your first evening is a good sign.
- Reclaim is communal and mixing clay bodies ruins it — Most studios keep a reclaim bucket for scraps. Putting a different clay body into it — a stoneware trimming into a porcelain bucket, anything with grog into a smooth body — spoils the batch for everybody. Ask which bucket before you throw anything in.
- Label everything, and label it before you forget — A shelf of unlabelled greenware is a studio’s standing argument. Initials on the base, in the leather-hard stage, every time.
- The kiln is a queue and somebody else runs it — Firings happen when the kiln is full, which means your bowl waits for other people’s work and other people’s work waits for yours. Nobody loads their own pieces into a communal kiln without being asked to. And the pot that explodes because it was not dry ruins its neighbours, which is why the technician is strict about it and why nobody argues.
- Glaze buckets are stirred, tested and not decanted — Studio glazes are a shared resource with a known result on a known clay body. Stir before dipping, do not tip other things into the bucket, and check the test tiles rather than the colour of the liquid — the bucket almost never looks like the fired result.
The social shape of the craft follows from the same constraint. Because the equipment is expensive and the kiln is communal, pottery is unusually club-like for a craft: evening classes that people stay in for years, studios with a members’ shelf and a waiting list, open studio days, and a strong tradition of the more experienced member simply taking over your wheel for ninety seconds to show you the hand position. It is also a craft where failure is public — your cracked pot comes out of a kiln in front of everybody — and the answer to that has become its own convention: people show each other the disasters first.
Sources for this section
- Construction dust: sweeping and cleaning (opens in a new tab) — Health and Safety Executive · Governing body · read — supports the claim
- COSHH essentials in ceramics: Silica (CR series) (opens in a new tab) — Health and Safety Executive · Governing body · read — supports the claim
Fired ceramics predate agriculture and metalworking, and are among the most useful materials archaeology has: pottery is durable, breaks often, and changes style rapidly, which makes potsherds an unusually precise dating tool. The potter’s wheel appears in the ancient Near East and transforms production from an occasional activity to a specialised trade.
In Britain, the industry concentrated around Stoke-on-Trent from the eighteenth century, where local clay, coal and canal transport combined. Josiah Wedgwood’s contribution is often described in terms of taste; the more consequential part was systematic: standardised bodies, controlled firing, division of labour, and the pyrometer as a means of knowing what a kiln was actually doing rather than guessing.
The studio pottery movement of the twentieth century was a deliberate reaction to that industrialisation. Bernard Leach, working at St Ives from 1920 after training in Japan, and Shoji Hamada with him, established an approach that treated the individual potter’s judgement, the character of local materials and the influence of East Asian traditions as the point rather than as inefficiency. Most hobby pottery in Britain today descends from that tradition rather than from the industrial one.
Sources for this section
- Craft Potters Association (opens in a new tab) — Craft Potters Association of Great Britain · Specialist publisher · could not be reached
- Can I do pottery at home without a kiln?
- You can form clay at home, but without firing you do not have ceramics. Air-dry clay makes decorative objects that are not waterproof, not food safe and not durable — they soften if they get wet. The usual arrangement is to make at home and pay a studio to fire, which many studios offer, or to work at a studio entirely.
- How long does it take to learn to throw?
- Centring reliably takes most people several sessions. Producing a recognisable, even cylinder takes a few weeks of regular practice. Producing the same form repeatedly to a consistent size takes months, and that consistency — not any individual pot — is what studio potters mean by competence.
- Why did my pot come out smaller than I made it?
- Clay shrinks as it dries and again as it fires — commonly 10–15% in total, depending on the clay body. To make a finished item at a specific size you must build it that much larger. Fire a marked test bar in your own clay and your own kiln to find your actual figure, because it varies between bodies and firing temperatures.
- Is pottery dangerous?
- The risks are specific rather than general. Silica dust from dry clay causes irreversible lung disease and is managed by wet cleaning and never dry sweeping. Glaze materials are chemicals to be handled according to their safety data sheets, and a glaze that is not properly formulated or fired can leach into food. Kilns are very hot and need ventilation and correct electrical installation. All of these are manageable, and studios manage them routinely — but they are not theoretical.
- Wheel or hand-building?
- Try both, and do not assume the wheel is the real version. Hand-building has no equipment barrier, can be done at a table, imposes no symmetry, and produces a great deal of the most interesting contemporary ceramics. The wheel is faster for round functional forms and is physically demanding. Many potters do both and use each for what it is good at.
Within this activity
Disciplines, variants and techniques that sit inside it.
Disciplines
- Wheel throwing — Forming pots on a spinning potter’s wheel — the hardest and most addictive part of ceramics.
- Hand-building — Making pottery with pinch, coil and slab techniques, no wheel required.
- Kiln building — Building a wood, gas or raku kiln, which is a refractory and combustion problem.
Variants
- Raku firing — Pulling red-hot pots from the kiln into combustible material for dramatic crackled glazes.
Techniques
- Slip casting — Pouring liquid clay into plaster moulds to reproduce a form repeatedly.
- Ceramic transfer printing — Applying printed decals to glazed ware and refiring, which brings graphics into pottery.
If you like this
Each of these is here for a stated reason, not because it is also a hobby.
Similar to
- Natural dyeing — Both are chemistry disguised as craft, both are worked to percentages, and in both the result appears hours after the decisions that determined it.
- Clay sculpture — The same material worked for form rather than function, and often the direction hand-builders drift towards.
Indoor alternative
- Miniature painting — For someone who wants to make small objects at a table without a studio, a kiln, or the dust.
- Polymer clay — Hardens in a domestic oven, makes no dust, needs no studio, and suits small work — the practical option when a kiln is out of reach.
Easier way in
- Hand-building — No wheel, no centring, no upper body strength requirement, and no shape constraint — a genuine route into ceramics rather than a compromise.
Cheaper alternative
- Air-dry clay modelling — All the forming and none of the kiln, for under £20 — at the cost of an object that is not waterproof, food safe or durable.
Sources for this section
- Craft Potters Association (opens in a new tab) — Craft Potters Association of Great Britain · Specialist publisher · could not be reached
- Control of exposure to silica dust (INDG463) (opens in a new tab) — Health and Safety Executive · Governing body · read — supports the claim
- Construction dust: sweeping and cleaning (opens in a new tab) — Health and Safety Executive · Governing body · read — supports the claim
- COSHH essentials in ceramics: Silica (CR series) (opens in a new tab) — Health and Safety Executive · Governing body · read — supports the claim
- COSHH: Control of Substances Hazardous to Health (opens in a new tab) — Health and Safety Executive · Governing body · read — partly supports
Comprehensive
Last reviewed 2026-08-13. Cost, time and difficulty figures on this page are HobbyHQ estimates — see how we work. Something here wrong or out of date? Tell us.