Learning & intellectual · Nature & wildlife · Outdoor & adventure
Astronomy
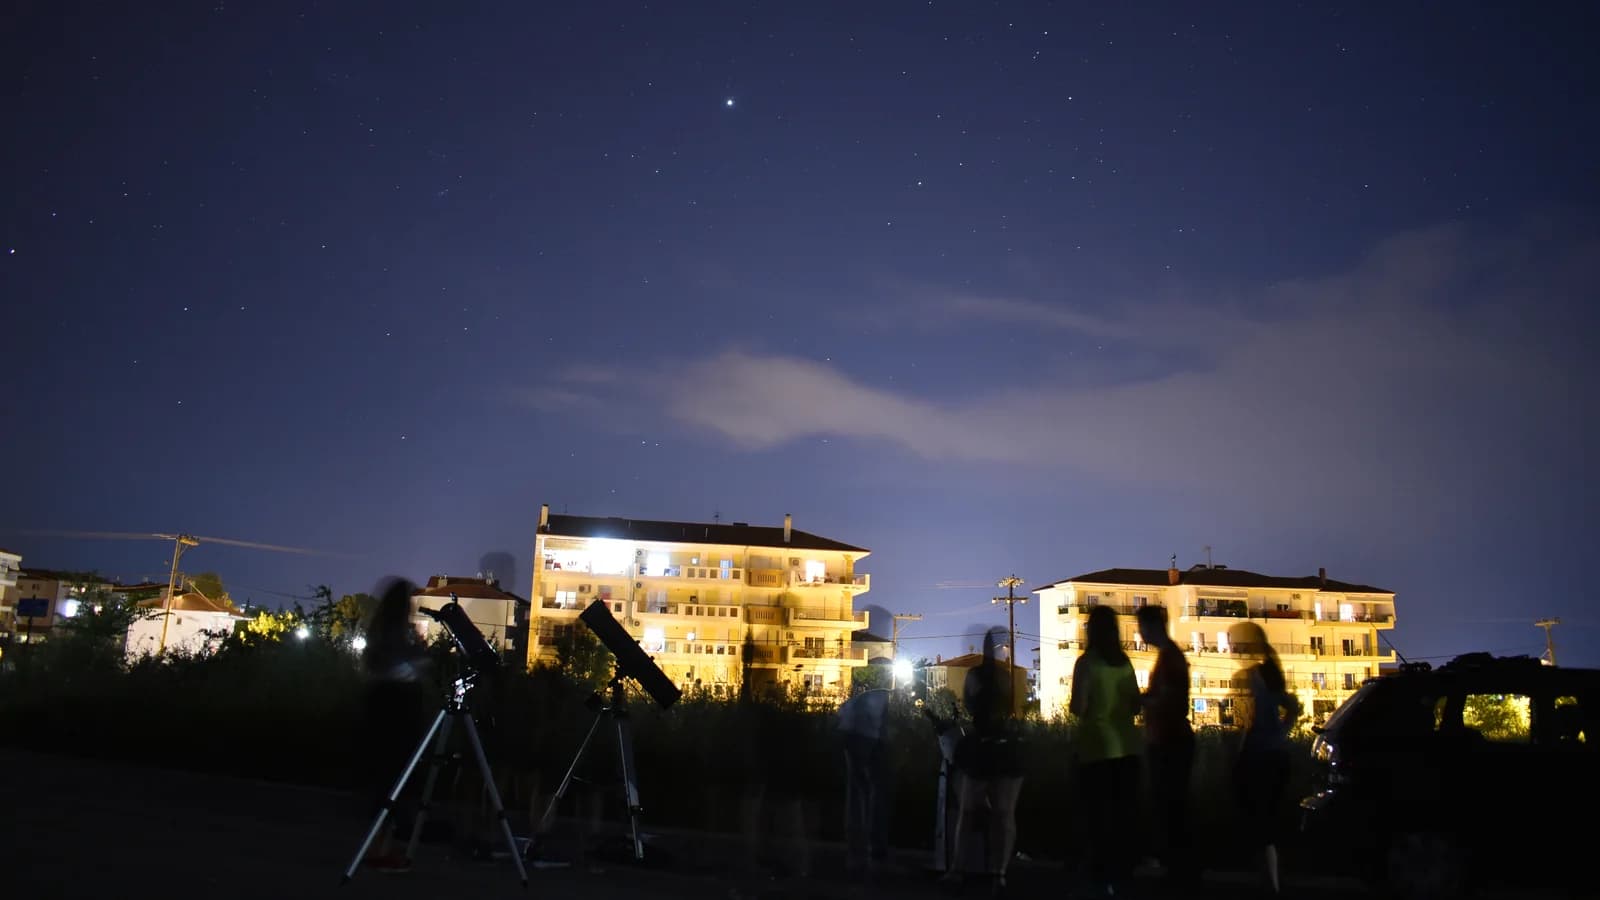
Amateur astronomy has an unusually bad on-ramp: the standard first purchase — a cheap department-store telescope — is the single most reliable way to kill the hobby before it starts. The order that works is the opposite of what people expect, and it begins with no equipment at all.
Also known as stargazing, amateur astronomy.
Amateur astronomy divides into observing what is bright and observing what is faint, and the two have almost opposite requirements. The Moon and planets are brilliant, small, and best served by magnification and steady air; galaxies and nebulae are large, extremely dim, and best served by aperture and dark skies. A great deal of beginner disappointment comes from buying equipment for one and expecting the other.
There is also a third mode that costs nothing: learning the sky itself. Knowing where the constellations are, when they rise, how the Moon’s phase and position change through a month, and where the planets currently sit is genuinely satisfying, and it is the foundation everything else stands on. Without it, a telescope is a device for pointing at nothing in particular.
- Free to start
- Yes — the sky is the equipment
- Weather dependence
- The highest of any hobby hereIn British winters, expect to lose most planned nights.
- Best beginner purchase
- 10×50 binoculars
- Worst beginner purchase
- A sub-£150 telescope with a 600× claim on the box
Explore astronomy
Almost everything in astronomy depends on two things a beginner cannot control: what is above you tonight, and how dark it is where you are standing. The pages here start from those rather than from equipment.
Telescopes and binoculars
What the kit does, and how the pieces work together.
Starting out
The first session, the first purchase, and what not to buy yet.
Optics calculators
All 4The arithmetic, done for you, with the working shown.
““The box says 675× magnification. What will this telescope actually show me, and which eyepiece should I use for what?””
Telescope & eyepiece calculator
““What is this actually going to cost me in the first year, including the things nobody mentions?””
Hobby startup cost estimator
““Will the Andromeda Galaxy fit in my frame with this telescope, and are my camera’s pixels the right size for it?””
Field of view and image scale calculator
““These two pairs are the same price. Which is better for what I do?””
Binocular specification comparison
Amateur astronomy has an unusually flat entry and an unusually long ceiling. The first year is mostly learning where things are and what your equipment can honestly show you, and almost nobody needs to spend more money in it. What changes afterwards is not aperture so much as what you are trying to do with the sky.
The routes below diverge rather than stack. Very few people do all of them, and choosing one early saves a great deal of money.
- Learn the sky before buying anything else — The first genuine step is being able to find things without an app pointing at them — a dozen constellations, the ecliptic, and how the whole sky rotates through a night and a year. This costs nothing, is the skill every later route depends on, and is the thing that most often gets skipped in favour of equipment.
- From naked eye to binoculars to a mount — The unglamorous progression, and the one that produces the most observing hours. A pair of binoculars on a tripod shows more than a small telescope waved about, and a stable mount improves a modest instrument more than a larger instrument on a poor mount improves anything.
- Observing programmes rather than a shopping list — Working through a structured list — the Messier objects, double stars, lunar features, the planets across an apparition — gives a season a shape and teaches the sky far faster than random looking. Several astronomical societies publish certificate programmes for exactly this, and finishing one is a real achievement rather than a participation award.
- The step to imaging, and why it is a different hobby — Astrophotography shares a sky and almost nothing else: it is dominated by tracking accuracy, calibration and processing rather than by looking, and it is expensive in a way visual observing is not. This site treats it as a separate subject for that reason, and the honest advice is to be sure you want it before buying a mount for it.
- Going darker rather than bigger — For deep-sky observing the darkness of the site changes more than aperture does, and a modest instrument under a genuinely dark sky beats a large one in a town. Dark-sky places and star parties are the cheapest upgrade available, and they are also where most people learn fastest, because everybody there is willing to show you what they are looking at.
- Specialising: the Moon, the planets, the Sun, or the deep sky — These want different instruments and different conditions, and trying to do all four with one setup is how people end up disappointed with a perfectly good telescope. Solar observing in particular needs purpose-made equipment and is the one branch where getting it wrong causes permanent injury — the safety section on this page is unambiguous about it.
- Contributing observations — The rare hobby where an amateur can still produce data professionals use. Variable star estimates, occultation timings, meteor counts and comet monitoring are all coordinated by long-established organisations, and the entry requirement is consistency rather than equipment.
- Joining a society, and eventually running the outreach — Local astronomical societies are the standard route to trying equipment before buying it, and the observing sessions are where the sky gets learnt. A good proportion of experienced amateurs end up doing public outreach, which is its own skill and is what most people remember about their first look through a telescope.
Getting started
The order matters more here than in any other hobby on this site.
Step 1: Learn six constellations with no equipment at all
From Britain: Ursa Major, Cassiopeia, Orion, Cygnus, Leo, and the Summer Triangle asterism. Use these to find everything else — the pointer stars of the Plough to Polaris, Orion’s belt to Sirius and Aldebaran. A free planetarium app will show you what is up tonight.
You will know it worked when: You can orient yourself in the sky in ten seconds.
Step 2: Watch the Moon for a month
It is the one object that is spectacular in anything, changes visibly every night, and is not spoiled by light pollution. The terminator — the line between light and dark — is where the shadows are longest and the craters look three-dimensional. A full Moon is the worst time to look at it.
You will know it worked when: You understand phases from observation rather than diagram, and you have seen real lunar detail.
Step 3: Buy binoculars, not a telescope
10×50 or 8×42. They show the Galilean moons of Jupiter, the Pleiades properly, the Andromeda Galaxy, the Orion Nebula, comets, and lunar detail — and unlike a telescope they are usable in three seconds from a doorstep, which is why they get used.
You will know it worked when: You observe on marginal nights instead of not bothering.
Step 4: Join a local astronomical society
The most efficient thing in the hobby. You will look through several telescopes before buying one, which is worth more than any amount of reading, and someone will show you how to find things.
You will know it worked when: You buy the right telescope, once.
Step 5: Then, if you still want one, buy a Dobsonian
A 6 or 8-inch Dobsonian is a large mirror on a simple wooden mount that just points. No electronics to fail, no polar alignment, the most aperture per pound available. It is the standard recommendation because it is right.
You will know it worked when: Galaxies, globular clusters and planetary detail, on a mount that does not wobble.
Sources for this section
- Astronomy guides (opens in a new tab) — Royal Museums Greenwich · Institutional · corroborated indirectly
- British Astronomical Association (opens in a new tab) — British Astronomical Association · Specialist publisher · corroborated indirectly
Telescope marketing focuses on magnification, which is the least important specification and the one most easily faked. What actually determines what you can see is aperture — the diameter of the main lens or mirror — because that is what collects light and sets the maximum useful resolution.
The relationships that matter, all of which HobbyHQ’s telescope calculator works through:
- Magnification
- telescope focal length ÷ eyepiece focal lengthA 1200mm telescope with a 25mm eyepiece gives 48×.
- Maximum useful magnification
- roughly 2× the aperture in mmBeyond this you enlarge the blur, not the detail. British atmospheric conditions often cap it far lower — around 150–200× on a typical night.
- Exit pupil
- aperture ÷ magnificationLarger than about 7mm and you are wasting light outside your own pupil; below about 0.5mm the image goes dim and grainy.
- True field of view
- eyepiece apparent field ÷ magnificationHow much sky you see. Low power and wide field is how you find things.
- Focal ratio (f/number)
- focal length ÷ apertureFast (low f/) telescopes give wider fields and are more demanding of eyepiece quality; slow ones suit planets.
The three telescope types:
- Refractor — A lens at the front. Sharp, low maintenance, good on the Moon and planets. Large apertures become very expensive very quickly.
- Reflector (Newtonian, including Dobsonians) — A mirror at the back. By far the most aperture per pound, and therefore the best value for faint objects. Needs occasional collimation — aligning the mirrors — which sounds harder than it is.
- Catadioptric (SCT, Maksutov) — Mirrors and a corrector lens, folding a long focal length into a short tube. Compact and portable, good on planets, more expensive per inch of aperture.
Sources for this section
- British Astronomical Association (opens in a new tab) — British Astronomical Association · Specialist publisher · corroborated indirectly
Ordinary night-time precautions:
- Cold — Standing still outdoors for two hours in winter is much colder than walking. Dress for considerably worse than the thermometer suggests, and cover your head and feet.
- Trip hazards — Tripod legs, cables and steps are invisible when dark-adapted. Set up in daylight where possible and know your site.
- Remote sites — Dark-sky sites are dark because nobody is there. Tell someone where you are, and consider going with the local society rather than alone.
- Aperture
- The diameter of the main lens or mirror. The single specification that determines how much a telescope can show.
- Magnitude
- Brightness on a reversed logarithmic scale — lower is brighter, and a difference of 5 magnitudes is a factor of 100 in brightness. The naked-eye limit under dark skies is around magnitude 6.
- Seeing
- The steadiness of the atmosphere. Poor seeing makes stars boil and caps useful magnification, independently of how clear the sky is.
- Transparency
- How much light the atmosphere absorbs. Good transparency helps faint objects; it is a different thing from seeing, and the best nights for one are often the worst for the other.
- Collimation
- Aligning a reflector’s mirrors so the optical path is true. Required occasionally on Newtonians.
- Averted vision
- Looking slightly to one side of a faint object so its light falls on the more light-sensitive part of the retina. It genuinely reveals detail that direct vision does not.
- Bortle scale
- A nine-point classification of night sky darkness, from 1 (an excellent dark site) to 9 (an inner-city sky).
- Messier object
- One of 110 deep-sky objects catalogued by Charles Messier in the eighteenth century — the standard beginner’s observing list.
- Goto
- A motorised mount that points itself at a chosen object once aligned.
- Terminator
- The line dividing lit and unlit lunar surface, where shadows are longest and detail is best.
- Buying a telescope advertised by magnification — "675× POWER" on a box is a reliable indicator of a telescope that cannot usefully exceed about 100×. Aperture and mount quality are what to read.
- Underestimating the mount — A good telescope on a bad mount is a bad telescope. If the image shakes for four seconds every time you touch the focuser, you will not use it. Half the budget going to the mount is a normal ratio.
- Expecting Hubble colours — The eye’s colour receptors do not work at low light levels, so nebulae and galaxies appear grey. They are still remarkable — but a first look at the Andromeda Galaxy is a faint elongated smudge, and knowing that in advance is the difference between wonder and disappointment.
- Not letting the telescope cool — A warm mirror sits in a column of its own rising air, which ruins the image. Twenty to forty minutes outside before observing makes a visible difference, particularly on planets.
- Destroying your dark adaptation — Full dark adaptation takes 20–30 minutes and one glance at a white phone screen resets it. Use a red light, and set the phone to its dimmest red-shifted mode.
- Observing a full Moon and concluding the Moon is boring — At full Moon the Sun is directly behind you and nothing casts a shadow, so the surface looks flat. Observe near first or last quarter and it is a different object entirely.
Astronomy divides by what you look at, and the branches ask for genuinely different equipment and different conditions. The most common beginner mistake is buying a telescope before knowing which branch appeals, because a good instrument for one is frequently a poor one for another.
- Naked-eye and binocular astronomy — Constellations, meteor showers, bright comets, aurorae and the Moon. Costs nothing or almost nothing, works from a garden, and is the branch that teaches the sky itself — which every other branch depends on.
- Lunar and planetary — High magnification on bright objects. Tolerates light pollution well, which makes it the best branch for town observers, and rewards patience because atmospheric steadiness matters more than aperture.
- Deep sky — Galaxies, nebulae and star clusters. Wants aperture and dark skies, and is the branch most damaged by light pollution. Also the one where learning to star hop pays off most.
- Solar — The Sun, in white light or hydrogen-alpha, with dedicated filters or a purpose-built instrument. A daytime hobby, which suits a lot of people, and the one branch with an absolute equipment requirement rather than a preference.
- Variable stars and occultations — Systematic brightness estimates and precisely timed events. Modest equipment, real scientific value, and one of the few remaining fields where amateur observations are routinely used by professionals.
- Astrophotography — Imaging rather than observing, and effectively a separate hobby with its own equipment priorities — mount before optics, and processing as a major skill. Published here as its own subject.
- Radio astronomy — Detecting rather than seeing: meteor scatter, the hydrogen line, solar bursts. Works in daylight and cloud, which in Britain is a serious advantage.
The equipment consequence is worth stating plainly. A long-focal-length instrument suits planets and disappoints on faint extended objects; a fast wide instrument does the reverse; and a photographic setup prioritises the mount over everything, which visual observers often find surprising. Deciding the branch first is the cheapest decision in the hobby.
Red light, and the etiquette of a dark field
A solitary hobby with an unusually generous social side, whose etiquette almost all protects one fragile thing: everybody else’s night vision.
Full dark adaptation takes something like twenty to thirty minutes, and one white torch destroys it for everybody facing you. That single physiological fact generates most of the conventions at an observing session, and it is why a group of astronomers in a field at midnight behaves in a way that looks, from outside, faintly ceremonial.
- Red light only, and dimmer than you think — Red torch, red head-torch, red screen filter, phone on its lowest brightness and in your pocket. Arriving with headlights sweeping across the field is the classic newcomer mistake; the answer is to arrive before dark, or to park facing out and kill the lights before you turn in.
- Set up in daylight if you possibly can — Not etiquette exactly, but everybody will assume you know it. Assembling a mount in the dark means a torch, and a torch means an apology.
- Never walk in front of a camera — A visual observer loses a glance; an imager loses a two-hour exposure. Astrophotographers and visual observers want incompatible things from the same field — one wants absolute stillness and darkness for hours, the other wants to move between eyepieces and talk — which is why larger star parties separate them into different areas. If nobody has, ask where the imagers are and go round.
- Ask before touching a telescope, and expect to be offered a look — Mounts are aligned and easily knocked off. But the ordinary state of an observing session is people calling other people over to see something, and the generosity is real: a stranger with a large Dobsonian will find you the Ring Nebula and then ask what you have got. It is among the least competitive hobbies there is, for the simple reason that nobody owns the sky.
- Say what you can actually see — The most useful convention in the hobby and the one that takes longest to learn. Deep-sky objects are faint smudges and it is tempting to claim more than you saw. Experienced observers describe honestly — "averted vision only", "suspected, not confirmed" — and that habit is the entire reason amateur observations are worth anything.
The organised side is societies rather than clubs. Most towns have one; they meet monthly with a lecture and run observing evenings, and the national associations coordinate observing sections where amateurs submit real data — variable star estimates, meteor counts, occultation timings. Astronomy is one of the very few sciences in which somebody with a modest instrument and careful habits produces measurements professionals actually use, and the observing sections are the mechanism by which that happens rather than an idea about how it might.
Sources for this section
- British Astronomical Association (opens in a new tab) — British Astronomical Association · Specialist publisher · corroborated indirectly
Astronomy is the oldest of the sciences and one of very few in which amateurs still make original contributions. The telescope reached astronomy in 1609, and within a year Galileo had published observations of lunar mountains, four moons orbiting Jupiter, and the phases of Venus — three results that were individually awkward for the geocentric model and collectively fatal to it.
The amateur tradition in Britain runs deep. William Herschel was a working musician who ground his own mirrors and discovered Uranus in 1781 from a garden in Bath. Charles Messier catalogued his famous 110 objects specifically as things that were not comets, so that comet hunters would stop being fooled by them — a list compiled as a nuisance filter that became the standard beginner’s tour of the sky.
Amateurs still discover comets, supernovae and variable star behaviour, and organised amateur networks contribute genuine data on occultations, meteors and planetary weather. The British Astronomical Association has coordinated that work since 1890.
Sources for this section
- Astronomy guides (opens in a new tab) — Royal Museums Greenwich · Institutional · corroborated indirectly
- British Astronomical Association (opens in a new tab) — British Astronomical Association · Specialist publisher · corroborated indirectly
- Stars look like fuzzy blobs at every magnification — Focus, collimation or the atmosphere. Check focus on a bright star first, then whether the telescope has cooled to outside temperature — a warm tube produces exactly this. Collimation is the third check, not the first.
- You cannot find the object at all — Usually finder alignment rather than the chart. Check that the finder and the main tube point at the same thing by aligning on a distant object in daylight. Then start from a bright star and work across.
- Everything shakes — The mount, not the telescope. Check whether the tripod legs are fully extended and on soft ground — a good telescope on a poor mount is unusable, and this is where beginner sets most often disappoint.
- The view is dim and washed out — Light pollution, moonlight, or over-magnification. Check the magnification first: more is usually worse, and low power on a dark night beats high power on any night.
- Everything drifts out of view quickly — That is the Earth turning and it is normal. Check whether the drift rate matches magnification — the higher the power, the faster it leaves. A tracking mount solves it; nothing else does.
- What telescope should I buy first?
- For most people, none — buy 10×50 binoculars and learn the sky first. If you are certain you want a telescope, a 6 or 8-inch Dobsonian at £250–£400 is the standard recommendation, because it puts the whole budget into aperture and a mount that does not wobble, and has nothing to go wrong. Avoid anything under about £150, and avoid anything whose box advertises magnification.
- Can I do astronomy from a city?
- Partly. Light pollution destroys faint deep-sky objects but has almost no effect on the Moon, the planets, double stars or bright star clusters — all of which are excellent from a city garden. For galaxies and nebulae you will need to travel to darker skies, or use a light-pollution filter, which helps with emission nebulae and does essentially nothing for galaxies.
- Why does everything look grey?
- Because the eye’s colour-sensitive cone cells need more light than deep-sky objects provide, so you see with rod cells, which are monochrome. The colours in published images come from long exposures. Bright stars do show colour, and so do the planets — Mars is distinctly orange and Jupiter’s belts are visibly brown in a modest telescope.
- How much difference does a dark sky make?
- An enormous one, and more than any equipment upgrade. Moving from an urban sky to a genuinely dark one is worth several inches of aperture for faint objects. This is why an 8-inch telescope taken to a dark site outperforms a 16-inch one in a town.
- Do I need a goto mount?
- No, and starting without one teaches you the sky in a way goto never will. Goto is genuinely useful once you know your way around and want to spend the clear hour observing rather than searching — particularly for faint objects that are hard to star-hop to. It is a convenience, not a capability.
- What is the best time of year?
- Autumn and winter in Britain, for the straightforward reason that the nights are long and genuinely dark. In June, astronomical darkness does not occur at all across much of the country. The trade-off is that winter is when the weather is worst, which is why the hobby rewards being ready to go out on short notice.
Within this activity
Disciplines, variants and techniques that sit inside it.
Disciplines
- Astrophotography — Photographing the night sky, from a camera on a tripod to hours of accumulated exposure through a tracked telescope.
- Solar observing — Watching the Sun safely with dedicated filters or telescopes — the one daytime astronomy.
- Lunar observing — Observing and sketching the Moon, the one target light pollution cannot spoil.
- Naked-eye stargazing — Learning the sky without equipment — constellations, planets and the year’s motion.
- Radio astronomy — Detecting hydrogen line emission and solar activity with a home-built dish and software radio.
If you like this
Each of these is here for a stated reason, not because it is also a hobby.
Progresses to
- Astrophotography — The natural next step once you have seen everything visually — and a substantially more technical and expensive hobby than it looks.
Similar to
- Birdwatching — Both are observational hobbies built on patience, optics and learning a large named catalogue — and birders already own usable binoculars.
Goes well with
- Wild camping — A night on a hill is a night under the darkest sky most people in Britain ever stand under, and the equipment overlap is a warm coat and a red torch.
- Wild swimming — Both reward being outside at times most people are not, and both depend entirely on watching the forecast.
- Weather observing — Astronomers become amateur meteorologists whether they intend to or not, because forecasting cloud is what decides whether the evening happens.
Shares equipment with
- Photography — A tripod, an interchangeable-lens camera and an understanding of exposure carry directly from one to the other.
Sources for this section
- Astronomy guides (opens in a new tab) — Royal Museums Greenwich · Institutional · corroborated indirectly
- British Astronomical Association (opens in a new tab) — British Astronomical Association · Specialist publisher · corroborated indirectly
- DarkSky International (opens in a new tab) — DarkSky International · Institutional · could not be reached
Comprehensive
Last reviewed 2026-08-13. Cost, time and difficulty figures on this page are HobbyHQ estimates — see how we work. Something here wrong or out of date? Tell us.