Vehicles & motorsport · Technical & maker · Woodworking
Campervan conversion
A conversion is not one project. It is a small carpentry job, a small electrical system and a small plumbing system, all built inside a steel box that has to stay under a weight limit and pass through a legal reclassification at the end. The order you do them in decides how much of it you build twice. This page covers the planning, the fabric of the build and the decisions that are hard to reverse, and it deliberately stops short of instructing anybody on gas or mains electricity.
Also known as van conversion, van build, camper conversion, campervan build, self build campervan, van life build, motor caravan conversion.
The appeal is easy to state and mostly accurate: for the price of a modest second-hand car plus some plywood, you end up with a vehicle you can sleep, cook and shelter in, built exactly to the shape of how you travel. Nothing bought off a forecourt fits one person as well as something they designed around their own habits.
What is less often stated is that this is three separate crafts wearing one name. There is a carpentry project, which is most of the visible work and most of the satisfaction. There is a low-voltage electrical system, which is genuinely learnable and genuinely unforgiving of guesswork. And there is a gas system, which is neither of those things and which the law treats differently from both. People arrive expecting the first and are surprised by the second and third.
The other thing nobody mentions in advance is the weighing. A van has a maximum authorised mass stamped on a plate, and a build that ignores it produces a vehicle that is either illegal to drive on an ordinary licence or illegal to drive at all. Weight is the constraint that quietly decides how thick the ply is, how much water you carry and whether the battery is lead-acid or lithium — and it is far easier to design around at the sketch stage than to fix once the furniture is screwed down.
- Realistic first build
- Six to eighteen months of weekendsNearly everyone underestimates this, usually by a factor of two.
- The three systems
- Carpentry, 12V electrical, gas and waterOnly the first is a straightforwardly amateur job.
- The hard constraint
- Maximum authorised massStamped on the vehicle plate. Everything else is negotiable; this is not.
- The last step
- Insurance, and possibly reclassificationBoth are easier to arrange if you photograph the build as you go.
- Still deciding — Converting a van vs camping
- Still deciding — Narrowboat restoration vs campervan conversion
Almost every regret in this hobby traces back to the base vehicle, and almost every one of those was a decision made in a hurry because a listing looked cheap. The van sets your internal length, your standing height, your payload and your running costs, and none of those can be changed afterwards for a sensible amount of money.
The single most useful thing a beginner can do is spend a day inside other people’s finished vans before buying anything. Interior dimensions on paper are meaningless — the difference between a bed you can lie across and one you cannot is about fifteen centimetres, and you will not feel that on a spreadsheet.
The decisions the base vehicle makes for you:
- Length and wheelbase — Decides whether the bed goes across the van or along it, which in turn decides your entire layout. A crosswise bed frees up an enormous amount of floor and is the single biggest space win available — but it needs interior width most medium vans do not have.
- Roof height — Standing up inside changes the character of the vehicle more than any other feature. A low roof can be fixed with a pop-top or a high-top conversion, both of which are significant jobs; a high roof cannot be undone if you later need to fit under a height barrier.
- Payload — The difference between the plated maximum and what the van weighs empty. This is your entire budget for the build, the water, the gas, the people and the luggage, and it is smaller than people expect — a fully-fitted build routinely absorbs 500–800kg.
- Rust — The one fault that is worth walking away from. Everything mechanical can be repaired at a knowable price; structural corrosion in the sills, wheel arches and floor cannot be sensibly costed in advance, and it will be underneath your beautiful new floor.
- Parts and community — A van model with a large owners’ forum and a healthy breakers’ market is materially cheaper to run than an unusual one, and you will be looking up how to remove a trim panel a great many times.
A sequence that avoids the commonest expensive reversal:
Step 1: Write down how you will actually use it
Two people for long weekends is a different vehicle from one person working from it for months. Be honest about the frequency rather than the fantasy — most conversions are used for far fewer nights per year than their owners planned for.
You will know it worked when: A brief, rather than a shopping list.
Step 2: Sketch three layouts before buying anything
On squared paper, to scale, with real dimensions for a bed you fit on and a seat you can sit up in. Layouts are cheap to discard on paper and ruinously expensive to discard in plywood.
You will know it worked when: You know the interior length and width you need.
Step 3: Buy the van to fit the layout
Rather than the other way round. This is the step almost everybody does backwards, and it is why so many builds contain a compromise that irritates their owner for a decade.
You will know it worked when: The base vehicle serves the plan.
Step 4: Strip it bare and deal with the metal first
Out with the bulkhead, ply lining and any old racking. Then treat every spot of surface rust and every hole you are not using before a single panel of insulation goes in — because after that, you cannot see any of it.
You will know it worked when: A clean, dry, sound shell.
Step 5: Do the holes next
Roof vent, windows, any external hatches. Cutting into the shell is the most intimidating step and the one people put off, but doing it before the interior exists means metal swarf lands on bare floor rather than on a finished bed.
You will know it worked when: Every aperture cut, sealed and tested for leaks.
Step 6: Then the fabric, then the furniture, then the systems
Insulation and lining, then the units, then the electrics and plumbing threaded through them. Running cable and pipe before you know where the furniture sits is the most common cause of building the same thing twice.
You will know it worked when: A build that goes forwards rather than sideways.
The tool list is shorter than people fear, and hiring or borrowing the expensive end is entirely normal. What is not negotiable is a decent cordless drill-driver, a jigsaw, a multi-tool and a way of cutting sheet material straight — a track saw or a circular saw with a clamped straight-edge. Everything else can be improvised for a first build.
| System | What it is for | Typical materials cost | Who normally does it |
|---|---|---|---|
| Insulation and lining | Warmth, condensation control, and something to screw furniture to | £300–£800 | You |
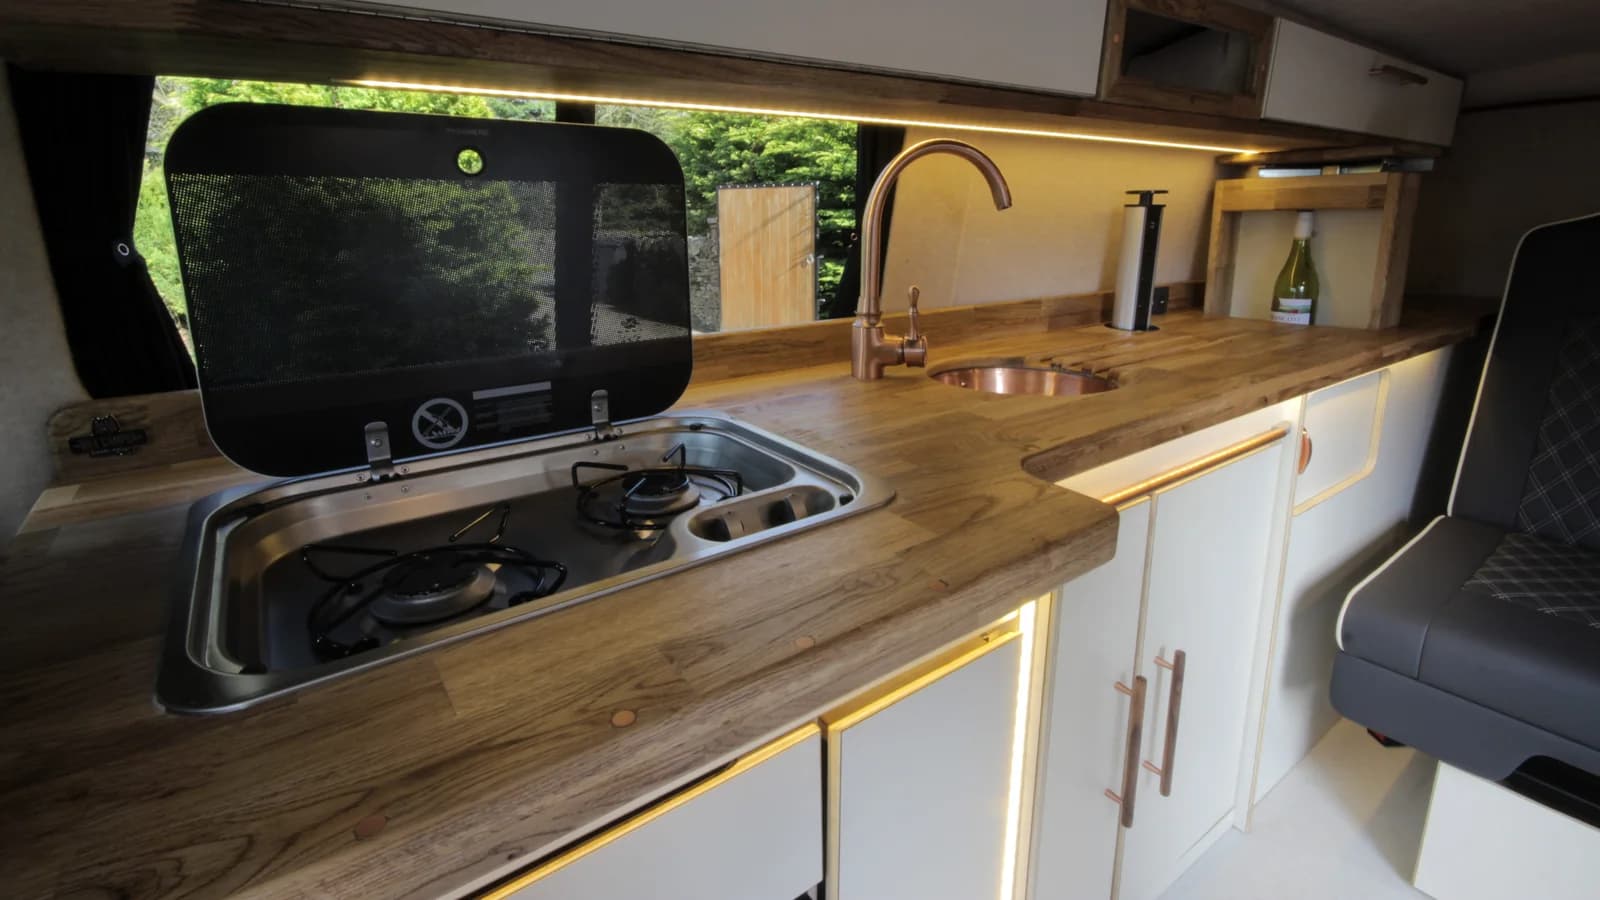
| Furniture | Bed, seating, galley, storage — the bulk of the visible build | £400–£2,000 | You |
| 12V electrical | Lighting, fridge, water pump, charging, from a leisure battery | £500–£3,000 | You, carefully — or an installer |
| Solar and charging | Keeping the leisure battery alive without a hookup | £300–£1,200 | You, carefully — or an installer |
| Water | Fresh tank, pump, tap, waste tank — cold water only in most builds | £150–£500 | You |
| Gas (LPG) | Cooking, and sometimes heating and hot water | £200–£900 | A registered engineer |
| 230V mains hookup | Running mains appliances on a campsite bollard | £150–£600 | A qualified electrician |
| Diesel or LPG heater | Heat that does not depend on being plugged in | £150–£1,200 | You or an installer, depending on the fuel |
The low-voltage system is where most of the interesting engineering lives and where a beginner can genuinely become competent. The concepts are few — capacity in amp-hours, current in amps, voltage drop over a cable run, and fusing every circuit close to the battery — and the arithmetic is arithmetic. What punishes guesswork is the cabling: undersized cable on a long run to a high-current appliance gets hot, and a circuit without a correctly rated fuse at the battery end has no protection at all.
Twelve-volt work is also where the false economy bites hardest. Cheap crimped connectors, unbranded cable of uncertain cross-section and a battery specified by hope rather than by adding up the loads are the three failures that produce a system which works for a season and then does not.
- Work it out — Van payload calculator
Layout planning is the part of this hobby that most rewards patience, because it is the only stage where changing your mind is free. The recurring beginner error is designing for the photograph — an open, uncluttered interior with a beautiful galley — rather than for a wet Tuesday in February when two people are inside with a dog and a week of luggage.
The useful test is to walk through an ordinary evening in your head, minute by minute. Where do wet boots go? Can one person cook while the other is on the bed? Can you reach the light switch from lying down? Where does the thing you need at three in the morning live? Layouts that survive that walkthrough tend to survive real use.
The layout archetypes, and what each trades away:
- Fixed rear bed with a garage — A permanent bed across or along the back, with storage underneath accessible from the rear doors. Nothing to make up at night, and the garage swallows bikes and boots. Costs you a large proportion of the floor.
- Convertible seating — A dinette or bench that becomes the bed. Enormously more usable floor by day, at the price of a nightly conversion that gets old faster than anybody expects — the honest question is whether you will still do it cheerfully in year three.
- Pop-top sleeping — Bed upstairs, living downstairs. The best use of a small van by some distance, and the reason so many small conversions have one. The roof is a serious job and a long-term maintenance item.
- Side kitchen, rear lounge — Galley along one wall, seating at the back with the doors open. Lovely in good weather and the layout that photographs best; think carefully about what it is like with the doors shut in the rain.
Insulation and ventilation are two halves of one problem and they are almost always treated as separate. A van is a steel box: it loses heat through every panel and every window, and the metal skin is colder than the air inside it, so moisture condenses on the inside of the walls where you cannot see it. Two people asleep put out a surprising quantity of water vapour overnight, and cooking adds more.
The consequence is that insulating a van thoroughly while ventilating it poorly produces a wetter vehicle than not insulating it at all — the damp simply has somewhere hidden to collect. Rot behind a beautifully finished wall panel is the characteristic failure of a keen first build.
What the fabric of the build has to do:
- Fill the voids, do not compress — Insulation works by trapping still air. Material stuffed hard into a cavity insulates worse than the same material laid loosely, and the ribs and box sections of a van are full of awkward voids that need filling rather than covering.
- Break the thermal bridges — Every steel rib that touches both the outer skin and your inner lining carries cold straight through the insulation and gives condensation somewhere to form. A continuous layer over the ribs matters more than a thick layer between them.
- Manage the vapour, deliberately — Different builders take genuinely different approaches here — a sealed vapour barrier on the warm side, or a deliberately breathable build that lets moisture pass and dry. Both work when done consistently. What fails is doing half of each, which is what happens by accident.
- Ventilate permanently, not on demand — A roof vent and a low-level intake give continuous air movement without anybody having to remember. Ventilation you have to open is ventilation that is shut on the cold nights when it matters most.
- Insulate the windows and the cab — The cab is a greenhouse in summer and a heat sink in winter, and glass is where most of the heat goes in either direction. Thermal screens are the cheapest comfort improvement available and are usually done last, which is the wrong way round.
The complaints that show up in the second and third year:
- Damp, and a musty smell that will not clear — Almost always condensation rather than a leak. Check the obvious ingress points first — roof vent seal, window seals, any hole you drilled — then look at whether ventilation is actually flowing rather than merely present.
- The leisure battery will not hold charge — Usually the battery has been repeatedly discharged too far, which lead-acid chemistry does not forgive. Check what is drawing current when everything is switched off; a parasitic load of a couple of amps will flatten a bank over a fortnight.
- Furniture working loose — A vehicle is a vibrating environment and ordinary screws into ply back out over thousands of miles. Anything structural wants bolting through with a spreader plate rather than screwing.
- Water pump cycling or hammering — Air in the system, a partly blocked filter, or a pump fighting an undersized pipe run. Bleed it, check the strainer, and confirm the pipe bore matches what the pump expects.
- Cold spots and streaming windows — Thermal bridging through steel ribs, and single glazing. Screens and a small dehumidifier fix more of this than more insulation would.
- Rattles you cannot find — The universal complaint. The usual culprits are a loose catch, a drawer that is not quite latching, and pipework touching a panel — and finding one requires driving with a passenger listening rather than a stationary search.
A conversion has two maintenance schedules running side by side and they have nothing to do with each other. The vehicle needs what any vehicle needs. The habitation side — the part you built — needs its own attention, and it is the half that people forget until something has been quietly wet for a year.
The habitation side, roughly in order of how much trouble neglect causes:
- Look for damp every autumn — Before the wet months rather than during them. Check every aperture you cut — roof vent, windows, hatches, aerial — and every screw that went through the shell. A damp meter is £20 and finds what a hand does not.
- Have the gas checked, and do not do it yourself — An annual habitation gas check by a registered engineer with the LPG competences. This is the one item on the list where the failure mode is a fire or a poisoning rather than an expense.
- Test the alarms on a schedule — Carbon monoxide and smoke, monthly, with the test button. Replace them at the interval printed on the case rather than when they stop working — the sensors age whether or not they have ever alarmed.
- Sanitise the water system twice a year — A tank that has sat warm and half full for a month grows things. Flush, sanitise with a purpose-made product, and drain the system down completely before a hard frost, including the pump and the taps.
- Keep the leisure battery charged over winter — Lead-acid chemistry is damaged by sitting discharged, and a van left unused for three months with a parasitic load will kill a battery that would otherwise have lasted years. A small solar panel or a monthly charge fixes it.
- Re-tighten the furniture — Once a year. A vehicle vibrates continuously and screws back out of plywood; anything structural should have been bolted through, and anything that has worked loose is telling you which.
- Reseal before it leaks — Sealant around roof fittings has a life measured in years and fails from ultraviolet rather than from water. Reseal on a schedule rather than after a stain appears on the ceiling.
- Weigh it again occasionally — Conversions gain weight. A weighbridge check every couple of years catches the drift before it matters, and takes ten minutes.
On the vehicle side, the thing worth knowing is that a converted van spends most of its life stationary, and standing still is harder on a vehicle than driving it. Tyres age out long before they wear out and should be replaced on date rather than on tread depth; brakes seize; and diesel particulate systems on modern vans do not enjoy a diet of short cold trips. A monthly run of a reasonable length is genuine maintenance rather than an excuse for one.
This is the section people skip and then wish they had not. A converted van is still a vehicle, and three separate legal questions attach to it: how much it may weigh, what licence you need to drive it, and what the registration document says it is.
Weight is the one that constrains the build. Every vehicle has a maximum authorised mass — the weight of the vehicle plus everything in it — recorded on a plate, and it is a limit rather than a target. Subtract the empty weight from it and you have the payload, which is what the entire conversion, the water, the gas, the passengers and the luggage have to fit inside.
The figures that decide what you can drive:
- Category B licence, issued from 1 January 1997
- Up to 3,500kg MAMFor petrol and diesel vehicles. Electric and hydrogen vehicles are permitted up to 4,250kg.
- Category C1
- 3,500kg to 7,500kg MAMA separate entitlement. Many drivers licensed before 1997 hold it automatically; most licensed since do not.
- What MAM means
- Vehicle plus maximum safe loadAlso called gross vehicle weight or permissible maximum weight, and shown on the vehicle plate.
Reclassification is the last step and the one with the most folklore attached. The DVLA will change the recorded body type of a converted vehicle to "motor caravan" where the vehicle meets its published requirements, and the application is made on a conversion checklist form. The requirements cover both permanent external features — the vehicle has to look like a motor caravan from the outside — and a set of fixed internal living features.
Two things are worth knowing before you plan around it. Applications are refused fairly often, usually on the external appearance rather than the interior. And reclassification is not a safety certificate: it changes what the registration document says, and it has no bearing on whether the gas, the electrics or the structure are sound.
Three hazards in this hobby are categorically different from the rest, because the failure mode is not a ruined weekend but a fire, an electrocution or a poisoning in an enclosed space you are asleep in. They are worth separating from the ordinary workshop risks of blades and dust.
The rest of it, in proportion:
- 230V mains — A hookup system is a fixed electrical installation in a vehicle and is work for somebody qualified to certify it. The 12V side is genuinely amateur territory; the moment mains voltage is involved, it is not.
- Batteries — A leisure battery can deliver enormous current into a short circuit — enough to melt a spanner. Fuse every circuit close to the battery, disconnect before working, and never let a metal tool bridge the terminals.
- Fire — A small dry-powder extinguisher and a fire blanket by the door, not behind the cooker. The exit in a converted van is often single and narrow, which is exactly why the blanket goes on the escape side.
- Cutting and grinding — Cutting a roof aperture throws hot swarf across the whole interior, and it rusts wherever it lands. Eye protection, hearing protection, and sweep it out properly before anything else goes in.
- Structural alterations — Cutting into a vehicle’s structure — roof, floor, pillars — can affect its strength in a collision. What is safe to remove varies by vehicle and is not something a general guide can answer, which is why this one does not try.
The pattern is consistent enough to list:
- Buying the van first — Then discovering the layout you wanted needs fifteen more centimetres of interior width. The layout is the cheap part to get right and the expensive part to get wrong.
- Ignoring payload until the end — Solid hardwood worktops, a full tank of water and a leisure battery bank add up faster than anyone expects. Weigh components as you buy them and keep a running total on the wall.
- Insulating over unsound metal — Every spot of rust you cover is a spot of rust you will meet again in five years, from the other side, after it has spread under something you built beautifully.
- Sealing the van up — The instinct to eliminate every draught produces condensation, damp bedding and mould behind the panels. Permanent ventilation is a feature.
- Running services before the furniture is placed — Cable and pipe routed to where you thought the units would go is cable and pipe you will pull out. Dry-fit the furniture, mark the runs, then wire.
- Overbuilding the furniture — Carcasses made from 18mm ply throughout are enormously heavy and no stronger where it matters. Lighter sheet with sensible bracing is the normal answer, and weight saved here buys water capacity elsewhere.
- Designing for the photograph — Beautiful open interiors with no wet-weather storage and nowhere to put anything down. The test is a wet Tuesday, not a sunset.
- Leaving insurance to the end — Insurers ask what has been fitted and by whom, and gas and electrical work by a competent person is much easier to insure. Photograph everything as you build, particularly what will be hidden.
- MAMalso: maximum authorised mass, gross vehicle weight, GVW
- Maximum authorised mass — the weight of the vehicle including the maximum load it may safely carry on the road. Shown on the vehicle plate.
- Payload
- The difference between the plated maximum and the vehicle’s actual empty weight. Everything you build, carry and travel with has to fit inside it.
- Leisure batteryalso: house battery, domestic battery
- A battery for running the living area, separate from the vehicle’s starter battery, and designed to be discharged and recharged repeatedly rather than to deliver a large starting current.
- Split charge
- An arrangement that charges the leisure battery from the engine’s alternator while driving, while keeping it electrically separate so a flat leisure battery cannot leave you unable to start.
- Thermal bridge
- A path — usually a steel rib — that carries heat straight through the insulation, producing a cold stripe on the inside surface where condensation forms.
- Vapour barrier
- A sealed layer on the warm side of the insulation intended to stop moist interior air reaching cold metal. One of two consistent approaches; the other deliberately lets the build breathe.
- Pop-topalso: elevating roof, poptop
- A hinged or scissor-lifted roof section that raises to give standing height and, usually, a bed in the roof.
- Garage
- The storage space under a fixed rear bed, usually reached through the back doors. Where bikes, boots and the wet things live.
- Hookupalso: EHU, electric hook-up
- A 230V mains connection to a campsite bollard, feeding a fixed mains installation in the vehicle.
- Habitation check
- A periodic inspection of the living systems — gas, electrical, water, damp and ventilation — analogous to an MOT but covering the conversion rather than the vehicle.
- Wild camping
- Staying overnight away from a formal site. Legally quite different across the United Kingdom, and covered on its own page rather than assumed here.
Living out of a converted vehicle is considerably older than the modern hobby, and the usual account — that it begins with a particular German van in the 1950s — is a tidy story that flattens a messier one. Horse-drawn living vans were in use by showpeople and travelling workers long before, and motorised conversions were being built by enthusiasts from the interwar period onwards, generally from whatever chassis was cheap.
What is reasonably clear is that the post-war period turned it from an improvisation into an industry, and that Britain acquired a substantial commercial conversion trade alongside the amateur one. The two have run in parallel ever since, and a great deal of received wisdom in the hobby is inherited trade practice rather than anything anybody worked out from first principles.
The current wave is generally dated to the 2010s and is usually attributed to a combination of cheap used vans, housing costs, remote work and a large amount of online build documentation. That account is plausible and widely repeated rather than established; what is observable is that the volume of amateur conversion has grown enough for the regulatory questions around weight, gas and reclassification to become mainstream concerns rather than specialist ones.
The subject has an unusually generous online culture. Model-specific forums will tell you exactly which trim clip breaks and where the factory holes are, and that knowledge is genuinely hard to get any other way. It is worth finding the forum for your specific van before you start rather than after you have broken something.
It also has an unusually distorted public face. A great deal of the visible content is made by people whose income depends on the vehicle looking beautiful, and the resulting picture leaves out the storage, the wet clothes, the noise of rain on a metal roof and the amount of time spent looking for somewhere legal to park. None of that makes the hobby worse; it does make the marketed version a bad basis for planning.
The etiquette that matters is mostly about parking. Overnighting in vehicles is tolerated in many places, regulated in some and actively resented where a beauty spot has been overwhelmed — and the reputation of everybody in a van is set by the least considerate person in one. Arrive late, leave early, take everything with you, do not put out furniture, and do not empty anything anywhere it does not belong.
Almost nobody stops. The first conversion teaches you what you actually wanted, and the usual pattern is a period of small revisions — moving a socket, rebuilding the storage that never worked — followed either by a second, much better build, or by a decision that the vehicle is fine and the interest has moved on to where it goes.
The skills transfer widely, which is part of the appeal. The carpentry is ordinary cabinetmaking done in an awkward space; the electrical work is the same twelve-volt understanding that underlies boats, off-grid sheds and solar installations; and the problem-solving is straightforward mechanical restoration thinking. People who enjoyed the systems side more than the joinery tend to end up in one of those.
Where people go next:
- A second build — Faster, lighter and far better resolved, because the mistakes are known. The second one is usually where the hobby becomes genuinely satisfying.
- Deeper into the electrical side — Larger solar arrays, lithium chemistry, battery management and monitoring. This is a real technical hobby in its own right and shares almost everything with off-grid domestic systems.
- Mechanical restoration — Owning an older van teaches you its engine whether you intended to learn or not, and a fair number of converters end up enjoying that more than the interior.
- Using it rather than building it — The genuinely healthy outcome, and the one the hobby’s own culture is worst at celebrating. A finished van that is out most weekends is the point of the exercise.
- How much does a self-build actually cost?
- Two separate numbers, and conflating them is why quoted figures vary so wildly. The van is anything from £3,000 for a high-mileage medium panel van to £20,000 or more for something low-mileage and rust-free. The conversion itself is genuinely elastic: a plywood-and-foam build with a portable stove, a leisure battery and no plumbing can be done for £1,500–£3,000 in materials, while a full build with fitted kitchen, fixed water, diesel heater, solar and lithium reaches £8,000–£15,000. Add several hundred pounds of tools if you own none, and remember that professional gas and mains installation is a cost rather than an optional extra.
- How long does it take?
- Six to eighteen months of weekends for a first build is the honest range, and most people underestimate by roughly half. The stages are wildly unequal: stripping and insulating goes quickly and feels productive, the furniture takes far longer than anyone expects because every panel is a different shape, and the last ten per cent — trim, catches, the fiddly finishing — routinely takes as long as the first half of the build. Working outdoors makes it seasonal in practice, whatever the plan said.
- Do I have to register it as a motor caravan?
- No. Reclassification changes the body type recorded on the registration document, and plenty of perfectly good conversions are never reclassified at all. What you must do, regardless, is tell your insurer what the vehicle now is and what has been fitted — an undisclosed conversion is a live problem at claim time. If you do apply, the guidance asks for specific things: externally two or more side windows, a separate habitation door, motor caravan graphics, an awning bar and a high-top roof that is not a pop-top; internally seats and a table, sleeping accommodation, cooking facilities and storage, all rigidly fixed bar the table. Applications are refused fairly often and usually on the external appearance. It is not an inspection, and it establishes nothing about whether the gas, electrics or structure are sound.
- Can I do the gas myself?
- The Gas Safety (Installation and Use) Regulations 1998 require that no person carries out work on a gas fitting unless competent to do so, and separately require anyone doing such work in the course of a business to be a member of a class of persons approved by the Health and Safety Executive — in practice the Gas Safe Register, with the LPG competences for leisure vehicles. So the honest answer is that the registration duty is written against businesses, and the competence duty applies to everybody. Competence here means pipework, appliance installation, ventilation sizing and a proper soundness test, which is not something a video confers. We publish no gas installation instructions and recommend a registered engineer without qualification.
- What is the single most common expensive mistake?
- Buying the van before settling the layout. Interior length and width decide whether the bed goes across or along, and that one fact determines the entire interior; discovering afterwards that you needed fifteen more centimetres is not fixable for a sensible amount of money. The second most expensive is ignoring payload until the build is finished, and then finding the vehicle is overweight loaded — which is both a legal problem and a handling one, and is solved only by removing things you have already built.
- Is it warm enough in winter?
- A well-insulated van with a working heater is comfortable in British winter conditions, and a poorly insulated one with a heater is a machine for making condensation. The difference is almost entirely in whether the thermal bridges were dealt with and whether there is genuine continuous ventilation, rather than in how thick the insulation is. Expect streaming windows without thermal screens whatever you do, and expect to run a heater rather than to rely on insulation alone — a steel box has too much surface area for two people to heat by existing in it.
- What weight limit applies, and does it affect my licence?
- Every vehicle has a maximum authorised mass on its plate, covering the vehicle plus everything in it. A category B licence issued on or after 1 January 1997 covers petrol and diesel vehicles up to 3,500kg MAM, with 4,250kg allowed for electric and hydrogen vehicles; between 3,500kg and 7,500kg needs category C1, which most drivers licensed since 1997 do not hold. Many panel vans are plated at or just under 3,500kg, so a heavy build can genuinely consume the payload. Weigh the finished vehicle at a public weighbridge loaded as you actually travel, rather than estimating.
If you like this
Each of these is here for a stated reason, not because it is also a hobby.
Similar to
- Home automation — Both are wiring a small building nobody designed to be wired, both live on twelve volts until they suddenly do not, and both punish undocumented decisions eighteen months later.
- Narrowboat restoration — The same project in a different vessel — a small space, its own power, water and heating, a safety regime, and a fit-out sequence that punishes doing things out of order.
- Sauna building — The same shape of project: a small insulated timber space with a heat source, where the regulations and the ventilation are harder than the carpentry.
- Classic car restoration — Both are long vehicle projects where the enjoyable part is problem-solving and the unglamorous part is rust, and both reward finding the model-specific forum before starting rather than after.
Goes well with
- Hobby welding — The capability a conversion keeps wanting and usually pays somebody else for — brackets, bed frames, roof-rack mounts, rust repair on a van that is twenty years old. It is also the project most likely to tempt a new welder into something structural, so the boundary matters here more than it does elsewhere.
- Wild camping — The van is a way of reaching the places and staying warm afterwards, and the access and overnight-parking questions are the same ones in a different vehicle.
- Electronics — The twelve-volt system is a real electrical project — capacity, current, voltage drop and fusing — and it is the point at which a lot of converters discover they enjoy the wiring more than the joinery.
Shares equipment with
- Navigational rallying — The same tolerance for an ordinary vehicle being pressed into an unusual job, and the same habit of checking what the insurer actually covers before setting off.
- Furniture making — The interior is cabinetmaking done in an awkward space, and the tools, the sheet-goods knowledge and the habit of measuring twice transfer straight across in both directions.
Easier way in
- Camping — Camping answers the same want — sleeping somewhere other than a hotel — for a hundredth of the money and none of the build, which makes it the sensible way to find out whether you actually enjoy it before buying a van.
Sources for this section
- Gas Safety (Installation and Use) Regulations 1998, regulation 3 (opens in a new tab) — UK Government (legislation.gov.uk) · Governing body · read — supports the claim
- Driving licence categories (opens in a new tab) — UK Government (DVLA) · Governing body · read — supports the claim
- Converting a vehicle into a motor caravan (opens in a new tab) — UK Government (DVLA) · Governing body · read — supports the claim
- Vehicle weights explained (opens in a new tab) — UK Government (DVSA) · Governing body · read — supports the claim
Comprehensive
Last reviewed 2026-08-14. Cost, time and difficulty figures on this page are HobbyHQ estimates — see how we work. Something here wrong or out of date? Tell us.