Woodworking · Music & performance
Luthiery
Every decision in this craft descends from one fork: a kit, or from scratch. They cost differently, need different tools, take different years and teach genuinely different things, and most published advice fails to say which one it is describing. This page is built around that decision — then the wood, the tools, the operations that actually decide whether an instrument sounds like anything, and the CITES position on rosewood that applies to the timber you buy rather than the guitar you finish.
Also known as guitar making, instrument making, guitar building, lutherie, stringed instrument making.
Luthiery covers everything from assembling a bolt-on electric out of finished parts to carving a violin from a billet, and those two activities share a name and very little else. Almost every argument about tools, cost, difficulty and "is it really making one" dissolves once you notice which end of that range somebody is talking about.
The useful way to think about it is as a sequence of decisions that have already been made for you, and how many you want to take back. A kit hands you a shaped body, a shaped neck and a fretted fingerboard, and leaves you the assembly, the setup and the finish — which is genuinely where a lot of the playability lives. Scratch building hands you rough timber and leaves you everything, including the decisions that determine whether the instrument sounds good at all.
Neither is a lesser version of the other, and the common advice to "start with a kit" is right for a reason people usually state wrongly. It is not that kits are easy. It is that assembly, fretwork, setup and finishing are the skills that decide whether an instrument is playable, they are the skills a scratch builder needs anyway, and a kit lets you learn them without also gambling four hundred pounds of tonewood.
- Kit build
- £120–£600, weeksAssembly, fretwork, setup, finish. Real skills, real instrument.
- Scratch build
- £150–£400 in wood, monthsPlus £800–£2,000 of tooling before the first shaving.
- What actually decides the sound
- Top thickness and bracingOn an acoustic. Almost nothing else you do matters as much.
- What decides playability
- Fretwork and setupWhich is why a kit teaches more than its price suggests.
- The constraint people ignore
- Workshop humidityBuild wet, and the instrument cracks in a heated house.
The route that works for most people inverts the romantic one. Rather than beginning with the instrument you want to own, begin with the skills that every instrument needs, on something you can afford to ruin.
A sequence that builds real capability:
Step 1: Set up instruments you already own
Adjust the truss rod, set string height at nut and bridge, check neck relief, intonate it. This costs nothing, is completely reversible, and teaches the relationships between the parts that every later decision depends on. A great many players own instruments that have never been set up properly and are startled by their own guitar afterwards.
You will know it worked when: You understand what the adjustments actually do.
Step 2: Do a fret dress on something cheap
Level, crown and polish the frets on an instrument you do not care about. Fretwork is the highest-leverage skill in the craft and the one most beginners skip, and a cheap guitar with good fretwork plays better than an expensive one without.
You will know it worked when: The single most useful skill, learned on a low-stakes object.
Step 3: Build a solid-body electric kit
Assembly, wiring, fretwork if the board needs it, and finishing. You end with a playable instrument and a clear idea of which parts of the process you enjoyed. Wiring in particular is far less intimidating than it looks and is a genuinely separate small skill.
You will know it worked when: A complete instrument and an honest self-assessment.
Step 4: Build an acoustic kit with pre-bent sides
Side bending is the operation with the highest failure rate and the one most likely to end a first acoustic. Buying the sides pre-bent removes it, leaving you joining the top, bracing, closing the box and binding — the operations that actually teach acoustic construction.
You will know it worked when: Box construction, without the step that breaks first attempts.
Step 5: Take a course, or find one person to ask
Several operations — voicing a top, bending sides, judging a neck angle — are conducted by feel and judged by ear, and a day of somebody watching your hands replaces months of guessing. If a course is impractical, an online community focused on building rather than gear will answer a specific question with a photograph attached remarkably well.
You will know it worked when: The feel-based judgements, from somebody who has them.
Step 6: Then build from scratch
By this point you know whether you want to, which tools you actually use, and what your own workmanship looks like. This is also the point at which spending £1,500 on tooling is a considered decision rather than an act of optimism.
You will know it worked when: An instrument that is entirely yours.
Wood selection attracts more mythology than any other part of the craft. Some of it is real acoustics and a great deal of it is marketing, and the distinction is worth holding onto because the difference in price between the two is enormous.
What is well established: on an acoustic instrument the top does most of the acoustic work, its stiffness-to-weight ratio matters, and how thin it is taken and how it is braced dominate the result. Back and sides contribute, and contribute much less than their price suggests. On a solid-body electric, the acoustic contribution of the body timber is small and heavily disputed, while the pickups, the hardware and the setup are not disputed at all.
What matters far more than species, and gets far less attention, is moisture content. Wood moves with humidity, an instrument is a thin structure under tension, and one built at a high moisture content will shrink and crack when it reaches a centrally-heated house. Professional shops hold their build rooms at a controlled relative humidity for this reason, and it is the single most common cause of a first scratch-built acoustic failing months after it was finished.
- Tops (soundboards) — Spruce in several species, and cedar. Quartersawn, straight-grained, stiff and light. This is the component worth spending on, and the one where grade genuinely correlates with what the instrument does.
- Backs and sides — Rosewoods, mahogany, maple, walnut, sapele and a long list of alternatives. Contributes to tone and dominates appearance and price. Sapele and walnut are excellent, unfashionable and cheap, which is a good combination for a first build.
- Necks — Mahogany and maple, quartersawn and straight-grained, ideally with a carbon or steel reinforcement alongside the truss rod. Stability matters more here than anywhere: a neck that moves is an instrument that never quite settles.
- Fingerboards — Ebony, rosewood, and increasingly maple, richlite and other engineered alternatives. Hard, stable and fine-grained is the requirement, and the alternatives to the traditional species are now genuinely good rather than concessions.
- Moisture content — The specification nobody lists. Build at the humidity your instruments will live in, keep the timber in the same room for weeks before working it, and buy a hygrometer before you buy a fourth chisel.
A build has perhaps forty steps and about six of them determine whether the result is good. The rest is tidy woodworking that can be redone. Knowing which is which is most of what experience buys.
- Thicknessing and voicing the top — Taking the soundboard down to a thickness and shaving the braces until the top responds as you want. Judged by flex, tap and feel rather than by a number, which is why it is the operation most resistant to written instruction and the one worth finding a person for. Too thick is dull; too thin is loud briefly and then structurally unwise.
- Neck angle and geometry — Where the neck sits relative to the bridge determines whether the instrument can ever be set up properly. Get it wrong and no amount of adjustment recovers it. It is pure geometry rather than feel, and it rewards careful measurement and a dry run.
- Fretwork — Levelling, crowning and polishing so every fret is in the same plane. Undramatic, unglamorous, and the difference between an instrument that plays and one that buzzes. This is the skill that transfers directly into repair work.
- The nut — Slot depth and spacing at the nut affects every note in the first position and is the most commonly bad component on factory instruments. Cutting one properly needs dedicated files and about an hour, and it is the cheapest large improvement available to any player.
- Bending sides — Heat, moisture and steady pressure over a hot pipe or in a bending machine. The highest failure rate of any single operation on a first acoustic, which is why pre-bent sets exist and why using one on a first build is sensible rather than a cheat.
- The finish — Thin and even beats thick and glossy, both acoustically and aesthetically. Most first instruments are over-finished, and a heavy finish on a soundboard measurably damps it.
Tooling is where the money goes and where beginners spend it worst, because the lists published online are inventories of a working shop rather than routes into one. Buy for the operation in front of you, buy few and sharp rather than many and blunt, and let the hand tools tell you which machines you would actually use.
- For a first kit
- £60–£150Files, nut files, fret rocker and levelling beam, radius block, straightedge, screwdrivers, soldering iron.
- Add for a first acoustic
- £300–£600Block plane, low-angle smoother, chisels, fine saw, scrapers, and clamps in quantity.
- Sharpening
- £80–£200Not optional and not a later purchase. A dull chisel demands force, and force is where accuracy goes.
- The machines to resist
- Until build fourThickness sander, bandsaw, buffing arbor. Transformative at volume, dead weight for one instrument.
- The measurement nobody buys
- A hygrometer, £15Prevents the failure mode that ruins finished instruments months later.
- Fret tools — Levelling beam, fret rocker, crowning file, fret end file and a set of nut files. The highest return per pound in the craft, because they fix instruments you already own as well as ones you build, and nut files in particular have no substitute — improvising with needle files produces slots the wrong shape.
- Clamps — More than you think, in more sizes than you think. Cam clamps are the traditional answer and can be made rather than bought, which is most people’s first shop-made tooling and a good introduction to why jigs matter.
- Workholding and jigs — A go-bar deck, a mould, a radius dish, a bending form. Almost all of these are shop-made from sheet material, cost very little, and remove failure modes rather than saving time. Building them is a genuine part of learning the craft.
- Dust extraction — Belongs on this list rather than in a footnote. Extraction at the tool, a fitted mask and a vacuum are equipment, and the safety section explains why they are not optional for hardwood work.
- Go deeper — Setup: why a cheap instrument can play better than an expensive one
- Work it out — Fret position calculator
- Fret buzz after assembly — Almost always fret levelling, neck relief or nut slot depth rather than anything structural. Diagnose in that order: check relief with a capo and a straightedge, check the frets against a rocker, then look at the nut. Genuinely recoverable and the normal state of a new build before setup.
- The action is high and adjusting the bridge does not fix it — Usually neck angle, set at glue-up. On a bolt-on it is a shim and an afternoon. On a glued dovetail it is a neck reset, which is a serious operation. This is why the geometry step above is worth the extra care.
- A crack appears in the top weeks after finishing — Humidity, nearly always: the instrument was built wetter than the room it now lives in. Repairable with a cleat and patience, but the underlying cause is the build environment and it will keep happening until that changes.
- The finish will not cure, or stays soft — Usually contamination — silicone from a polish, oil from an oily timber, or wax — or applying too thick a coat in cold, damp conditions. Oily species need sealing before finishing; the fix once it has happened is to remove and start again.
- A glue joint fails — Nearly always clamping pressure, a poorly fitted joint or glue that had begun to set before assembly. Hide glue is more forgiving to repair later and less forgiving during assembly; modern aliphatic glues are the reverse. Neither rescues a joint that did not fit.
- It is finished and it sounds ordinary — The commonest disappointment and rarely one thing. Over-thick finish, an over-braced or over-thick top, and a heavy bridge are the usual suspects in that order. Some of it is recoverable and some of it is the reason people build a second one.
The craft branches after the first build, and the branches are genuinely different careers-in-miniature rather than stages of one path.
The usual directions, any of which is a destination:
Step 1: Repair and setup
The most practically useful branch and the one with real demand. Setups, fret dresses, nut replacements, electronics and structural repair. It pays, it sharpens the skills that matter, and it puts a great many instruments through your hands — which is the fastest way to learn what good construction looks like.
You will know it worked when: A skill other people want, and volume of experience.
Step 2: Refining one model
Building the same instrument repeatedly and changing one variable at a time. Unglamorous and the only way anybody has ever learned what their own decisions actually do, because a build that changes six things teaches nothing about any of them.
You will know it worked when: Genuine knowledge rather than accumulated folklore.
Step 3: Historical and classical construction
Violin family, lute, early guitar, traditional methods and hide glue. A deep, well-documented tradition with its own literature, its own tools and a strong culture of apprenticeship.
You will know it worked when: A craft with centuries of recorded practice behind it.
Step 4: Design and the electric side
Original body shapes, multiscale instruments, pickup winding, electronics. The branch with the most freedom, because the acoustic constraints are far looser and the tradition is a century old rather than four.
You will know it worked when: Instruments that are yours rather than copies.
Step 5: Tooling up properly
Moulds, go-bar deck, thickness sander, side bender, buffing arbor. Each removes a failure mode rather than saving time, and each is worth building yourself — shop-made jigs are a tradition in this craft and a good way to learn the machine work.
You will know it worked when: Repeatability, which is what separates the fifth from the first.
Rosewood is controlled under CITES, and the rules changed in a way that is very widely reported and very widely reported wrongly. The reporting is about instruments. The transaction a hobbyist luthier makes is about timber, and they are not treated the same.
- Musical instrument certificate — Where a CITES specimen is a musical instrument and the movement is not for commercial purposes — a touring player, an instrument going abroad and coming back — a musical instrument certificate can be applied for instead of repeated permits, and there is no fee for one.
- Brazilian rosewood is a separate case — Dalbergia nigra sits on Appendix I rather than Appendix II. Pre-Convention material exists and is traded, but it requires documentation, and an old guitar with a Brazilian back is a paperwork question rather than a free one when it crosses a border.
- The practical answer for a first build — Use domestic or uncontrolled species. Walnut, sapele, maple, cherry and sycamore make excellent instruments, cost less, and remove the question entirely. The alternatives to controlled fingerboard timbers are also now well proven.
Sources for this section
- CITES Issues Official Notification for Dalbergia Annotation Change (opens in a new tab) — National Association of Music Merchants (NAMM) · Specialist publisher · read — supports the claim
- Trading CITES-listed species: imports, exports and re-exports (opens in a new tab) — UK Government (APHA / GOV.UK) · Governing body · read — partly supports
Two hazards in this craft are worth taking seriously, and both are cumulative rather than dramatic — which is exactly why they get ignored in a hobby workshop.
Finishing is the other half. Nitrocellulose lacquer, the traditional guitar finish, is both highly flammable and a solvent exposure, and spraying it indoors without extraction is the genuinely dangerous thing a hobby luthier is most likely to do. Water-based finishes, oil-varnish and French polish all avoid most of that, and shellac in particular is forgiving, repairable and entirely appropriate for a first instrument.
Sources for this section
- Wood dust (opens in a new tab) — Health and Safety Executive · Governing body · read — supports the claim
- Repair and setup — Adjusting, levelling, refretting and repairing existing instruments. Not a lesser branch — it is how nearly every professional started, it is where the paying work is, and it teaches what a good instrument does before you try to make one.
- Kit and partscaster building — Assembling from a pre-machined kit or bought parts. Skips the joinery and keeps the setup, the wiring and the finishing, which are the parts that actually determine whether the instrument plays well.
- Solid-body electric — The most approachable instrument to build from scratch, because the body is a shaped plank and the acoustic performance does not depend on it. The difficulty sits in the neck, the fretwork and the geometry, all of which are unforgiving.
- Steel-string acoustic — Bracing, a thin soundboard and a body under permanent tension. Substantially harder than an electric, and the branch where a millimetre changes the sound — the point at which the craft becomes acoustics rather than woodwork.
- Classical and nylon-string — Lower tension, fan or lattice bracing, and a tradition with strongly held schools. Historically the training ground of the trade and still the most codified body of instruction.
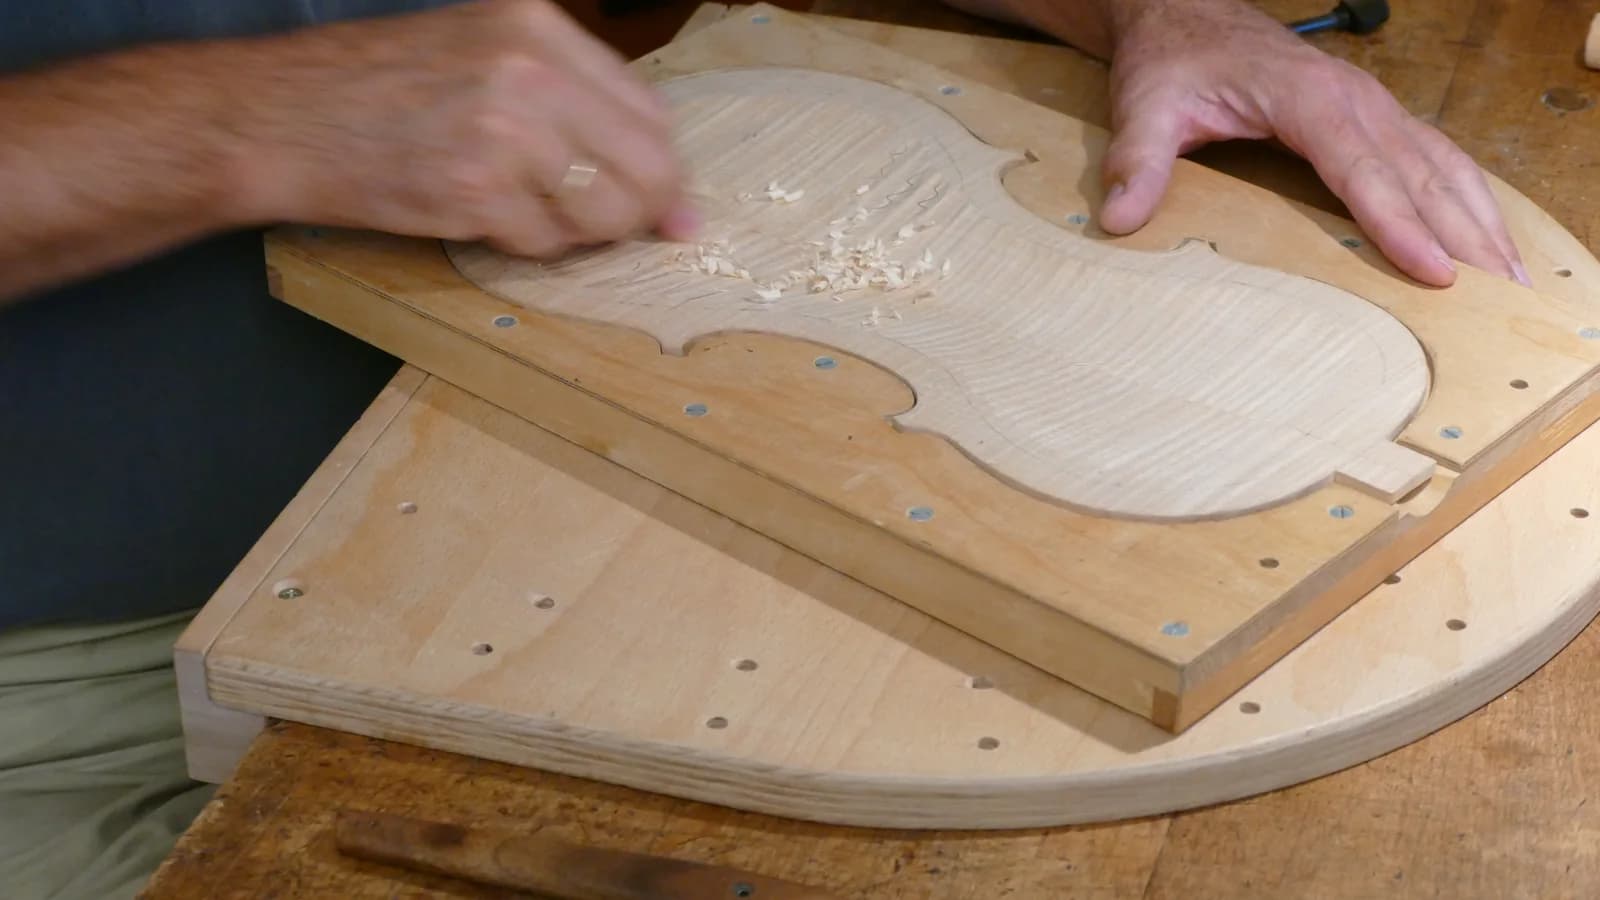
- Violin family — Carved arched plates rather than bent and braced flat ones — a genuinely different craft that happens to share the word. Its own tools, its own varnish literature, and its own centuries of argument.
- Finishing — Cutting across every branch and deciding how the finished instrument is judged. Nitrocellulose, oil, and the modern waterborne finishes behave differently and need different facilities; wood finishing has its own page here for the shared ground.
Almost no other craft asks its beginners to reproduce an object designed before the industrial revolution and then judges them against the originals. Luthiery does, and the reason is that the problem was solved early and unusually well. The Ashmolean holds "the earliest dated violin, made by Andrea Amati in 1564", and by the time of "Stradivari’s ‘Messiah’ of 1716" the instrument had arrived at proportions that four centuries of makers have adjusted rather than replaced.
The detail that matters most to somebody at a bench is the one the museum records about that most famous instrument. The ‘Messiah’ "owes its fame not to the sounds that it makes but to the astonishing condition in which it survives" — the varnish "almost unworn", the carving "as crisp as the day it was made". And then: "The neck was lengthened and the pegs, bridge and tailpiece were added in the 19th century."
That sentence is the whole history of the instrument in one line. Nearly every surviving classical violin was rebuilt during the nineteenth century — longer neck, raised and angled fingerboard, higher bridge, heavier bass bar, higher string tension — to make it loud enough for a concert hall and bright enough for the repertoire being written for it. The instruments people revere are not in their original condition, and a modern maker copying a Stradivari is copying a Stradivari as altered by somebody a century and a half later.
The guitar took a different route to the same place, arriving at its two modern forms much more recently and much more commercially — the steel-string flat-top and the electric solid body are twentieth-century industrial products with named inventors and patent dates, which is why guitar-making has a living tradition of design change and violin-making largely does not.
The practical consequence for a beginner is that these two halves of the craft ask different things of you. One is an act of reconstruction against a fixed and very old standard; the other is a craft where a maker is still expected to have opinions. Neither is more legitimate, and knowing which you have chosen is worth more than any tool.
Sources for this section
- Musical Instruments Collection, and the ‘Messiah’ violin (opens in a new tab) — Ashmolean Museum, University of Oxford · Institutional · read — supports the claim
- Action
- String height above the frets, measured at a stated fret. The headline playability figure, and only meaningful alongside neck relief and nut height, because the same action can be achieved in ways that play completely differently.
- Relief
- The very slight forward bow deliberately left in a neck under string tension, adjusted by the truss rod. Not a fault — a dead-straight neck usually buzzes.
- Voicingalso: tap tuning
- Shaving the top and braces of an acoustic instrument until it responds as the maker wants. Judged by flex, tap tone and feel rather than measurement, and the most experience-dependent operation in the craft.
- Quartersawn
- Timber cut so the growth rings run roughly perpendicular to the face. Stiffer across the width and far more dimensionally stable than flatsawn, which is why it is specified for tops, necks and fingerboards.
- Scale length
- The vibrating string length from nut to bridge saddle, which determines fret spacing and string tension at pitch. Chosen at the design stage and unchangeable afterwards.
- Neck reset
- Removing and re-gluing a neck to correct its angle. Routine on old acoustics, major surgery on a new one, and the repair that a bad neck angle at build time eventually requires.
- Go-bar deck
- A frame using flexible rods under compression to clamp braces to a curved top or back evenly. A workshop-made fixture that replaces a great many clamps and is usually somebody’s first jig.
- Nut and saddle
- The two pieces that set string height and spacing at each end of the vibrating length — nut at the headstock, saddle at the bridge. Small, cheap, and responsible for a disproportionate amount of how an instrument feels.
- Purfling and binding
- The decorative lines and the protective edging around the perimeter of an instrument. Binding is structural as well as cosmetic: it protects vulnerable end grain along the edge of the top and back.
- Should my first build be a kit or from scratch?
- A kit, for a reason worth stating properly: it is not that kits are easy, it is that they isolate the skills that decide whether an instrument is playable. Assembly, fretwork, setup and finishing are needed by every builder regardless of route, and a kit lets you learn them without simultaneously gambling several hundred pounds of tonewood and several months of shaping. You end with a real instrument, a clear sense of which parts you enjoyed, and — importantly — evidence about your own workmanship before you commit to £1,500 of tooling.
- How much does the wood really affect the sound?
- Less than the market implies, and unevenly across the instrument. On an acoustic, the top does most of the acoustic work and how thin it is taken and how it is braced matters more than which spruce it is. Back and sides contribute genuinely but far less than their price difference suggests, and there are excellent instruments in sapele and walnut. On a solid-body electric the body timber's contribution is small and heavily disputed, while pickups, hardware and setup are not disputed at all. The variable that reliably matters and gets least attention is not species but moisture content.
- Do I need a workshop, or can I do this in a spare room?
- A spare room is workable for a kit and possible for scratch building, with two real constraints. The first is dust: sanding and routing produce a great deal of it, hardwood dust is a carcinogen, and a room you also sleep in is a poor place for that — extraction at the tool and doing the dusty operations elsewhere are the ways round it. The second is humidity, which is not negotiable. An instrument built at a much higher moisture content than the house it will live in will crack, and a hygrometer and some means of control matter more than another machine. Finishing, particularly with solvent lacquers, should not be done in a living space at all.
- Can I still use rosewood?
- Generally yes, with a distinction that most reporting misses. The 2019 revision to CITES Annotation 15 exempts finished musical instruments, finished parts and finished accessories from permit requirements — but not raw timber or tonewood, which is exactly what a maker buys. So a finished guitar crosses a border more easily than the back-and-side set it was made from. Brazilian rosewood, Dalbergia nigra, is a separate and stricter case: it remains on Appendix I in whatever form. If you are buying or selling rosewood blanks internationally, check the position first; if you would rather not think about it at all, walnut, sapele, maple and cherry make excellent instruments and remove the question.
- What tools should I buy first?
- Buy for the operations you are actually about to do, and buy sharp rather than numerous. For a first kit: a good file set, nut files, a fret rocker and levelling beam, a radius block, a straightedge, decent screwdrivers and a soldering iron. For a first scratch acoustic add a block plane and a low-angle smoother, chisels you are prepared to keep sharp, a fine saw, a scraper, and clamps in quantity — always more clamps than seems reasonable. Resist the machines until the hand operations have shown you which ones you would actually use; a thickness sander is transformative for somebody building four instruments a year and dead weight for somebody building one.
- How long does a first acoustic take?
- For a kit with pre-bent sides, 40–80 hours spread over a couple of months. From scratch, 150–250 hours for a first instrument is a realistic range, and it will be spread over the best part of a year for most people because several stages need the previous one to be properly dry. The distribution surprises people: shaping and assembly go faster than expected, and setup, fretwork and finishing — the last ten per cent — routinely take a third of the total. Rushing the finish is the most common way a good build is spoiled at the end.
- Is it cheaper than buying an instrument?
- No, and it is worth being clear about that before starting. A first scratch-built acoustic costs more in wood, parts and tooling than a good factory instrument, and it will very probably not play as well as one. What you are buying is the process, an instrument that is exactly what you specified, and a set of skills — particularly setup and fretwork — that improve every instrument you subsequently own. The people who end up ahead financially are the ones who drift into repair work, where the tooling is already bought and the demand is real.
Guides
Longer answers to questions this page can only summarise.
If you like this
Each of these is here for a stated reason, not because it is also a hobby.
Similar to
- Scale modelling — Both are patient assembly crafts where the last ten per cent — finishing, fitting, setup — takes a third of the time and decides how the finished thing is judged.
Goes well with
- Harp — A harp is a wooden box under enormous string tension, and understanding what the soundboard is doing changes both how you assess a second-hand instrument and how you look after one.
- Music production — The instrument and what is done with it. Builders end up recording their own work to hear what changed, and producers end up wanting an instrument set up exactly their way.
Shares equipment with
- Wood finishing — Instrument finishing is the most demanding version of this craft — thin films, shellac and French polish, and a surface judged at arm’s length under a stage light.
- Woodturning — Sharp edge tools kept sharp, workholding, and a tolerance for slow removal of material. A woodturner already owns most of the bench skills a first instrument asks for, and already knows what hardwood dust does.
Sources for this section
- CITES Issues Official Notification for Dalbergia Annotation Change (opens in a new tab) — National Association of Music Merchants (NAMM) · Specialist publisher · read — supports the claim
- Trading CITES-listed species: imports, exports and re-exports (opens in a new tab) — UK Government (APHA / GOV.UK) · Governing body · read — partly supports
- CITES — Convention on International Trade in Endangered Species, appendices and notifications (opens in a new tab) — CITES Secretariat · Governing body · could not be reached
- Wood dust (opens in a new tab) — Health and Safety Executive · Governing body · read — supports the claim
Comprehensive
Last reviewed 2026-08-15. Cost, time and difficulty figures on this page are HobbyHQ estimates — see how we work. Something here wrong or out of date? Tell us.