Models & miniatures
Scale modelling
A modern plastic kit is a well-engineered thing that goes together in an evening, and almost every beginner guide is about that evening. It is the wrong emphasis. The difference between a model that looks like a model and one that looks like a small real object is entirely in what happens afterwards — the seams, the surface, the paint and the weathering that most beginners are too nervous to attempt. This page is organised around that: what to buy first, why the cheap tools matter more than the expensive ones, the airbrush decision and when it actually arrives, and how to make something look like it has existed in weather rather than in a box.
Also known as plastic modelling, plastic kits, model kits, scale models, airfix.
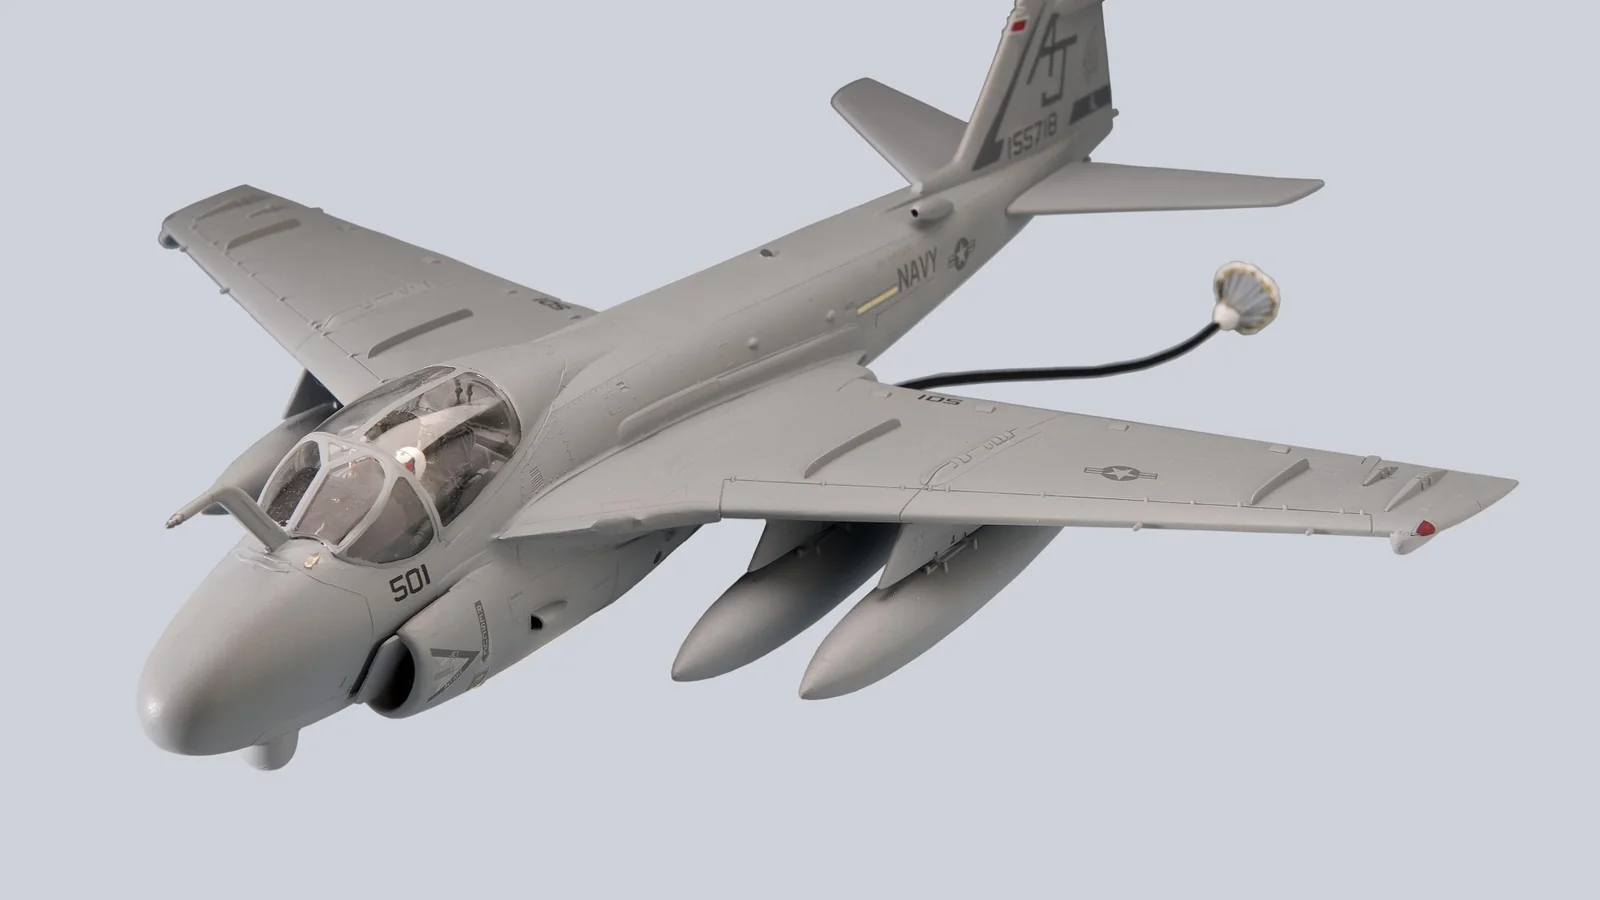
Scale modelling is building a miniature of a real object — usually an aircraft, a tank, a ship or a car — from a moulded plastic kit, then painting and finishing it so it reads as the real thing rather than as a toy. The kits are excellent now: tooling has improved enormously, parts fit, and a modern kit from a good manufacturer goes together without a fight.
That is precisely why the emphasis in most beginner material is wrong. Assembly is the easy part and it is where nearly all the writing is. The craft — the part that takes years and is worth the years — is everything after the glue dries: removing the evidence that it was made from parts, preparing a surface that paint will behave on, and applying a finish that suggests an object with a history rather than one that came out of a box.
The second thing worth knowing early is that this is a hobby of subjects. Almost everybody specialises, usually without deciding to, into aircraft or armour or ships or cars or figures. The techniques diverge more than they look: armour is about surface texture and weathering, aircraft are about smooth finishes and panel lines, ships are about rigging and scale, figures are about painting faces. Trying everything for a year is a good way to find out which one you actually are.
- The easy part
- Assembly. A modern kit fits
- The whole craft
- Surface, paint and finish
- The best £50 you will spend
- Cutters, blade, sanding sticks, cement
- The step change
- An airbrush — later than you think
Step 1: Buy the tools before the second kit
Sprue cutters, a sharp blade, sanding sticks and liquid cement come to under £50 and they change the result more than a more expensive kit would. Twisting parts off the sprue with your fingers and gluing with a tube is how a first model gets ruined before it starts.
You will know it worked when: Clean parts and joints that do not need rescuing.
Step 2: Pick a well-reviewed kit of something you like
A recent kit from a good manufacturer in 1/48 or 1/35 — big enough to handle, small enough to finish. Fit quality varies enormously between manufacturers and between decades, and an old kit with poor fit will teach you frustration rather than modelling. What the subject is matters less than that you actually want it on the shelf.
You will know it worked when: A kit that rewards the effort you put in.
Step 3: Build it, then stop and look at the seams
Where two halves meet there is a line. Removing it — filler if needed, then sanding, then rescribing any detail you sanded away — is the step that separates a model from a toy, and it is the step beginners skip. Do it once properly and you will never look at an unfinished seam the same way.
You will know it worked when: An object rather than an assembly.
Step 4: Prime it
A thin coat of primer does three things at once: it shows you every flaw you missed while there is still time, it gives the paint something to key to, and it unifies a model made of different-coloured plastic and filler. Skipping primer is the second commonest reason a finish disappoints.
You will know it worked when: A uniform surface, and a list of things to fix.
Step 5: Paint thin, and more than once
Thin coats built up beat one thick coat every time, by brush or by airbrush. Thick paint drowns detail, and detail is what you paid for. This is the single most repeated piece of advice in the hobby and it is repeated because it is true and because everybody ignores it first.
You will know it worked when: Colour without losing the surface underneath.
Step 6: Do one weathering step, and stop
A panel wash on an aircraft, or a dry-brushed edge on a tank. One technique, once, on a model you have already accepted might not be perfect. The fear of ruining it at the last moment is what keeps people at clean, toy-like finishes for years.
You will know it worked when: The first model that looks like it exists in weather.
Everything below is about making a small plastic object read as a large real one. The underlying problem is that our eyes read scale partly from surface: real objects have dirt, wear, faded paint and shadow in their recesses, and a uniformly clean model has none of it and therefore looks like plastic no matter how accurate it is.
The techniques, roughly in the order to learn them:
- Panel line wash — A very thin dark paint drawn into the recessed lines, then the excess wiped from the surrounding surface. It puts shadow where shadow would be and it is the single highest-impact technique in the hobby. Learn this one first.
- Dry brushing — Almost all the paint wiped off the brush, then dragged across raised detail so only the edges catch it. Crude, old-fashioned, and still the fastest way to make texture visible. Especially effective on armour.
- Decals and setting solution — Transfers need a gloss surface to sit on or they silver — a visible film around the edge — and a setting solution to pull them down into detail. Gloss coat, decal, solution, matt coat is the standard sequence and it is worth following exactly.
- Pre-shading and modulation — Darkening panel lines or shading panel centres before the colour coat, so the finish varies the way real weathered paint does. Airbrush work, and where the airbrush stops being a convenience and starts being a capability.
- Chipping and wear — Paint worn back to metal at edges and where hands and boots go. Effective and very easy to overdo — real vehicles are less chipped than model vehicles usually are.
- Pigments and dust — Powdered pigment for dust, mud and exhaust staining. The last step and the one that ties a model to a place.
- Varnish, twice — Gloss before decals, matt at the end. The final matt coat unifies everything and is what makes the whole finish read as one object rather than as layers.
- Sprue cutters — Flush-cutting nippers. Cut the part away from the frame leaving a small stub, then trim the stub with a blade — cutting flush against the part is how you get a divot. £8–£25 and the first thing to buy.
- A sharp blade — A scalpel or hobby knife, and a new blade far more often than feels reasonable. A blunt blade tears plastic instead of cutting it and is also the one likelier to slip.
- Sanding sticks and files — A range of grits. Most of the visible improvement in a model happens here and it costs almost nothing.
- Liquid cement — A solvent that welds the plastic rather than sticking it, applied with a fine brush to a joint already held together. Completely different from tube glue and much easier to control.
- Primer — Rattle can or airbrushed. Reveals flaws, keys the paint, unifies the surface. Non-optional in practice.
- Acrylic paints and decent brushes — Acrylics are the sensible default: low odour, water-cleanup, and now as good as enamels for most purposes. Three or four good brushes beat a set of twenty.
- A magnifying lamp — The purchase everybody makes eventually and most people should make sooner. It is not about eyesight failing; it is that you cannot fix what you cannot see.
- An airbrush and compressor — later — The genuine step change, and the reason is control rather than speed: an airbrush lays paint thinly and evenly in a way no brush can on a large smooth surface, and it makes modulation and fading possible at all. £120–£300 together. Worth deferring until you have built several kits, because it is a skill of its own and learning it alongside everything else is how people end up with a clogged airbrush in a drawer.
- Work it out — Scale converter
Most modelling disasters happen at the finishing stage, which is exactly when the model has the most hours in it — and that timing is why people abandon builds rather than fix them. The useful thing to know is that the majority are recoverable, and that the ones that are not are nearly always caused by a paint-and-thinner pairing chosen without thinking about it.
Read each entry as symptom → likely class → what you can safely check → what to do next.
- Class 1
- Surface — something under the paint
- Class 2
- Paint behaviour — thinning, pressure, humidity
- Class 3
- Chemistry — the wrong solvent on the wrong layer
- Class 4
- Sequence — a step done out of order
- The paint went on rough and grainy — Paint behaviour, usually too dry. With an airbrush this is paint drying between the nozzle and the model — thin it further, come closer, or drop the pressure. From a rattle can it is the same thing at a greater distance. Recoverable: let it cure fully, sand it smooth, and go again thinner.
- It has run, pooled or sagged — Paint behaviour, too wet. One heavy coat rather than several light ones. Let it cure completely before touching it — working a wet run makes it much worse — then sand it back and rebuild in thin coats.
- A seam you filled has reappeared under the primer — Surface, and the primer is doing its job. This is why primer exists: it shows what your eye missed while there is still time. Sand, refill if needed, rescribe any detail you lost, prime again. Two or three rounds on a bad seam is normal rather than a failure.
- The paint crazed, wrinkled or lifted — Chemistry, and this is the one to be careful about. A hot solvent has attacked the layer beneath — usually enamel or lacquer over acrylic without a barrier, or a second coat applied while the first was still gassing off. Stop immediately; working it spreads the damage. Let it cure completely, sand back to sound material, and reconsider the pairing before recoating.
- Decals have a visible silvery edge — Sequence. The decal was applied to a matt surface, so air is trapped under the film. Prevented by a gloss coat first and a setting solution to pull it down. Once dry it is difficult: pricking the film with a fine blade and reapplying setting solution sometimes works, and often the honest answer is a replacement decal.
- The wash stained the whole surface and will not wipe off — Sequence again, and the same root cause. No gloss coat, so the wash keyed into a matt finish. Remove what you can with the appropriate thinner, cure, gloss properly, and rewash. This is the commonest first-time weathering failure and it is recoverable.
- Clear parts have fogged or crazed — Chemistry. Solvent cement near clear plastic, or superglue fumes settling on it. Prevented rather than cured: clear parts are fitted with white glue or a dedicated clear-part adhesive, and fitted late. A fogged canopy usually means a replacement or a polish, and polishing rarely fully recovers it.
- Parts that will not line up at all — The kit, sometimes genuinely. Fit varies enormously between manufacturers and decades, and an older kit with poor engineering is not your fault. Dry-fit everything before glue, tape assemblies while the cement sets, and accept that some kits need filler at every major join.
- The finish is dusty or gritty and you cannot see why — Surface, from the room. Sanding dust in the air settles onto wet paint. Wet-sand, let the air settle, and keep the spraying and the sanding at different ends of the session.
The habit that prevents most of this is choosing the paint-and-thinner pairing deliberately at the start. An enamel or oil wash over acrylic under a gloss coat can be removed with a solvent that leaves the colour untouched, which turns almost every finishing mistake on this list into a setback rather than a loss. Get that wrong and the same mistakes strip the model.
Scale modelling has no grades and no ladder, which is part of its appeal and does leave beginners without an answer to "what now". The honest structure is that a small number of specific skills unlock everything else, and they unlock in a fairly reliable order.
Roughly the order things stop being the limiting factor:
- Getting a clean seam — The first wall, and the dullest. Fill, sand, prime, look, repeat. Once you can make a join disappear, every kit you build looks a class better regardless of what else you do.
- Laying a smooth even coat — By brush first, and by airbrush later. This is where thin-and-patient stops being advice and becomes habit.
- A panel line wash — The first weathering step and the biggest single return in the hobby. Twenty minutes, and the model stops looking like plastic.
- Decals that sit down properly — Gloss, decal, setting solution, matt. A sequence rather than a skill, and once it is automatic the finish looks bought.
- Restraint in weathering — The genuinely difficult one, and it takes longest. Real vehicles are less chipped, less streaked and less dusty than model vehicles usually are, and learning to stop early is what separates convincing from theatrical.
- Scratchbuilding and correction — Making a part the kit did not include, or fixing one it got wrong. Where the hobby becomes open-ended, and where plastic card, wire and reference photographs start to matter more than what you bought.
Projects that teach something specific, in a sensible order:
- A second kit of a subject you have already built — Underrated and the fastest way to see improvement, because the variable is you rather than the kit. Most modellers never do it and most who do are surprised.
- A single-colour subject, finished properly — Nowhere to hide. A model in one colour is entirely about surface and finish, which is exactly what you are trying to improve.
- Something with a complex camouflage scheme — The airbrush project. Soft edges, masking, and the first time modulation matters.
- A subject that needs an aftermarket set — Photo-etch or resin. Fiddly, transformative, and it teaches handling parts smaller than the ones you are used to.
- A small diorama — Two figures and a base. The moment the hobby turns from making objects into telling something, and the branch most likely to keep somebody at it for decades.
The two things that most reliably accelerate all of it are unglamorous. Join a club, because an hour of somebody showing you how they hold an airbrush replaces months of guessing, and because seeing finished work in the hand rather than in a photograph recalibrates what you are aiming at. And put work on a table at a show, which does not require it to be good — the conversations that happen over a half-finished model are the most useful feedback available in this hobby, and nobody is judging unless you have entered a competition.
- Go deeper — Getting better at miniature painting
- Ventilation — Solvent cement, enamel paints and their thinners give off vapour you should not be breathing at a desk with the door shut. An open window is the minimum; a spray booth is what airbrushing enamels really wants. Acrylics reduce but do not eliminate this.
- Sanding dust — Fine plastic and filler dust is worth not inhaling and worth not spreading over the kitchen. Wet sanding solves both and improves the finish as well.
- The blade — The commonest injury in the hobby by a distance, and almost always from cutting towards yourself or from a blunt blade slipping. Change blades often and cut away from your fingers.
- Resin and photo-etch — Aftermarket resin parts produce dust that is more irritant than styrene and should be cut wet. Photo-etched brass has genuinely sharp edges.
- Spray cans indoors — Primer and varnish in aerosol form put a great deal of solvent into a small room very quickly. Outdoors, or a booth with extraction.
- Aircraft — The largest branch. Smooth finishes, panel lines, and the hardest surface work in the hobby because there is nowhere for a flaw to hide. Usually 1/72 or 1/48.
- Armour — Tanks and military vehicles, usually 1/35. The most forgiving surfaces and the most rewarding weathering, which is why it is where most people learn finishing.
- Cars — A different discipline again: gloss finishes as deep and flawless as real paint, which is genuinely hard and closer to automotive refinishing than to weathering.
- Ships — Very small scales, enormous part counts, and rigging as a craft of its own. Rewards patience more than any other branch.
- Figures — Painting faces and cloth at very small size. Overlaps almost entirely with miniature painting, and it is the branch where painting skill dominates everything else.
- Dioramas — Putting the model in a setting and telling a story with it. Where scale modelling meets scenery-making, and the branch most likely to win things at shows.
- Still deciding — Model railways vs scale modelling
- Still deciding — Build the kit, or print the parts
The hobby has an old and well-organised club structure in Britain, with local branches that meet monthly and a substantial show circuit where people display work on tables and talk about it for a day. Shows are also where the aftermarket lives — resin detail sets, photo-etch, decals and paints from small makers who do not reach the high street.
Competition exists and is taken seriously by a minority, judged on construction, finish and accuracy. Most people never enter and the community is largely uninterested in whether you do. What it is interested in is how you did something, and the culture of showing work in progress and explaining techniques is unusually generous.
And then there is the stash: the accumulated pile of unbuilt kits that every modeller has and that grows faster than it shrinks. It is a running joke and it is also a genuine feature of the hobby — kits go out of production, shows have bargains, and the pile is a kind of library. Nobody builds it all and nobody expects to.
- Tube glue and twisted-off parts — The two habits that ruin a first model before painting. Liquid cement and sprue cutters cost £15 together and fix both permanently.
- Skipping primer — It shows you the flaws while you can still fix them and gives the paint something to hold. Almost every disappointing finish traces back here.
- Painting thick — One heavy coat drowns the detail you bought the kit for. Thin, several times, and be patient between them.
- Buying an airbrush first — It is a skill of its own. Learning it at the same time as everything else is how it ends up unused in a drawer. Build several kits by brush first.
- Being too frightened to weather — The thing that keeps people at toy-like finishes for years. Keep a model you are not precious about and practise on that.
- Starting with an old or badly-fitting kit — Fit varies enormously between manufacturers and decades. A 1970s kit will teach you filling and swearing rather than modelling.
- Ignoring the seams — The single most visible difference between a model and a toy, and the step most often skipped because it is dull.
- Sprue
- The plastic frame the parts are moulded on. Cut from it, do not twist off it.
- Flash
- Thin excess plastic at a mould join, common on older kits. Trimmed away with a blade.
- Seam line
- The visible join where two halves meet. Removing it is the step that separates a model from a toy.
- Panel line wash
- Thin dark paint drawn into recessed detail then wiped from the surface, putting shadow where shadow belongs. The highest-impact technique in the hobby.
- Silvering
- The visible film around a decal that has been applied to a matt surface. Prevented by a gloss coat and setting solution.
- Photo-etch
- Aftermarket parts etched from thin brass sheet, used for detail too fine to mould. Sharp, fiddly and transformative.
- The stash
- The pile of unbuilt kits every modeller owns. Grows faster than it shrinks, and this is universally understood.
- Scale
- The ratio to the real thing — 1/72 and 1/48 for aircraft, 1/35 for armour, 1/24 for cars. Determines part size, detail and how much shelf it takes.
- What should I buy first?
- Tools, before a second kit. Sprue cutters, a sharp blade, sanding sticks and liquid cement come to under £50 and improve the result more than spending the same again on a better kit would. After that, primer and a handful of acrylics. The airbrush is a later decision and a bigger one.
- Do I need an airbrush to get good results?
- No, and plenty of competition-standard work is brush-painted. What an airbrush gives you is thin even coverage over large smooth surfaces and the ability to fade and modulate colour, which matters most for aircraft and cars. It is a genuine step change and it is also a separate skill — build several kits by brush first, so you are learning one thing at a time.
- Which scale should I start in?
- Something big enough to handle comfortably: 1/48 for aircraft, 1/35 for armour, 1/24 for cars. Smaller scales are cheaper and take less shelf but ask more of your hands and eyes. It is also worth picking one scale and staying in it for a while, because a shelf of mixed scales never looks quite right together.
- How long does a model take?
- A simple kit built cleanly and painted is perhaps eight to fifteen hours spread over a few weeks — much of it waiting for paint to dry. A heavily detailed build with aftermarket parts and full weathering can be fifty hours or more. It is a hobby of evenings rather than sessions, which is a large part of its appeal.
- Is it an expensive hobby?
- Cheap to enter and easy to escalate. £60–£80 covers tools, a kit and paint to build your first few properly. The airbrush and compressor at £120–£300 is the one real step up, and after that it is paints, aftermarket parts and kits at whatever rate you choose. Compared with most things in this catalogue, the entry cost is genuinely low.
- How do I stop it looking like a toy?
- Three things, in order. Remove the seam lines. Prime it. Then do a panel line wash — thin dark paint into the recesses, wiped off the surface. That last one takes twenty minutes and does more than anything else in the hobby, because our eyes read scale from shadow and a uniformly clean surface has none.
If you like this
Each of these is here for a stated reason, not because it is also a hobby.
Similar to
- 3D printing — The same finishing skills — sanding, filling, priming, painting — applied to parts you made rather than parts from a box.
- Luthiery — Both are patient assembly crafts where the last ten per cent — finishing, fitting, setup — takes a third of the time and decides how the finished thing is judged.
- Miniature painting — The same paints, brushes and airbrush skills applied to vehicles and aircraft, with more construction and less figure work.
- Prop making — Same materials, same finishing techniques and much of the same community. Prop making is the version where the object gets carried, worn and seen from a distance, which changes what it must weigh and how much detail is worth adding.
Shares equipment with
- Model railways — The same knives, files, paints and weathering powders, and the same patience. Many railway modellers arrived through kits and never entirely left.
Substantial
Last reviewed 2026-08-18. Cost, time and difficulty figures on this page are HobbyHQ estimates — see how we work. Something here wrong or out of date? Tell us.