Models & miniatures · Technical & maker
Model railways
A train set is a circle of track on the carpet. A model railway is a design problem with a fixed budget of space, and almost every decision a beginner regrets comes from choosing the scale before working out what will fit. This page starts there, because that choice constrains everything after it.
Also known as model trains, railway modelling, model railroading, train set.
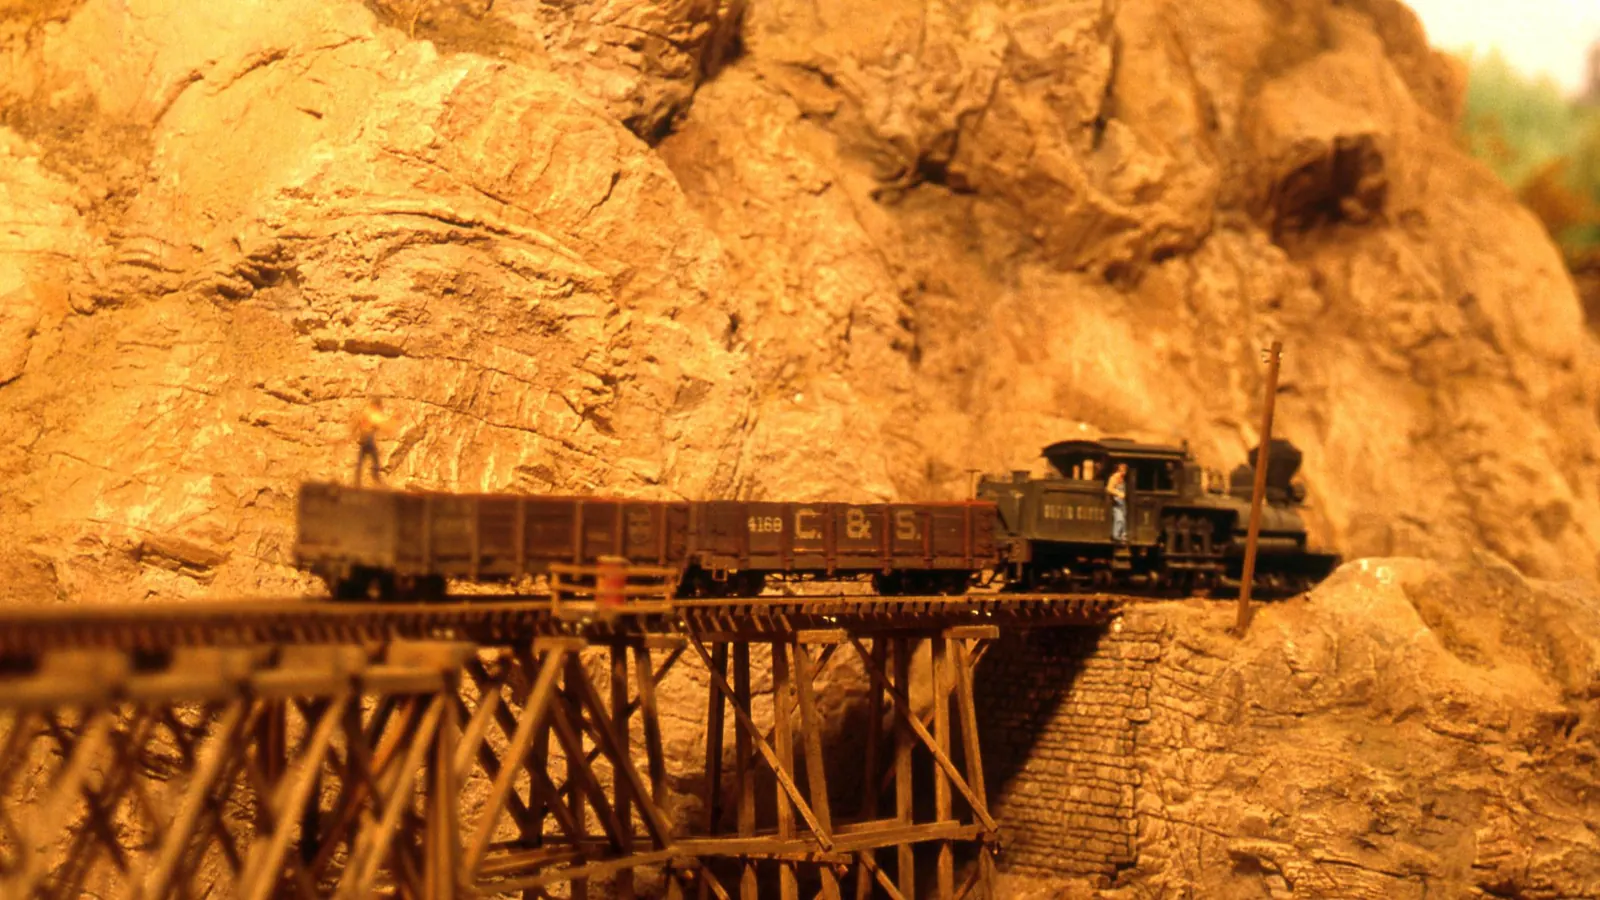
A model railway is several hobbies sharing a baseboard. There is modelmaking — building and detailing structures and rolling stock. There is a landscape craft closer to scenic painting than to engineering. There is genuine low-voltage electrical work. And there is operation, which is the part that looks like playing with trains and is, for many modellers, a simulation problem: running a timetable, shunting a yard, working out how a real railway would have done this.
People come in through one of those doors and often discover they care most about a different one. Somebody who buys a starter set to run trains ends up spending three years on a two-metre scenic section; somebody who wanted to build buildings finds they enjoy wiring. That breadth is why the hobby holds people for decades.
It is also why the first decision matters so much. Scale, gauge and available space are locked together, and choosing the scale before measuring the space is the mistake that produces a layout too cramped to be interesting or a project too large to finish.
- Decide first
- How much space you actually haveThen choose the scale to fit it — never the other way round.
- Most common British scale
- OO gauge, 1:76 on 16.5mm track
- Best value first purchase
- A starter setIt is a complete working railway and the cheapest way to find out what you enjoy.
- What kills beginner layouts
- Curves too tight for the stock
Step 1: Measure the space before you buy anything
Length, width, and — crucially — how you will reach the far side. A layout against a wall must be reachable across its full depth, which in practice means about 600mm maximum unless you build in access hatches. Write the numbers down before you look at a single locomotive.
You will know it worked when: A constraint you can design within rather than discover later.
Step 2: Buy a starter set and run it on the floor
It is a complete working railway for £120–£250 and it answers questions no amount of reading will. Do you enjoy watching trains run, or building things, or shunting? A month of playing with an oval is cheap research.
You will know it worked when: You know which part of the hobby you actually like.
Step 3: Choose your scale, and then commit
Space decides it more than preference does. Mixing scales is expensive and switching later means replacing almost everything, so this is the one decision worth thinking about for a week.
You will know it worked when: Everything you buy from now on is compatible.
Step 4: Check the minimum radius your stock needs
Every locomotive and coach has a minimum curve it will negotiate, and long bogie coaches and large steam locomotives need far more than a starter-set oval provides. Setrack curves are tighter than they look. Buying a beautiful express locomotive that derails on your own curves is the classic beginner disappointment.
You will know it worked when: Track that your trains will actually run on.
Step 5: Plan on paper — or in free planning software — before cutting timber
Track planning software will tell you honestly whether your idea fits, which a sketch will not. Include the reach, the operator’s position, and where the wiring will go. Most published plans that "fit" a small space assume tighter curves than mainline stock tolerates.
You will know it worked when: A plan that survives contact with the baseboard.
Step 6: Build a solid baseboard
Everything else sits on this. A warped or flexing board produces derailments you will spend months blaming on the track. Plywood on a softwood frame, braced, is standard and forgiving. Build it at a height you can work at comfortably — most people build too low and regret it.
You will know it worked when: A flat, stable, accessible foundation.
Step 7: Lay and test the track fully before any scenery
Run every locomotive and your longest train in both directions, repeatedly, before a single tree goes down. Track faults are trivial to fix on bare board and miserable to fix under ballast and scenery.
You will know it worked when: Reliable running, which is what makes a layout enjoyable.
This is presented online as a war and is really a straightforward trade between simplicity and capability.
Analogue — DC puts a variable voltage on the track. More voltage, faster train; reverse the polarity, reverse the direction. The controller controls the *track*, so every locomotive on an electrically connected section moves together. Running two trains independently means dividing the layout into isolated sections and switching between controllers, which is entirely workable and is how the hobby operated for most of its history.
Digital — DCC puts a constant voltage on the track carrying a digital signal. Each locomotive has a decoder with an address, and the command station speaks to locomotives individually. Two trains can run on the same piece of track at different speeds in different directions. Decoders also give you directional lighting, realistic acceleration and braking, and sound.
| Analogue (DC) | Digital (DCC) | |
|---|---|---|
| Cost to start | Lower — a controller is £30–£80 | Higher — a command station is £150–£400 |
| Cost per locomotive | Nothing extra | A decoder, £15–£30, plus fitting |
| Wiring complexity | More, if you want independent control | Less — a two-wire bus does most of it |
| Running two trains on one track | Not possible without sections | Straightforward |
| Sound and lighting | Very limited | Standard |
| Fault-finding | Simple and visible | Harder — a fault can be electrical or programmed |
| Suits | Small layouts, one operator, older stock | Shunting, multiple operators, sound |
The practical advice: if you are building a small layout and running one train at a time, analogue is cheaper, simpler and completely legitimate. If you want to shunt, run several trains, or you care about sound, go digital from the start — converting a wired analogue layout later is more work than building for digital in the first place. Most modern ready-to-run locomotives are sold "DCC ready", meaning there is a socket for a decoder, which keeps the option open cheaply.
What a working layout actually needs:
- Track — Two broad families. Sectional track — Hornby Setrack and equivalents — comes in fixed lengths and radii and clips together, which is fast and forgiving and produces geometric-looking curves. Flexible track comes in yard lengths you bend to any radius, which looks far better and demands more care. Most layouts use flexible track for the running lines and sectional for nothing at all, once past the first year.
- Points — Turnouts, in more formal usage. They divert a train from one track to another and they are the most expensive and most failure-prone item on a layout. They come in radii and in left, right, Y and slip forms, and they can be thrown by hand, by a motor under the board, or by a solenoid. Budget generously: a modest layout uses six to twelve.
- A controller or command station — Analogue controllers vary the voltage on the track. Digital systems put a constant voltage on the track and address each locomotive individually. See the control section below — this is the other decision worth thinking about properly.
- Locomotives and rolling stock — The visible half of the hobby and the half that absorbs money indefinitely. Modern ready-to-run British models are extremely good and correspondingly priced at £80–£250. Second-hand at swap meets and shows is roughly half, and older models are simpler to maintain.
- Baseboard materials — Plywood tops on a braced softwood frame. Avoid chipboard, which sags, and MDF, which is heavy and swells if it ever gets damp.
- Wiring — Dropper wires from the rails to a bus running under the board. Rail joiners alone are not a reliable electrical connection over time — they oxidise and work loose, and intermittent power is the commonest cause of stuttering running.
- Scenic materials — Plaster or foam for landform, scatter and static grass for surfaces, ballast, trees, figures. Individually cheap, cumulatively substantial, and the part where the layout stops being track and starts being a place.
- Tools — A track cutter or fine saw, a small file, a track rubber for cleaning railheads, a multimeter, and eventually a soldering iron. A multimeter costs £15 and turns electrical troubleshooting from guesswork into measurement.
- Work it out — Scale converter
A route that produces something finished at every stage:
Step 1: Run a starter set
On the floor, on a board, anywhere. Find out what you enjoy before committing money to a scale.
You will know it worked when: An informed choice of scale.
Step 2: Build a small shelf layout
A metre or two, a couple of points, a fiddle yard at one end. Small enough to finish, complete enough to be satisfying.
You will know it worked when: A finished layout, which most beginners never get.
Step 3: Learn scenery on it
Ballast, ground cover, a few structures. Scenery has the steepest visible improvement curve in the hobby — the difference between attempt one and attempt three is dramatic.
You will know it worked when: A layout that reads as a place.
Step 4: Add operation
A shunting puzzle, a timetable, a reason for each movement. This is where a layout stops being a display and becomes a game.
You will know it worked when: Something you keep coming back to.
Step 5: Build or detail rolling stock
Kits, weathering, detailing parts. The modelmaking half opens up properly here.
You will know it worked when: Stock nobody else has.
Step 6: Take it to a show, or build the bigger layout
Exhibiting is a distinct and social branch of the hobby, and the deadline is a famously effective way to finish things.
You will know it worked when: A layout built to be seen and operated by others.
These two words are used interchangeably everywhere and mean different things, which is the source of a great deal of beginner confusion.
Scale is the proportion of the model to the real thing — 1:76, 1:148, 1:43. Gauge is the distance between the rails, measured in millimetres. A scale can run on more than one gauge, and — awkwardly for Britain — the most popular British scale runs on a gauge that is slightly wrong for it.
| Name | Scale | Track gauge | Space needed | Suits |
|---|---|---|---|---|
| N | 1:148 (British) | 9mm | A 1.2m × 0.6m board is a real layout | Small spaces, long trains, sweeping landscape |
| OO | 1:76 | 16.5mm | Around 2.4m × 1.2m for a satisfying oval | Most people. The widest choice of models by far |
| HO | 1:87 | 16.5mm | Same as OO | European and American prototypes; rare for British outline |
| O | 1:43.5 | 32mm | A shunting plank, or a large shed | Detail, presence, and shunting layouts in small spaces |
| G | around 1:22.5 | 45mm | A garden | Outdoor lines, robust handling, weather |
The British oddity is worth understanding because it explains a lot of forum argument. OO models are built to 1:76 but run on 16.5mm track, which at that scale represents about 4 feet 1½ inches rather than the real 4 feet 8½ inches. The narrow track is a historical compromise from when motors were too big to fit inside a correctly-scaled British body. Nearly everybody accepts it, and the modellers who do not use EM or P4 gauges, which correct the track width at the cost of hand-building almost everything.
For a first layout the honest advice is: OO if you have a spare room or a garage, N if you have a shelf or an alcove, O if you want a small, highly detailed shunting scene and are not trying to run express trains. All three are complete hobbies.
- Still deciding — Model railways vs scale modelling
- Choosing the scale before measuring the space — The decision that constrains everything else, routinely made last. An OO layout in an N-gauge space is a cramped oval; an N layout in an OO space wastes what you had.
- Curves too tight for the stock you want to run — Setrack radii are tighter than they appear, and long coaches and large steam locomotives will not take them. Check the minimum radius for the stock you intend to buy before you design the track plan.
- Relying on rail joiners for electrical continuity — They oxidise, they loosen, and the resulting intermittent power gets blamed on the locomotive. Solder or clip dropper wires from each length of rail to a bus underneath.
- Building the baseboard too low — Waist height feels natural when you are building and is wrong for viewing and for reaching. Chest height looks unusual and is much better to operate and to look at.
- Starting scenery before the track is proven — Fixing a dodgy point under ballast, grass and a hedge costs a weekend. Fixing it on bare plywood costs ten minutes.
- Buying the locomotive first — The most tempting purchase and the least useful early one. A beautiful model with nowhere reliable to run is a shelf ornament.
- Underestimating points — They are the most expensive component per unit and the most common source of derailments, and beginner plans routinely include more than the budget allows.
- Making the layout too big to finish — The commonest way the hobby ends. A finished two-metre shelf layout gives more pleasure than an unfinished room-sized empire, and small layouts are a respected discipline rather than a compromise.
- Cleaning track with anything abrasive — Scouring the railhead leaves scratches that trap dirt and make the problem worse. A track rubber or a solvent on a cloth is the right approach.
What keeps a layout running, in rough order of how often it matters:
- Clean the railheads — The single most common cause of stuttering and stalling. Dirt is a mixture of oxidation, dust and residue from wheels; a track rubber or a lint-free cloth with a suitable solvent restores contact. If a layout has stood unused for months, expect to clean before anything runs well.
- Clean locomotive wheels — Dirty wheels transfer dirt back onto clean track within minutes, so cleaning one without the other is wasted effort.
- Check point blades and their contacts — Blades that do not close tightly against the stock rail cause both derailments and electrical dead spots. A dab of paint on the blade tip is a common trick to see at a glance whether it is seating.
- Oil sparingly — A trace of light oil on bearings and gears, and nothing on the wheel treads or the motor commutator. Over-oiling attracts dust and is more damaging than under-oiling.
- Check dropper connections — Vibration and temperature cycling loosen soldered joints over years. A multimeter across the rails at the far end of the layout finds voltage drop in seconds.
- Cover the layout when not in use — Dust is the enemy of everything above. A dust sheet costs nothing and halves the cleaning.
- Scale
- The proportion of the model to the real thing, such as 1:76 for OO. Not the same as gauge.
- Gauge
- The distance between the rails, in millimetres — 16.5mm for OO and HO, 9mm for N. A scale can run on several gauges.
- Prototype
- The real thing being modelled: a locomotive, a station, a whole railway company. "Prototypical" means faithful to it.
- Rolling stock
- Everything on rails that is not a locomotive — coaches, wagons, vans.
- Pointalso: turnout, switch
- The trackwork that lets a train move from one line to another. Called a turnout in formal and American usage.
- Frogalso: crossing vee
- The V-shaped crossing at the centre of a point. A "live frog" is electrically switched and gives better running; a "dead frog" is insulated and simpler to wire.
- Baseboard
- The structure the whole layout is built on.
- Fiddle yard
- An off-scene area where trains are stored and rearranged by hand, representing the rest of the railway network. The device that makes small layouts believable.
- DCC
- Digital Command Control. A constant track voltage carrying digital instructions, letting each locomotive be controlled individually.
- Decoderalso: chip
- The small circuit board fitted inside a locomotive that receives DCC commands and drives the motor, lights and sound.
- Dropper
- A short wire from a rail down to the power bus beneath the baseboard, providing reliable electrical continuity.
- Ballast
- The stone chippings the track sits in. Modelled with fine granular material glued in place, and the step that makes track look like railway.
- Static grass
- Fine fibres applied with a charged applicator so they stand upright, producing far more convincing grass than flat scatter.
- Weathering
- Deliberately dirtying models with paint, powders or washes so they look used. The fastest way to make cheap stock look good.
- Kitbashing
- Cutting up and recombining kits or ready-made models to produce something the manufacturer never made.
- Minimum radius
- The tightest curve a given locomotive or coach will negotiate reliably. Published by manufacturers and routinely ignored by beginners.
The hobby has a strong exhibition culture. Layouts are built to be transported, set up in a village hall or a leisure centre, and operated in public for a weekend, and the standard on the exhibition circuit is remarkably high. Going to a show is the best possible research — you can watch how things are done, ask the builders directly, and buy second-hand stock at a fraction of shop prices.
There is a long-running and good-natured split between modellers and collectors. Some people are principally interested in acquiring and preserving models, often boxed and unrun; others regard a model as unfinished until it has been weathered and has done a day’s work. Both are legitimate and they value the same object completely differently, which is worth knowing before you weather something borrowed.
The other division is over fidelity. "Rivet counting" is the affectionate-to-pointed term for insisting on exact prototype accuracy, and there is a genuine spectrum from freelance layouts that model nowhere in particular to finescale modelling that rebuilds track to correct gauge. Nobody needs to pick a side to enjoy the hobby, and beginners are sometimes made to feel they do.
Model railways began as toys and became a modelling hobby gradually. Clockwork and live-steam trains were sold in Europe from the late nineteenth century, and the German manufacturer Märklin is generally credited with the idea of a standardised range of gauges that would let track and trains from different sets work together — the origin of the numbered gauge system that still supplies the names O and 1.
The move indoors and downwards in size followed electrification and smaller motors. OO gauge emerged in Britain in the 1930s as a compromise: British loading gauge is smaller than continental, and a 1:87 body could not house the motors of the day, so bodies were built at 1:76 while keeping 16.5mm track. That compromise is why British OO still runs on slightly narrow track, and it is a good example of a historical engineering constraint outliving its cause by ninety years.
Post-war Britain is where the hobby became a mass pursuit, helped by cheap Hornby Dublo and Tri-ang sets and by a railway network that was still steam-worked and universally familiar. The end of steam in 1968 changed the emotional register: a great deal of British modelling since has been explicitly nostalgic, recreating specific locations at specific dates. Whether that nostalgia is the hobby’s strength or its constraint is argued about within it, and both cases are reasonable.
- What scale should I choose?
- Let the space decide. If you have a spare room, a garage or a loft, OO gives you the widest choice of British models by a large margin. If you have a shelf, an alcove or a board that has to go under a bed, N does far more in the same footprint. If you want a small, intensely detailed shunting scene rather than trains running, O gauge in two metres is a genuine option. Mixing scales is expensive and switching later means replacing everything, so this is worth a week of thought.
- Is DCC worth it for a beginner?
- It depends entirely on what you want to do. If you are building a small layout and running one train at a time, analogue is cheaper, simpler and completely respectable. If you want to shunt, run two trains on the same line, or have sound, go digital from the start — retrofitting a wired analogue layout is more work than building for digital initially. Buying "DCC ready" locomotives keeps the decision open at no extra cost.
- How much space do I actually need?
- Less than most people assume, if you give up the idea of a continuous circuit. A shelf 2m × 0.3m in OO supports a proper shunting layout with a fiddle yard, and in N it can be a small terminus with scenery. A continuous run in OO wants around 2.4m × 1.2m to avoid painfully tight curves. The bigger constraint is usually reach: nothing should be more than about 600mm from an edge you can get to.
- Why do my trains keep stalling?
- In roughly this order: dirty railheads, dirty locomotive wheels, poor electrical continuity through rail joiners, and point blades not seating properly. The first two account for most of it and both are fixed in ten minutes. If cleaning does not solve it, a £15 multimeter across the rails at the far end of the layout will show you whether power is actually reaching there.
- Do I need to be able to solder?
- It helps a great deal and it is not compulsory. Dropper wires can be attached with screw terminals and pre-wired rail joiners, and many decoders fit into plug-in sockets. That said, soldering is a genuinely useful skill, an iron costs under £30, and practising on scrap wire for an evening is enough to get competent at the joints this hobby needs.
- Is it an expensive hobby?
- It can be, and it does not have to be. The starter set is cheap, the baseboard is timber, and scenic materials are inexpensive. What costs money is rolling stock, and there is no requirement to buy new: swap meets, exhibitions and second-hand dealers routinely halve the price, and older models are simpler to maintain. The most expensive approach is buying a large layout’s worth of track and points before knowing what you want to build.
Guides
Longer answers to questions this page can only summarise.
Within this activity
Disciplines, variants and techniques that sit inside it.
Variants
- Garden railways — Model railways built outdoors at larger scales, where weather and planting become part of the layout.
- Model tramways — Building and operating tramway layouts, which model street running rather than rail.
If you like this
Each of these is here for a stated reason, not because it is also a hobby.
Similar to
- FPV drone flying — Both are model-engineering hobbies where the building is at least half the point, both are dominated by the choice of a standard to commit to, and both have a club structure that supplies the space an ordinary house does not have.
- Miniature painting — Weathering rolling stock and painting figures use the same brushes, washes and drybrushing, at the same scale and with the same viewing-distance logic.
- Tabletop wargaming — Both build scenery to a scale and then use it, and terrain-building techniques move between them almost unchanged.
Goes well with
- Microcontroller projects — Signalling, point control and animation are where a great many boards quietly end up, and the layout gives the projects a purpose the bench cannot.
- Electronics — Digital control, point motors, signalling and lighting are all low-voltage electronics, and a modeller who learns to solder and read a circuit gains far more control over the layout.
- Furniture making — Baseboards are joinery. A modeller who can build a flat, braced, non-warping frame has removed the commonest structural cause of derailments, and the skills come straight from furniture work.
Shares equipment with
- Home automation — The same low-voltage wiring, the same relays and increasingly the same microcontrollers, and both meet the mains at exactly the same regulated boundary.
- Robotics — The same motor control, the same low-voltage wiring and increasingly the same microcontrollers, approached from opposite ends — one wants prototypical behaviour, the other wants autonomy.
- Scale modelling — The same knives, files, paints and weathering powders, and the same patience. Many railway modellers arrived through kits and never entirely left.
Substantial
Last reviewed 2026-08-14. Cost, time and difficulty figures on this page are HobbyHQ estimates — see how we work. Something here wrong or out of date? Tell us.